Replacing valve trim is a simple and cost-effective option to do when:
- Your process flow rates have changed so that the original valve trim is oversized.
- Your valve trim has worn out.
For this simple process, we'll swap out the valve trim on a 2" High Pressure Control Valve.
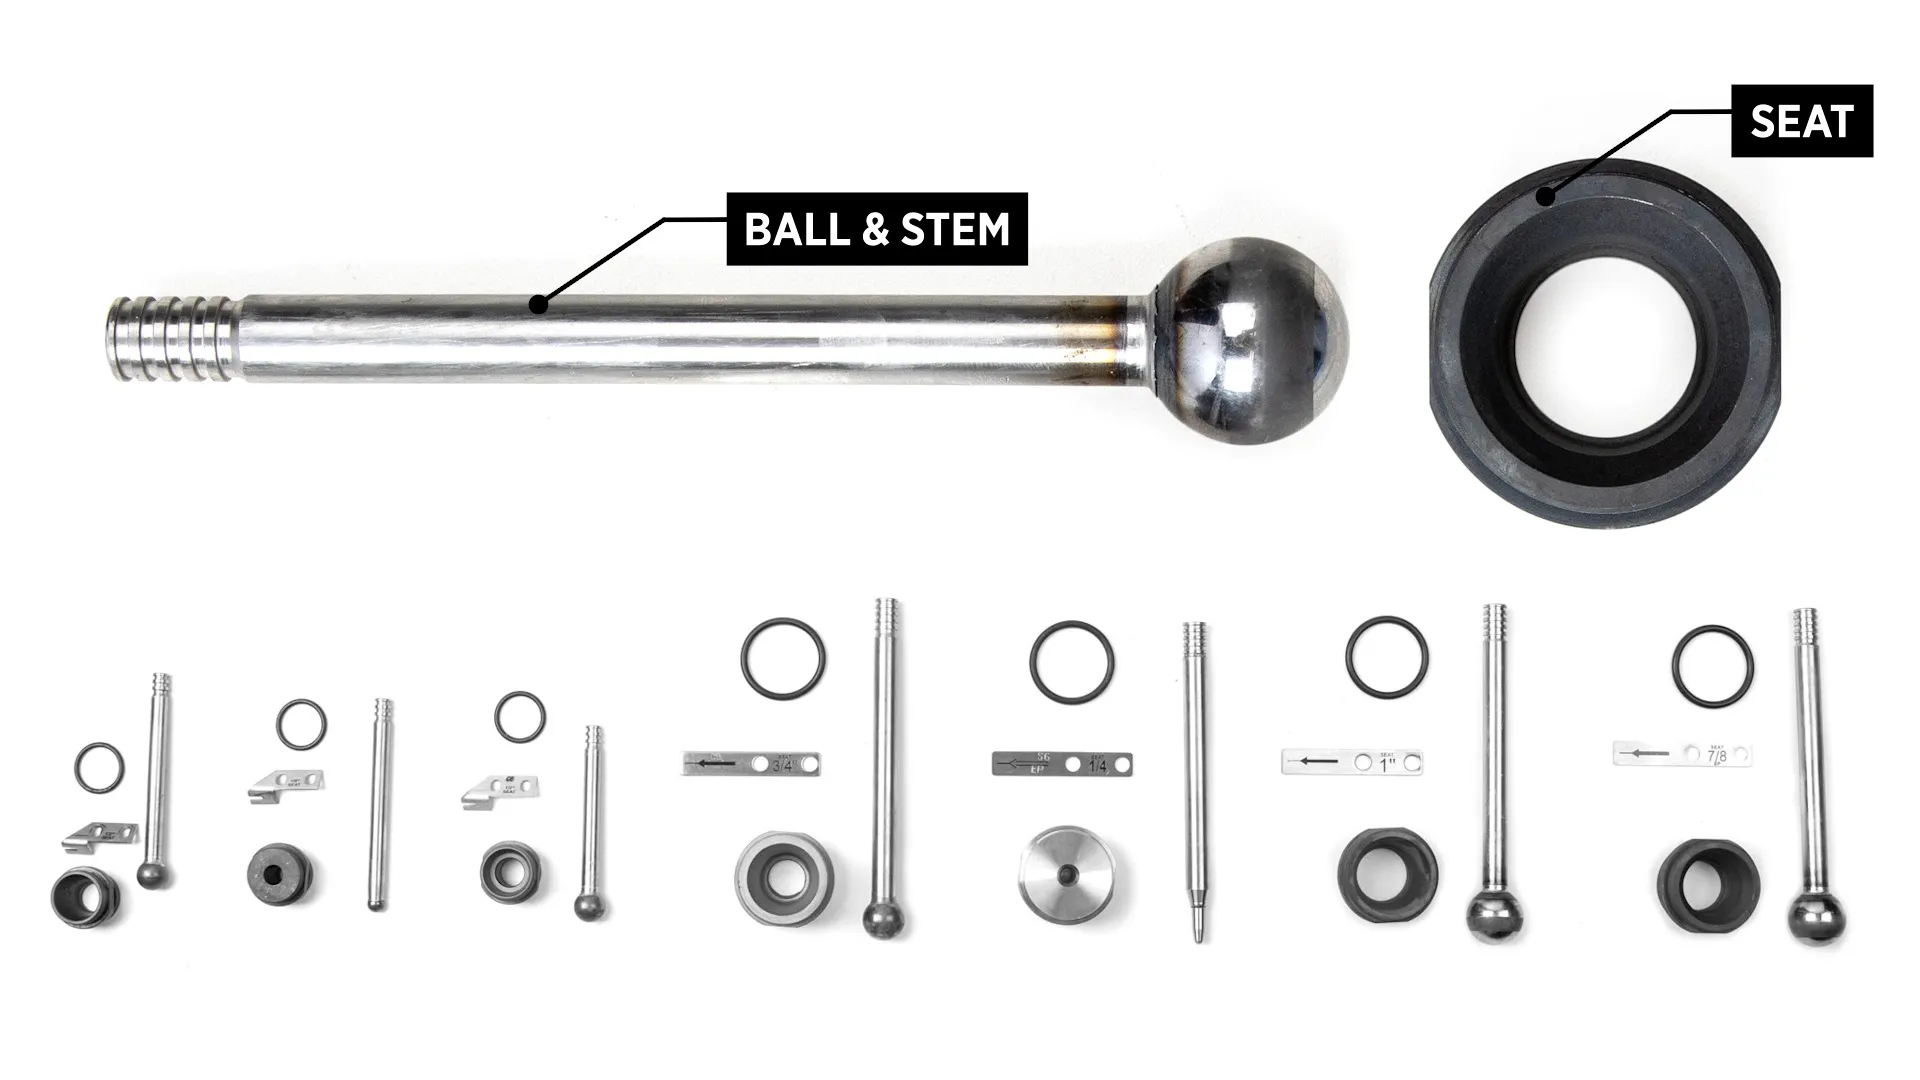
For help selecting a trim set, check out our guide to valve trim, seats, and springs.
Control Valve Trim, Seats, and Springs Guide
CAUTION: The procedures demonstrated in this video are intended for general informational purposes only. Always follow your company’s safety requirements, policies, and applicable regulations when performing any maintenance or repair.
Before starting any repair or maintenance activities:
- Review and follow all WARNING and CAUTION notes found in the Kimray Installation, Operation, and Maintenance (IOM) guide for your specific product.
- Wear all required personal protective equipment (PPE), including approved eye protection, steel toe safety shoes, and nitrile gloves to protect against exposure to chemicals and other hazardous materials.
-Failure to use appropriate PPE or follow proper procedures can result in serious injury or death.
WARNING: Before any service, be certain that the valve is fully isolated and that all pressure upstream and downstream has been relieved. Use bypass valves or fully shut off the process. Be sure that any operating or instrument gas lines have been disconnected. Never assume that a check valve is fully blocking the downstream line. Never tighten any fitting or the main connections to the regulator while there is pressure on the line.
How to Remove Control Valve Trim
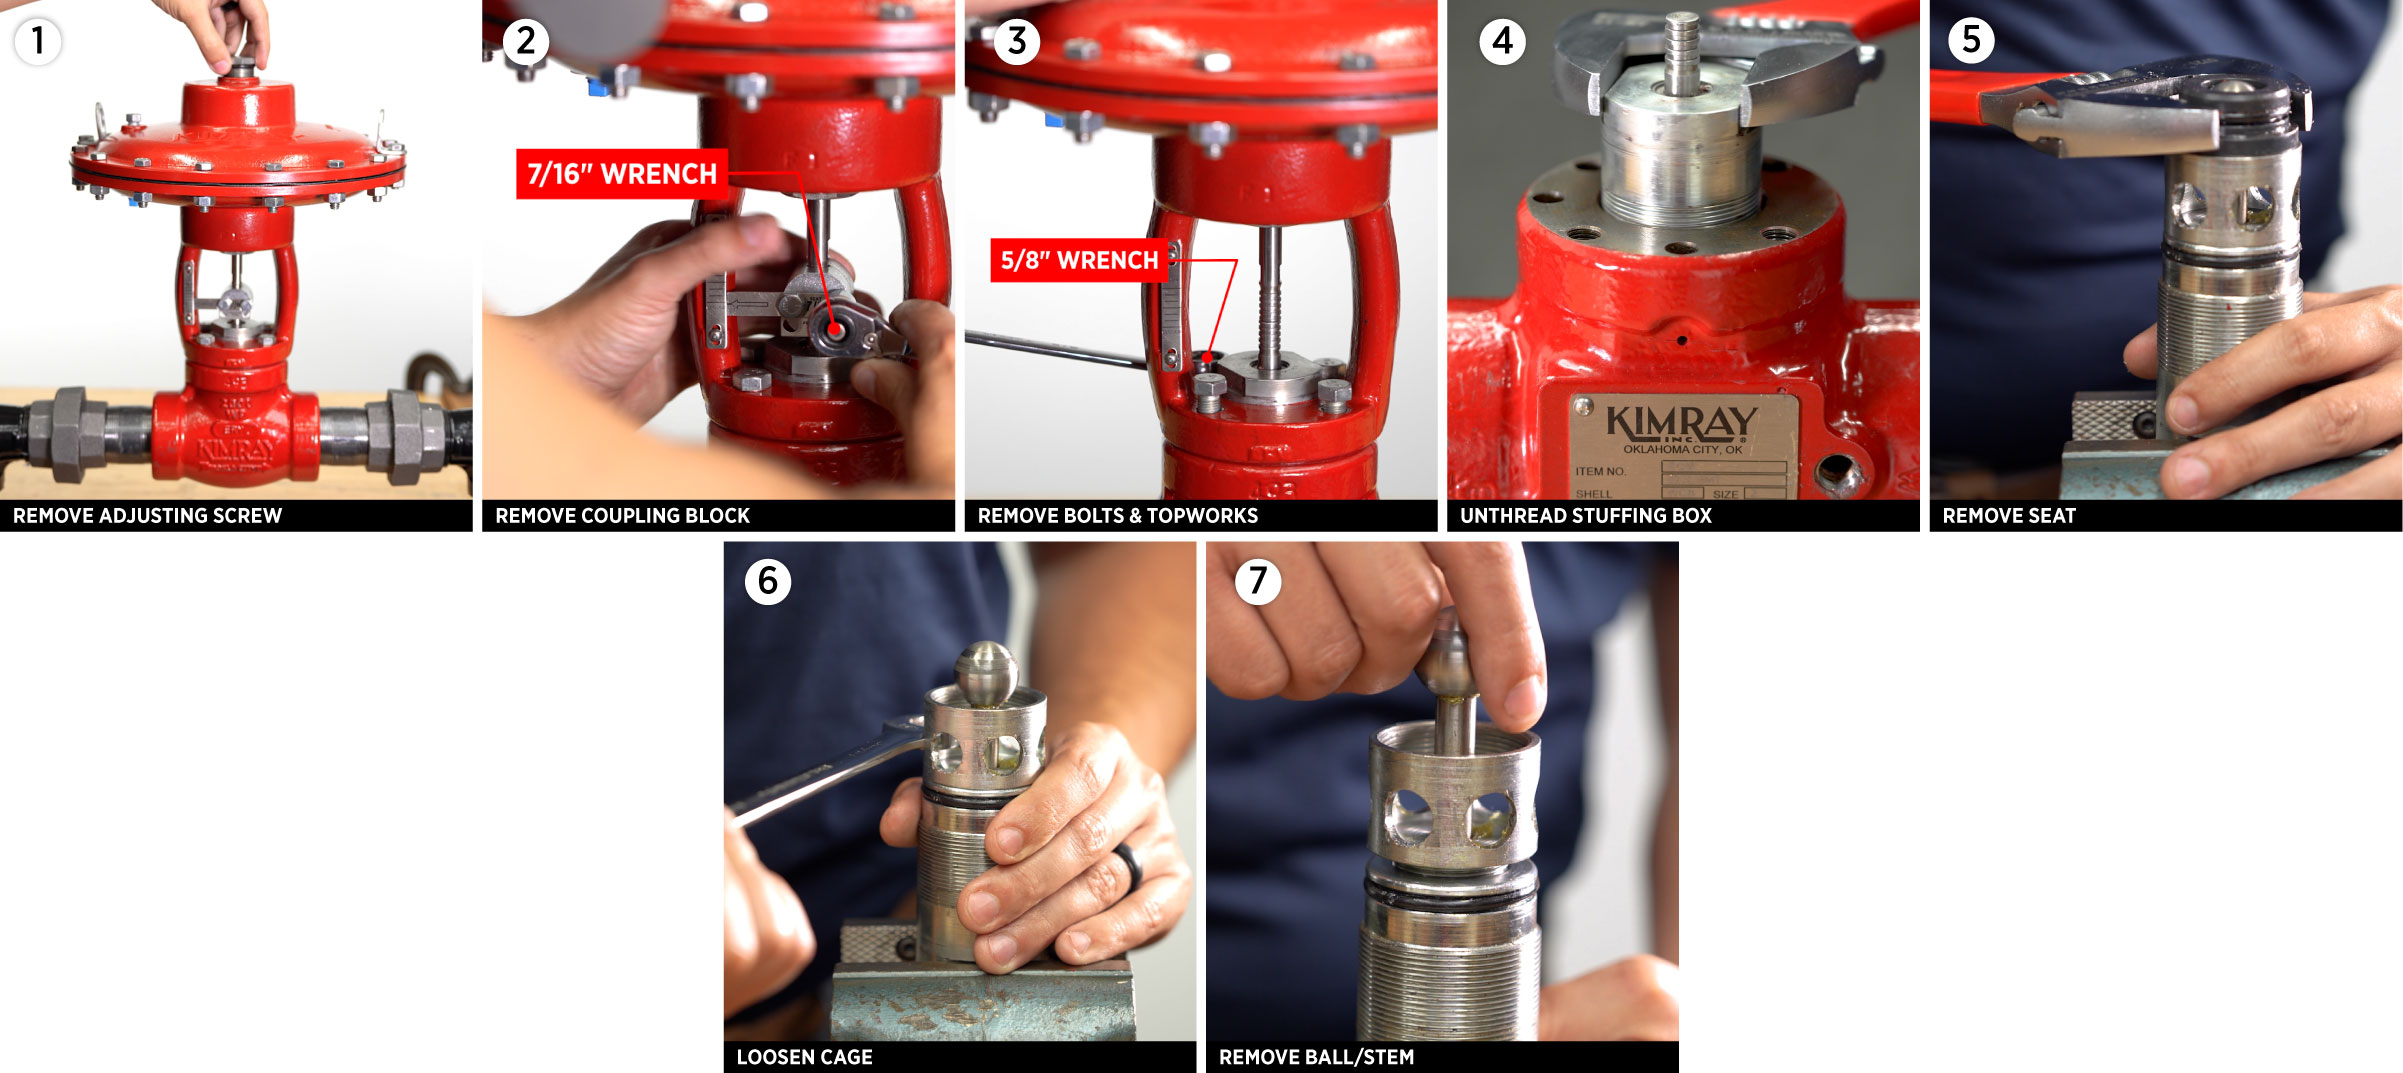
- First, remove the adjusting screw (adjustable wrench).
- Then remove the coupling block (7/16" socket wrench).
- Unthread the four body bolts and remove the topworks (9/16" wrench).
- Next, unthread the stuffing box from the valve body.
If you hear a hissing sound coming from the communication hole, stop working immediately! This is alerting you that there’s still pressure in the valve body. Make sure the valve is completely depressurized before continuing.

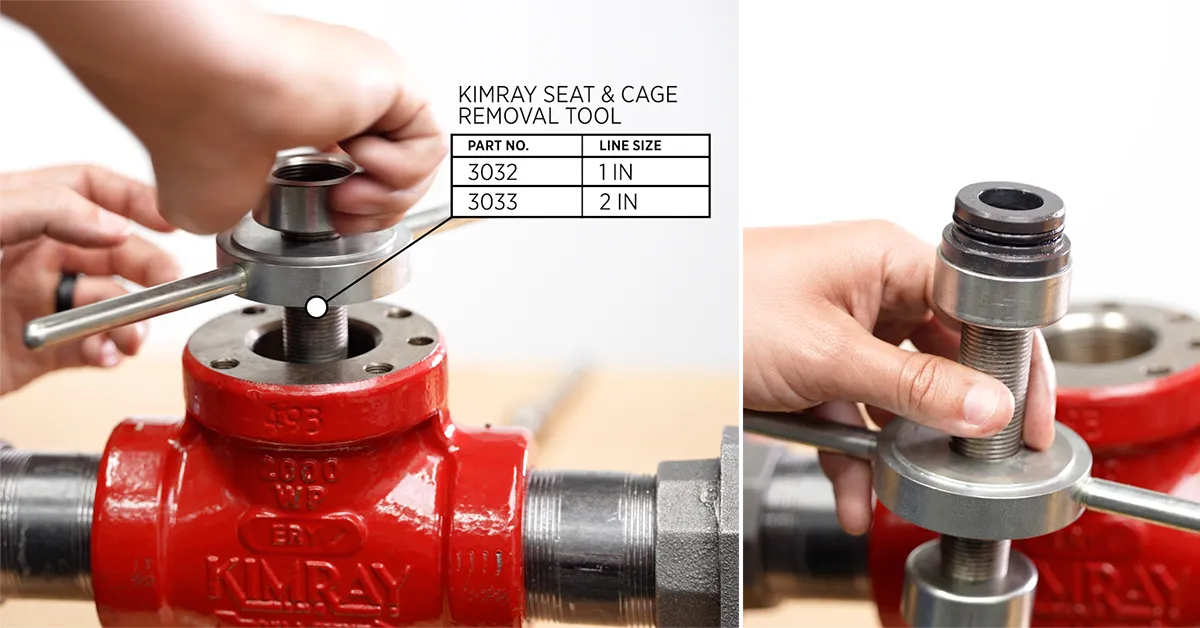
The stuffing box will usually come out as one assembly. If it doesn’t, you can use a Kimray Seat Removal Tool (3032 or 3033) to remove the seat from the body.
- Put the stuffing box in a vice, clamping onto the flats, to separate the seat from the stuffing box.
- Next, loosen the cage to take the spring tension off the packing and make removal and reinstallation easier.
- Finally, remove the ball and stem.
How to Install a New valve Trim Set
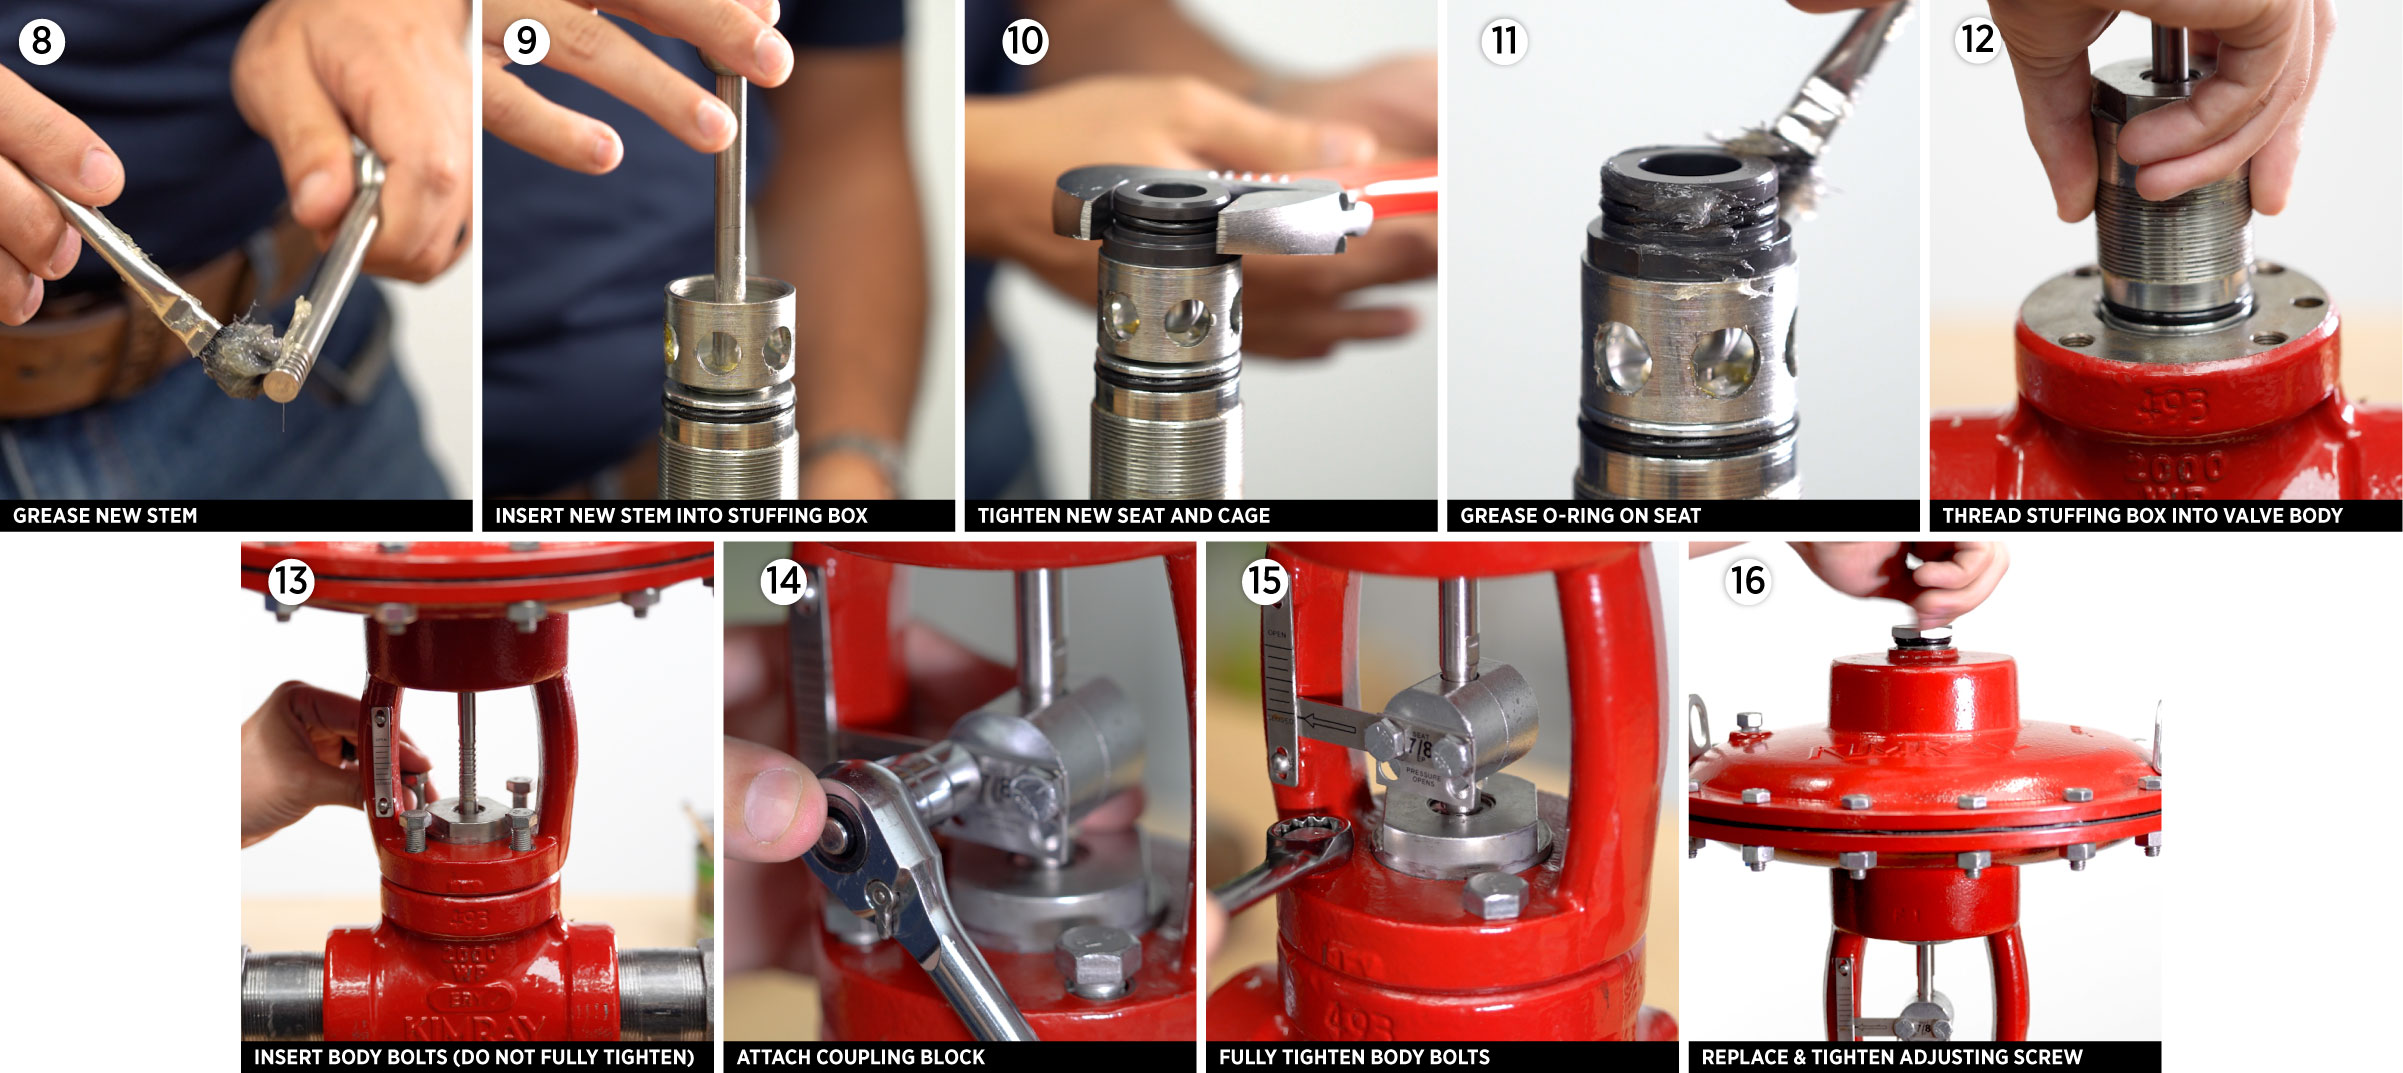
- Add grease to the new stem.
- Install it, making sure it’s fully inserted into the cage to prevent contact with the seat.
- Thread on the new seat and fully tighten the seat and cage.
- Grease the O-ring.
- Then thread the stuffing box assembly into the valve body.
- Replace the topworks and bolts, but don’t fully tighten them yet.
- Attach the coupling block (7/16" socket wrench) with the flats on top along with the new travel indicator.
- Then fully tighten the body bolts (9/16" wrench).
- Finish by replacing the adjusting screw (adjustable wrench).
Your valve trim set is now ready to handle your new flow conditions.