ESG requirements are a growing topic among oil and gas producers. One step you can take to support these goals is to eliminate natural gas emission from your pressure reducing regulators.
You can achieve non-vent operation by purchasing our non-vent pressure reducing regulators or by converting your existing regulators with a few simple parts. You may also want to do this if you are using the regulator inside a building or for other safety concerns.
In this video, Will show how to quickly and easily convert a pressure reducing regulator to non-vent.
We’re in a controlled environment, but if you are doing this in-line, you will need to isolate and depressurize the valve first. Before performing any service, consult your company's safety guidelines and requirements. Follow all regulations and wear all necessary PPE.
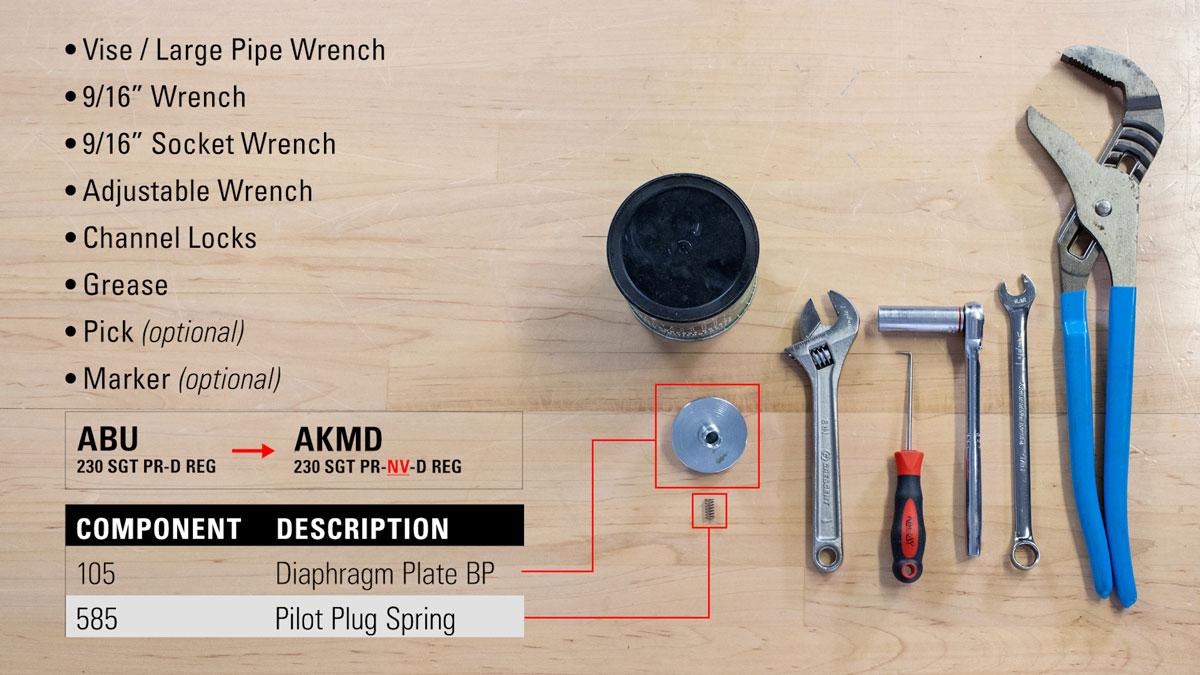
Parts & Tools Needed
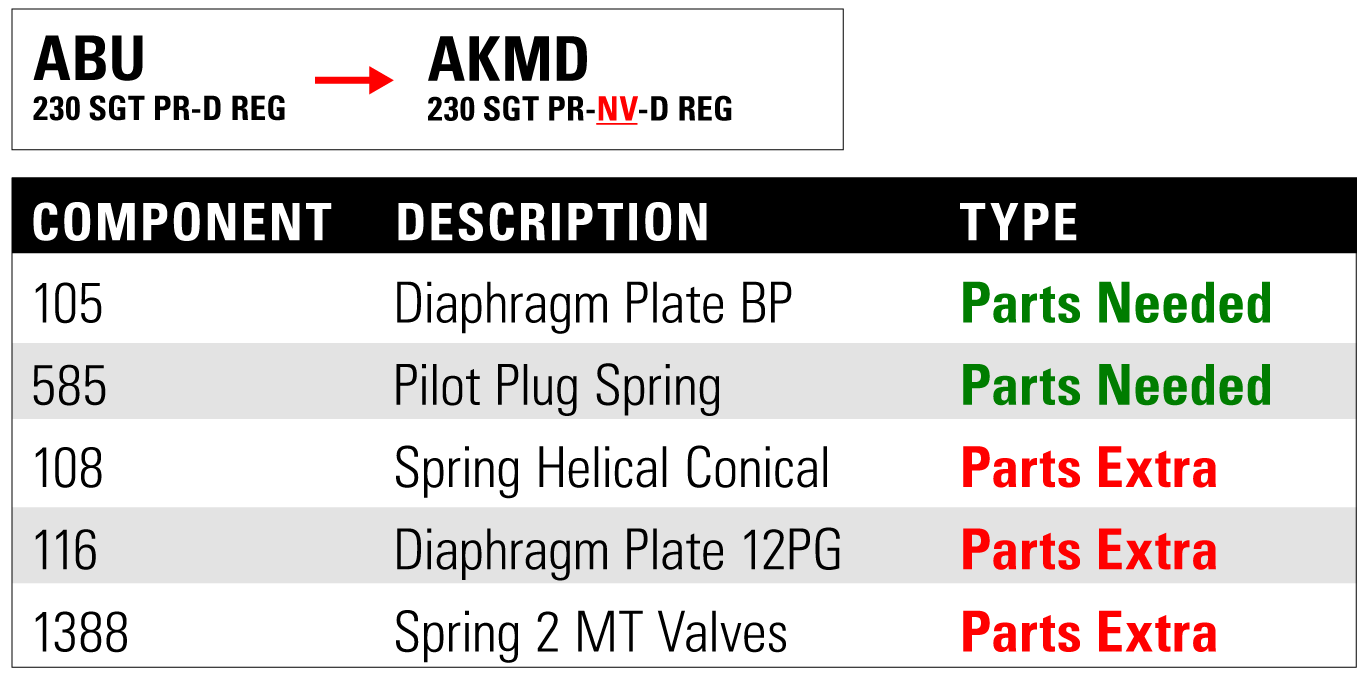
- Diaphragm Plate BP (105)
- Pilot Plug Spring (585)
- 9/16” Wrench and/or Socket
- Vise / Large Pipe Wrench
- Adjustable Wrench
- Channel Locks
- Grease
- Pick (optional)
- Marker (optional)
How to Disassemble a Pressure Reducing Regulator for Non-Vent Conversion
While doing this conversion, we also recommend using a repair kit for basic maintenance and improved operation.
- First, unthread the adjustment bolt to relieve the spring pressure.
- Make a mark down the regulator to help realign the components during assembly.
- Then, loosen all the tubing connections.
- Remove the bonnet bolts with a 9/16” wrench, then take off the bonnet, spring, spring plates and spacer ring.
- Remove the pilot housing and inspect the diaphragm for damage. If it’s damaged, it will need to be replaced.
- Use a 9/16” socket to remove the bolts from the upper housing, then remove the tubing and upper housing, inspecting the diaphragm for damage.
- Remove the lower housing and properly discard the oil.
- Put the diaphragm plate into the vise and use a 9/16” wrench to remove the nut.
- Remove the ratio plug and seat. Inspect them for damage and replace them if needed.
- Next, check the gasket for damage and then remove the lower housing.
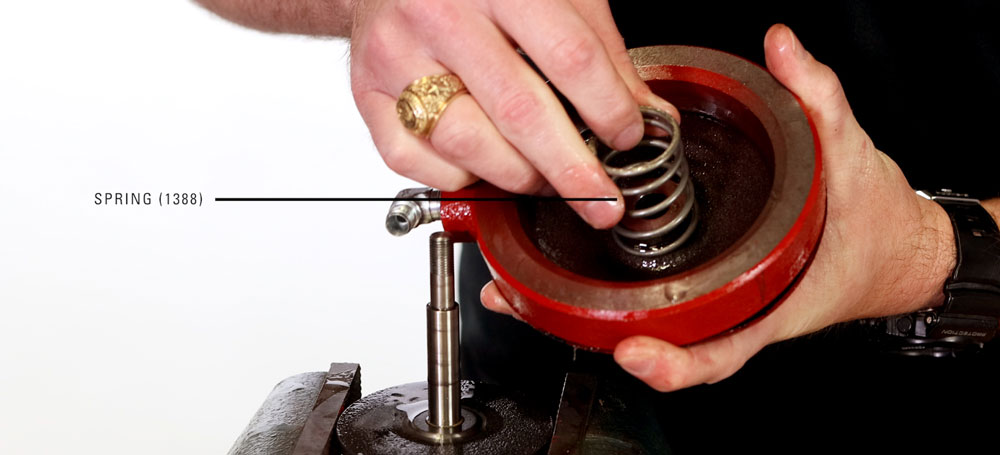
- Remove the spring and set this aside. This will be an extra part for this conversion.
- Reassemble the lower housing, seat, ratio plug and nut.
- Also apply new grease to the gasket.
Replacing the Diaphragm Plate
- Place the pilot housing upside down in the vise on the diaphragm plate.
- Use a socket wrench to remove the pilot seat.
- Inspect the diaphragm and replace it if necessary.
- Use channel locks to remove the diaphragm nut from the diaphragm plate.
- Remove and inspect the diaphragm and replace it if necessary.
- Keep the diaphragm nut, but set the diaphragm plate aside, it will be an extra piece.
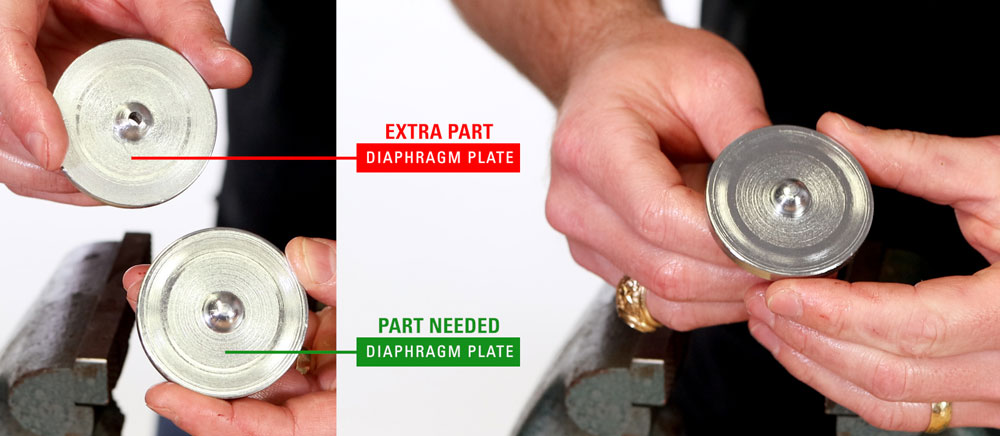
- Put the new diaphragm plate in the vise.
- Thread on the diaphragm, then the diaphragm nut.
- Place the spacer ring around the diaphragm to know how much to tighten it. If it is too tight, the diaphragm will be distorted and not fit correctly.
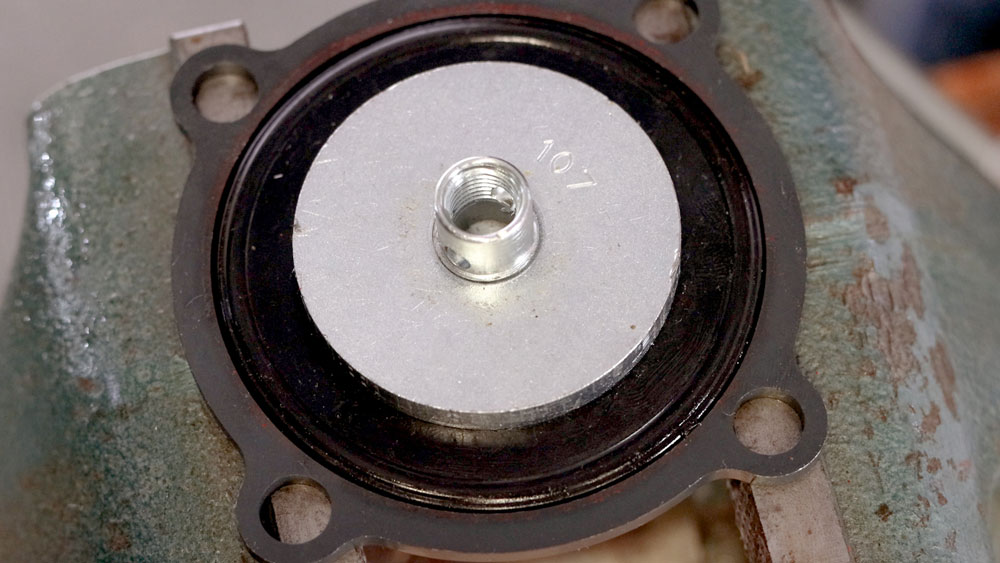
- Then tighten the diaphragm nut with channel locks.
- Replace the pilot housing and tighten the pilot seat and diaphragm in place. Again, be careful not to over tighten.
How to Reassemble a Pressure Reducing Regulator for Non-Vent
- Put the body back in the vise and put the upper housing back on the body. Be sure to align your marks.
- Fill the housing oil bowl with a low gravity oil, enough to cover the communication hole.
- Place the diaphragm on top, bevel side facing up.
- Replace the lower housing, aligning with your marks.
- Only hand-tighten the bolts at this point so that it’s easier to replace the tubing later.
Replacing the Pilot Plug Springs
- Use a 9/16 socket to remove the pilot seat. Inspect the gasket for damage.
- Use a pick to remove the pilot spring and set it aside; this will also be an extra piece.
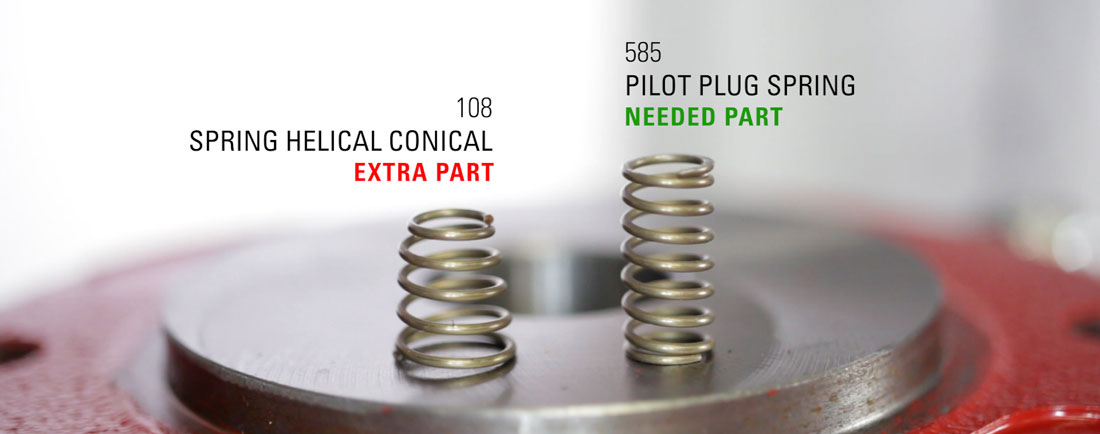
- Put in the new pilot plug spring (585).
- Hold the pilot plug assembly by the ball of the pilot plug to keep it together while you thread on the assembly by hand. Then fully tighten it with a socket wrench.
- Verify that the pilot plug can move freely before continuing.
- Install the pilot housing assembly back on to the upper housing, making sure the diaphragm isn’t pinched or off center.
Finish Reassembly
- Place the spacer ring around the diaphragm and align it with the bolt holes.
- Replace the lower spring plate, spring and upper spring plate.
- Align the bonnet with your markings and hand-tighten the bolts.
- Reassemble all the tubing and then fully tighten all the bolts in a crisscross pattern.
- Tighten the tubing connectors.
- Lastly, tighten your adjustment bolt on top for your desired set point.
Now your pressure reducing regulator is non-venting. If you have any questions about any part of this repair process or the custom Kimray tools used, reach out to your local Kimray store or authorized distributor.
We have other solutions available to help you meet your company’s ESG goals, including electric actuators and pilots, non-vent control valves and more. For more information, check out our emissions solutions guide.