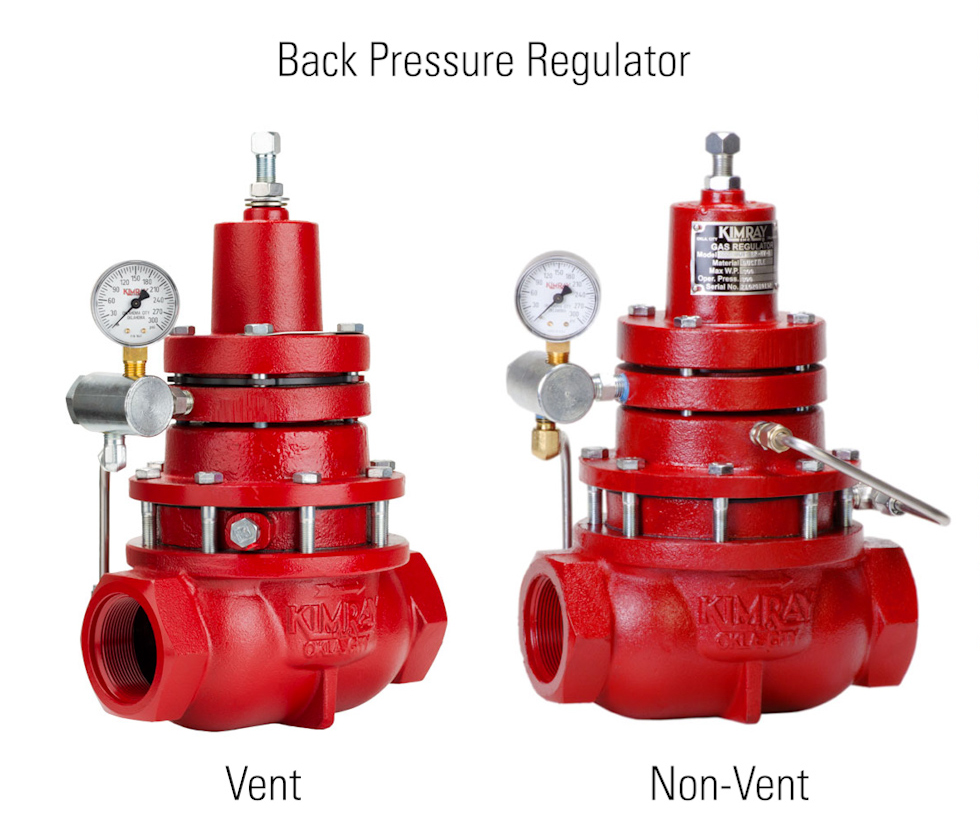
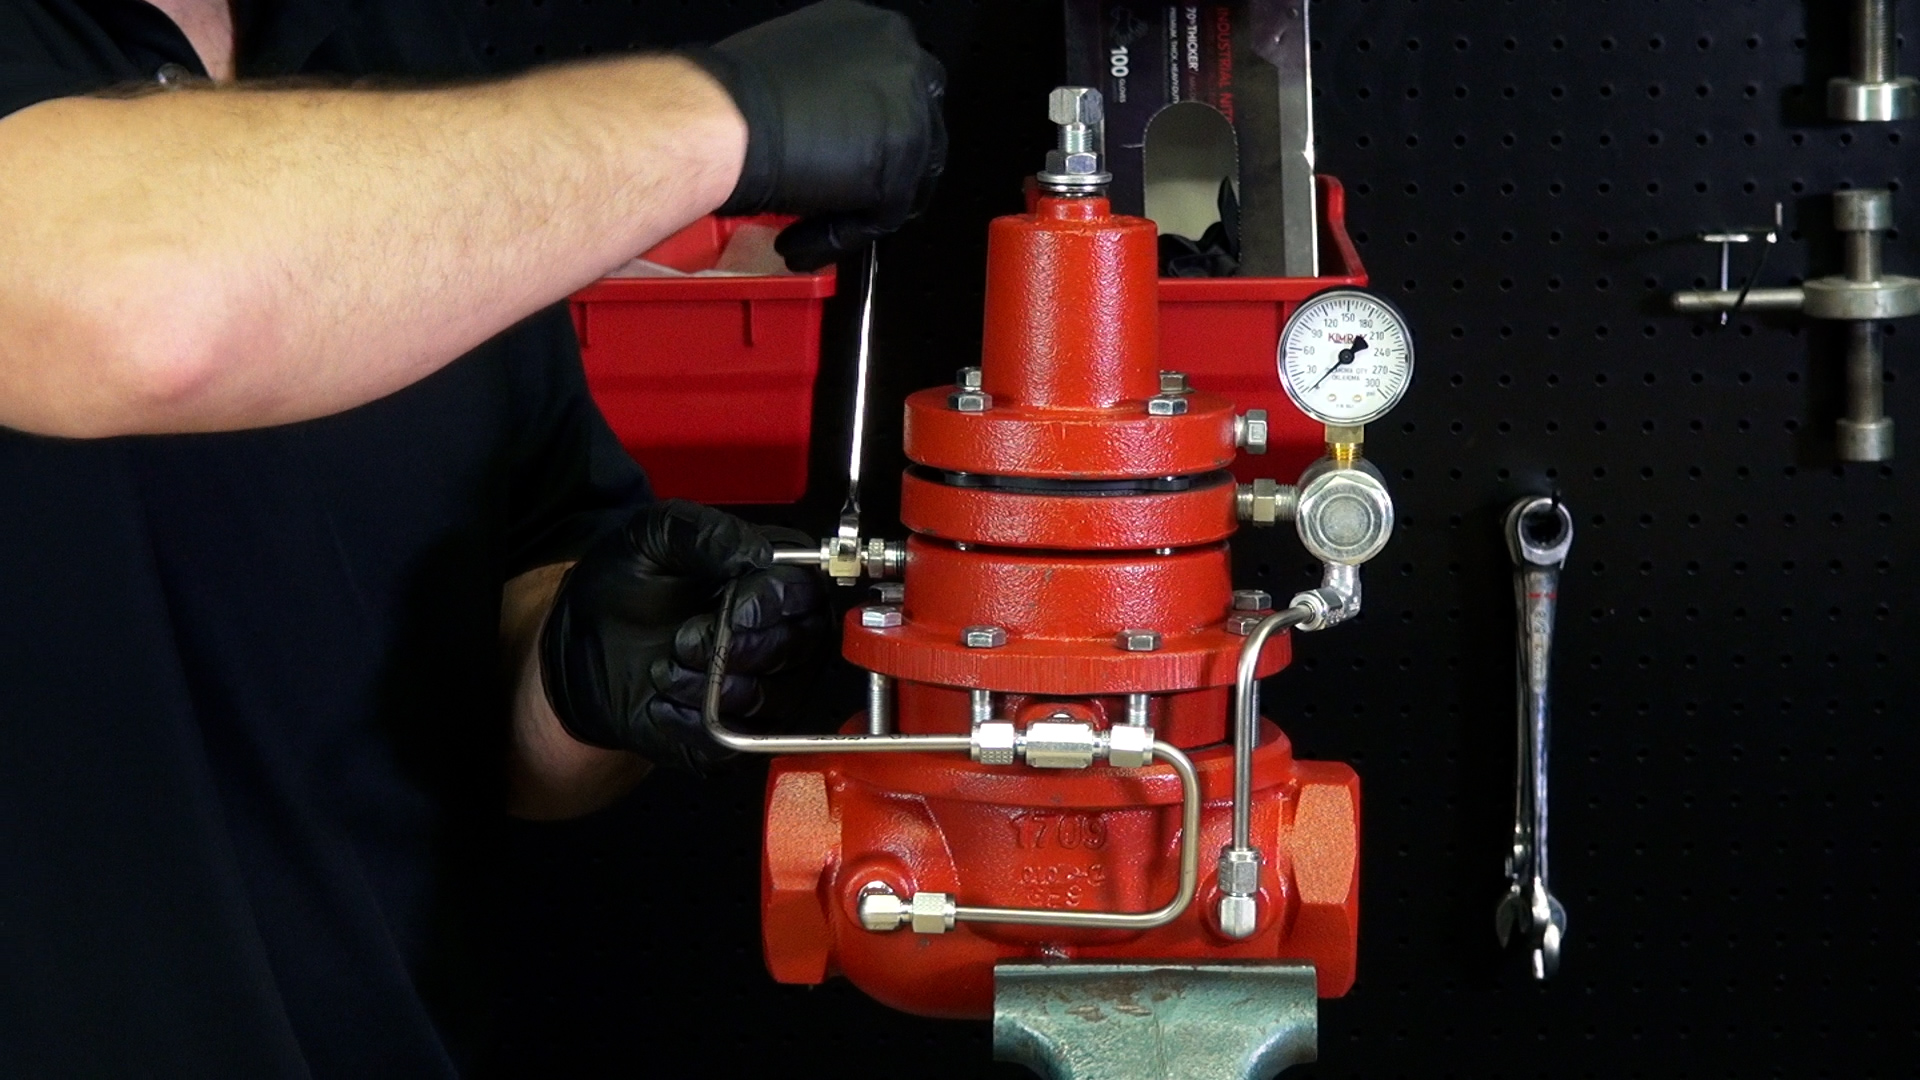
A Back Pressure Regulator is a specific type of control valve that holds pressure on production vessels such as separators, treaters, and free water knockouts and releases upstream pressure when a designated set point is reached.
When a back pressure regulator is operating correctly, it vents pressure off the diaphragm as it adjusts. However, some producers need to convert the regulator from venting to non-venting. You may need to do this if you are using the regulator inside a building, facing increased emissions regulations, or for safety concerns.
Helpful Documents
Conversion Kits
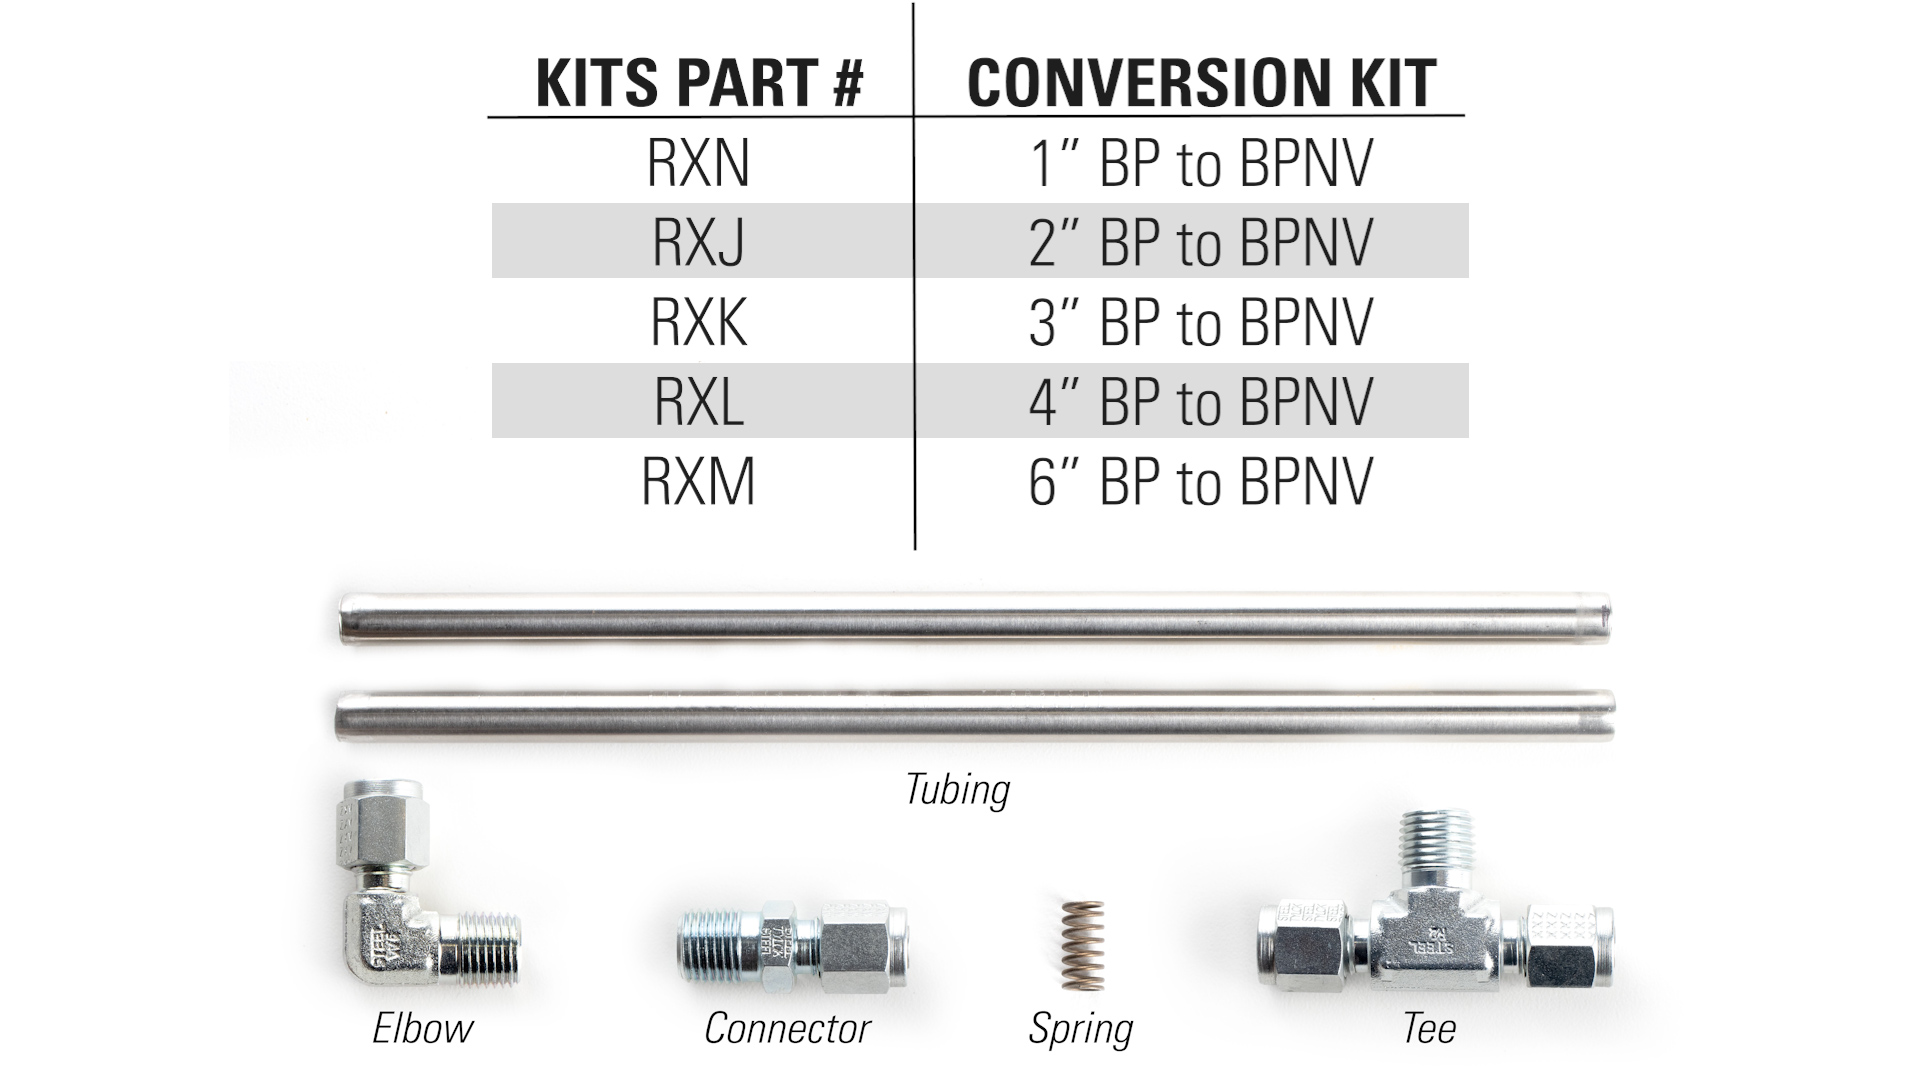
To make this process as simple as possible, we offer all-in-one non-vent conversion kits that include the tubing, connector, tee and elbow. To order one of these kits or speak with an expert about this process, reach out to your local Kimray store or authorized distributor.
Parts Needed
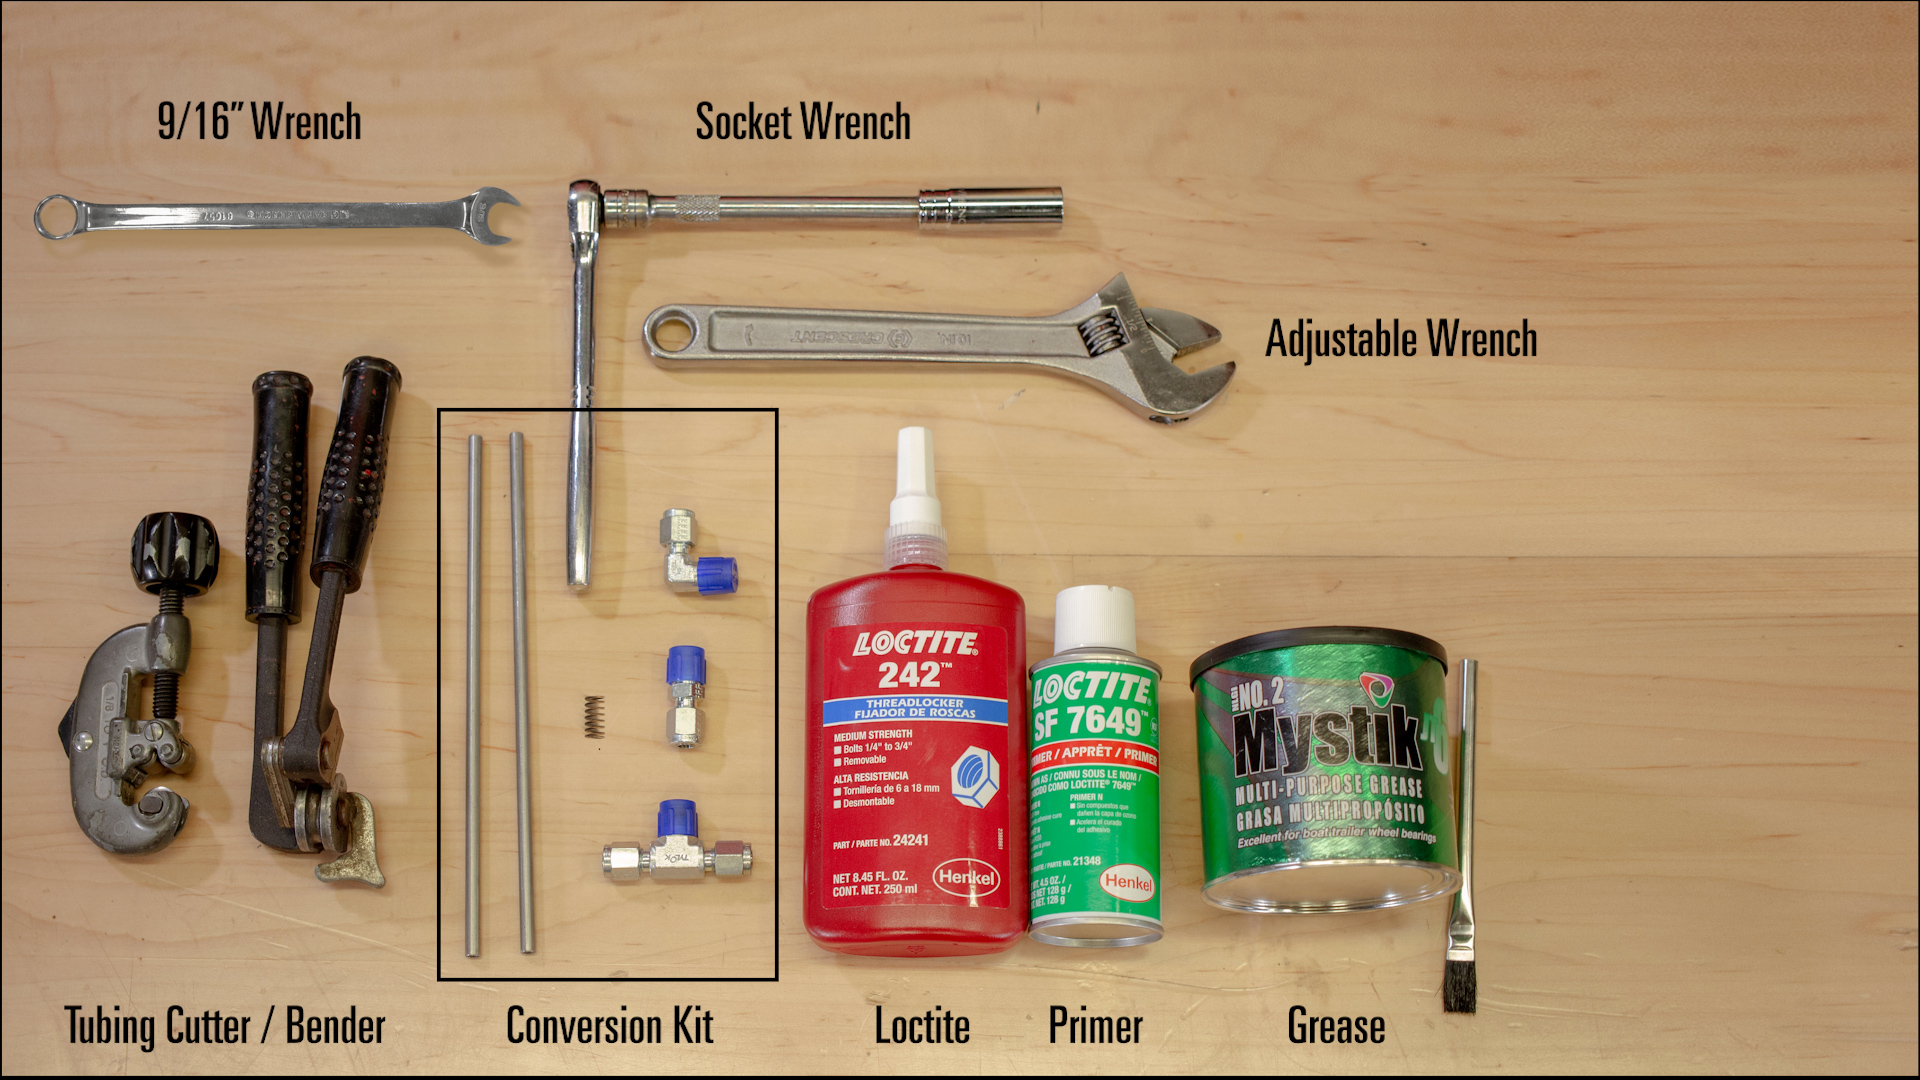
These are the parts you will need for this process:
- Tubing Benders
- Tubing Cutters
- Elbow
- Primer
- Loctite
- Grease
- Adjustable Wrench
- 9/16th” Wrench
- Socket Wrench
- Non-Vent Conversion Kit
- (2) 1/4" Steel Tubes (9" each)
- Connector
- Tee
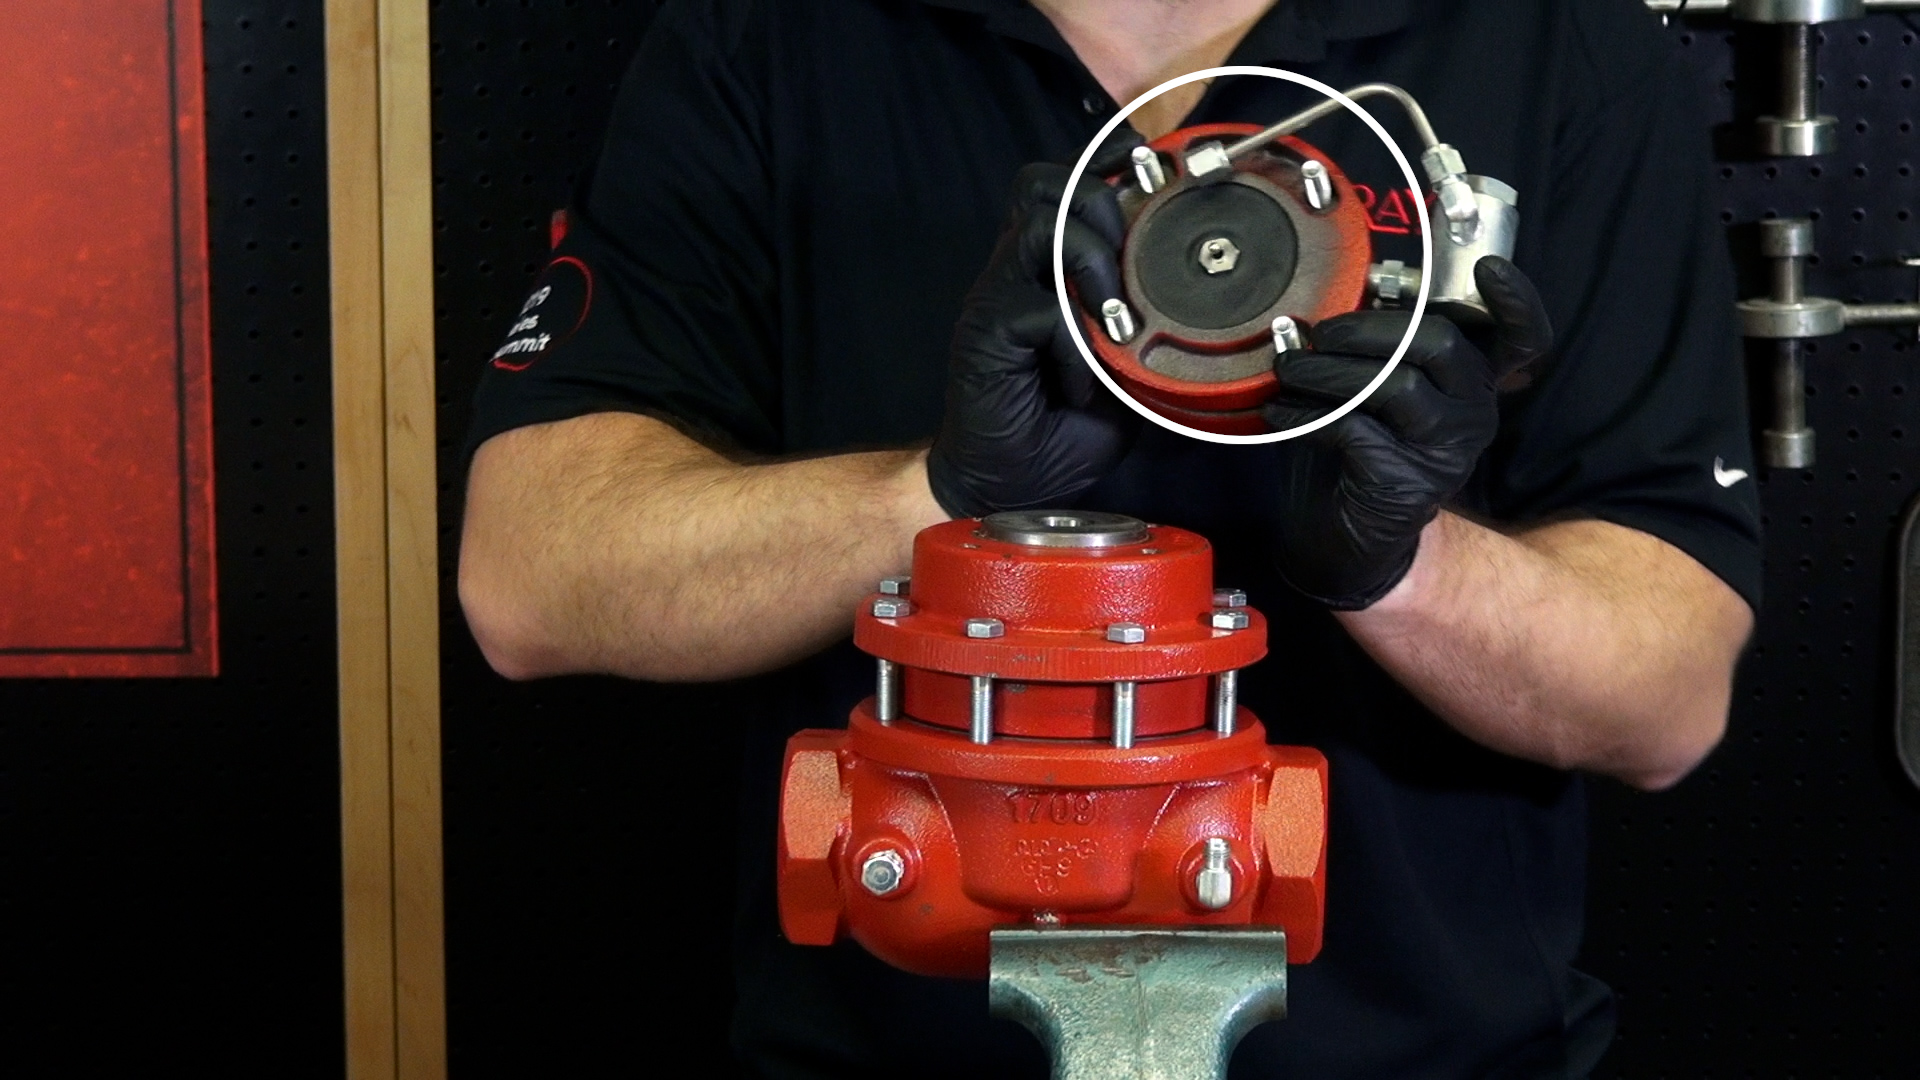
How to Disassemble a Back Pressure Regulator for Non-Vent Conversion
We’re in a controlled environment for the video, but if you are doing this in-line, you will need to isolate and depressurize the valve first.
If you’re using a vice, mount it slightly off center so that when it comes times to install the new elbow, you’ll be able to attach it without adjusting the valve.
- Unthread the adjustment bolt to relieve the spring pressure.
- Loosen the tubing.
- Remove the bonnet bolts but leave them in place to keep the assembly from coming apart.
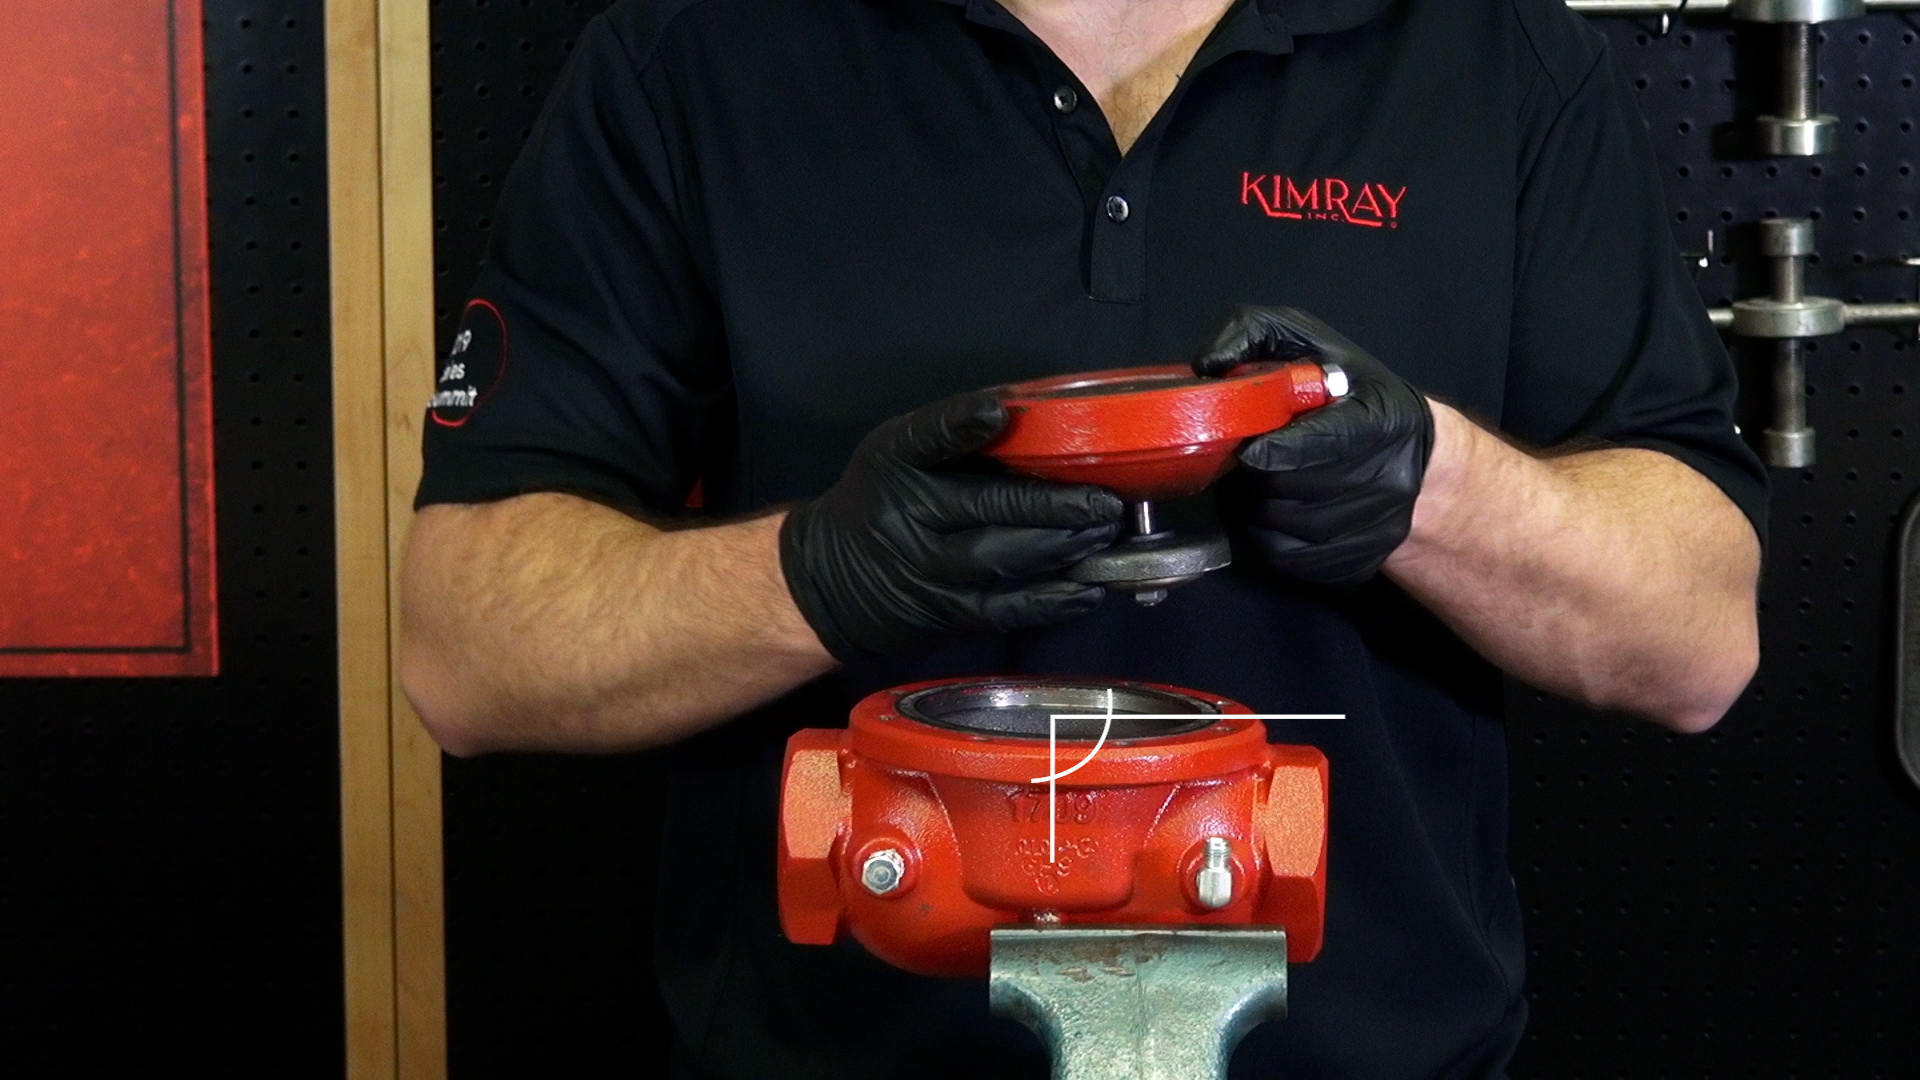
- Remove the tubing from the body and inspect the diaphragm for damage. If it’s damaged, it will need to be replaced.
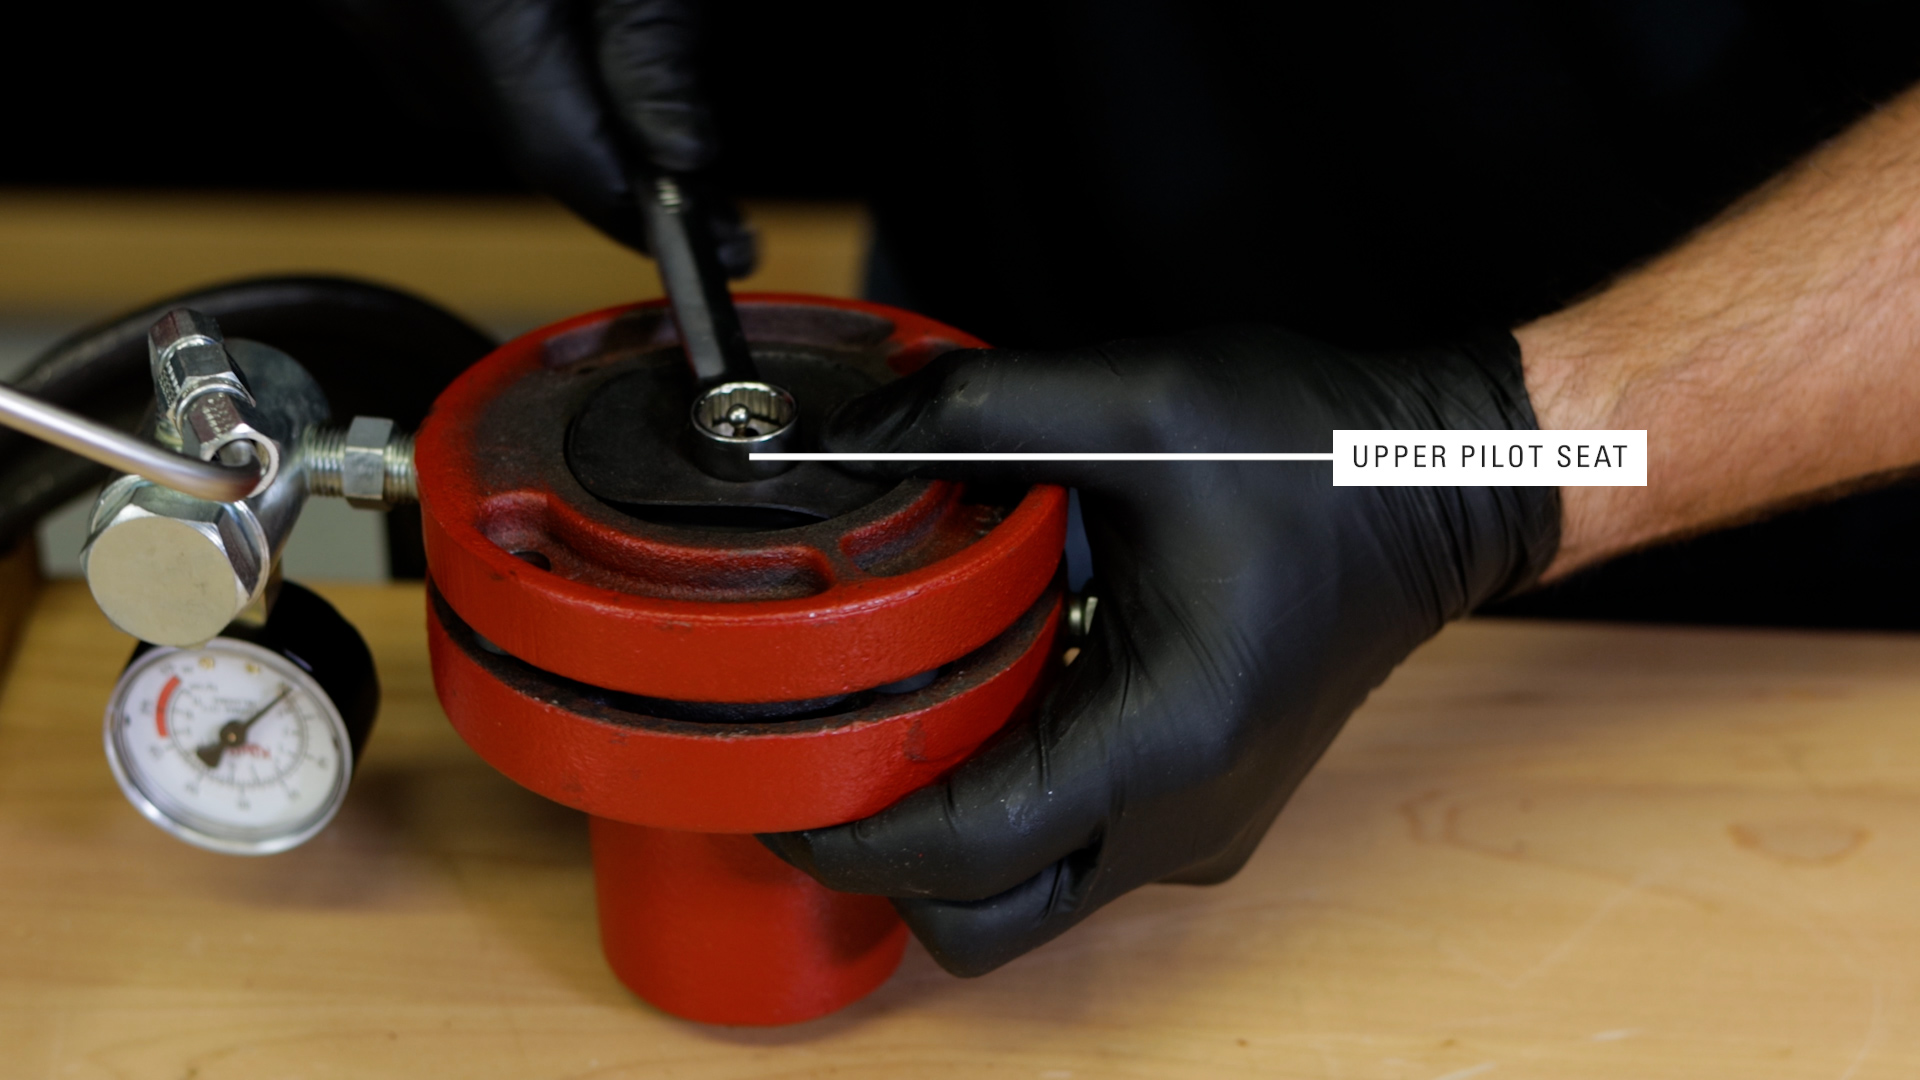
- Remove the upper pilot seat with a 9/16" wrench. Keep the upper seat assembly together as you separate it from the upper diaphragm plate.
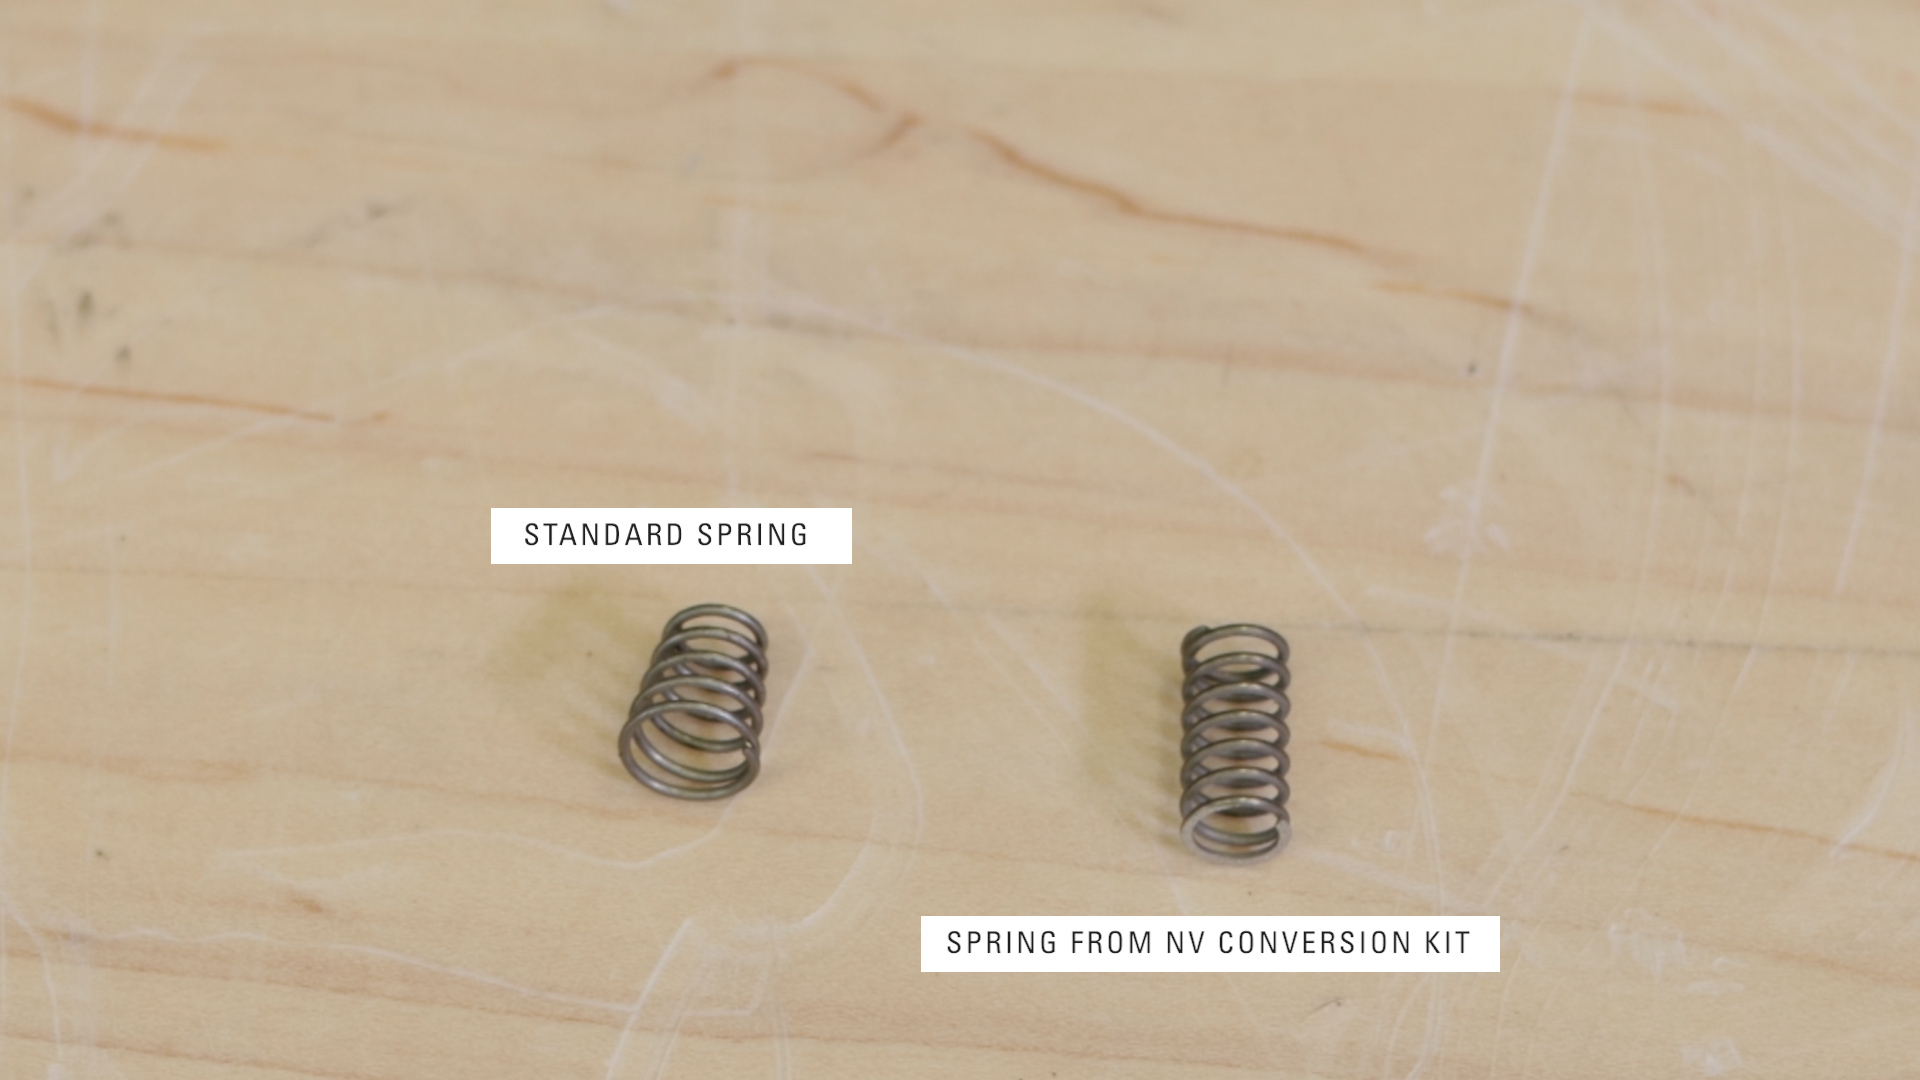
- Remove and discard the current spring and replace it with the new stronger spring from the conversion kit. Because we are venting to downstream, it can take a little more force to keep the pilot plug seated in some situations. This stronger spring is not a standard component and is only included in these non-vent conversion kits.
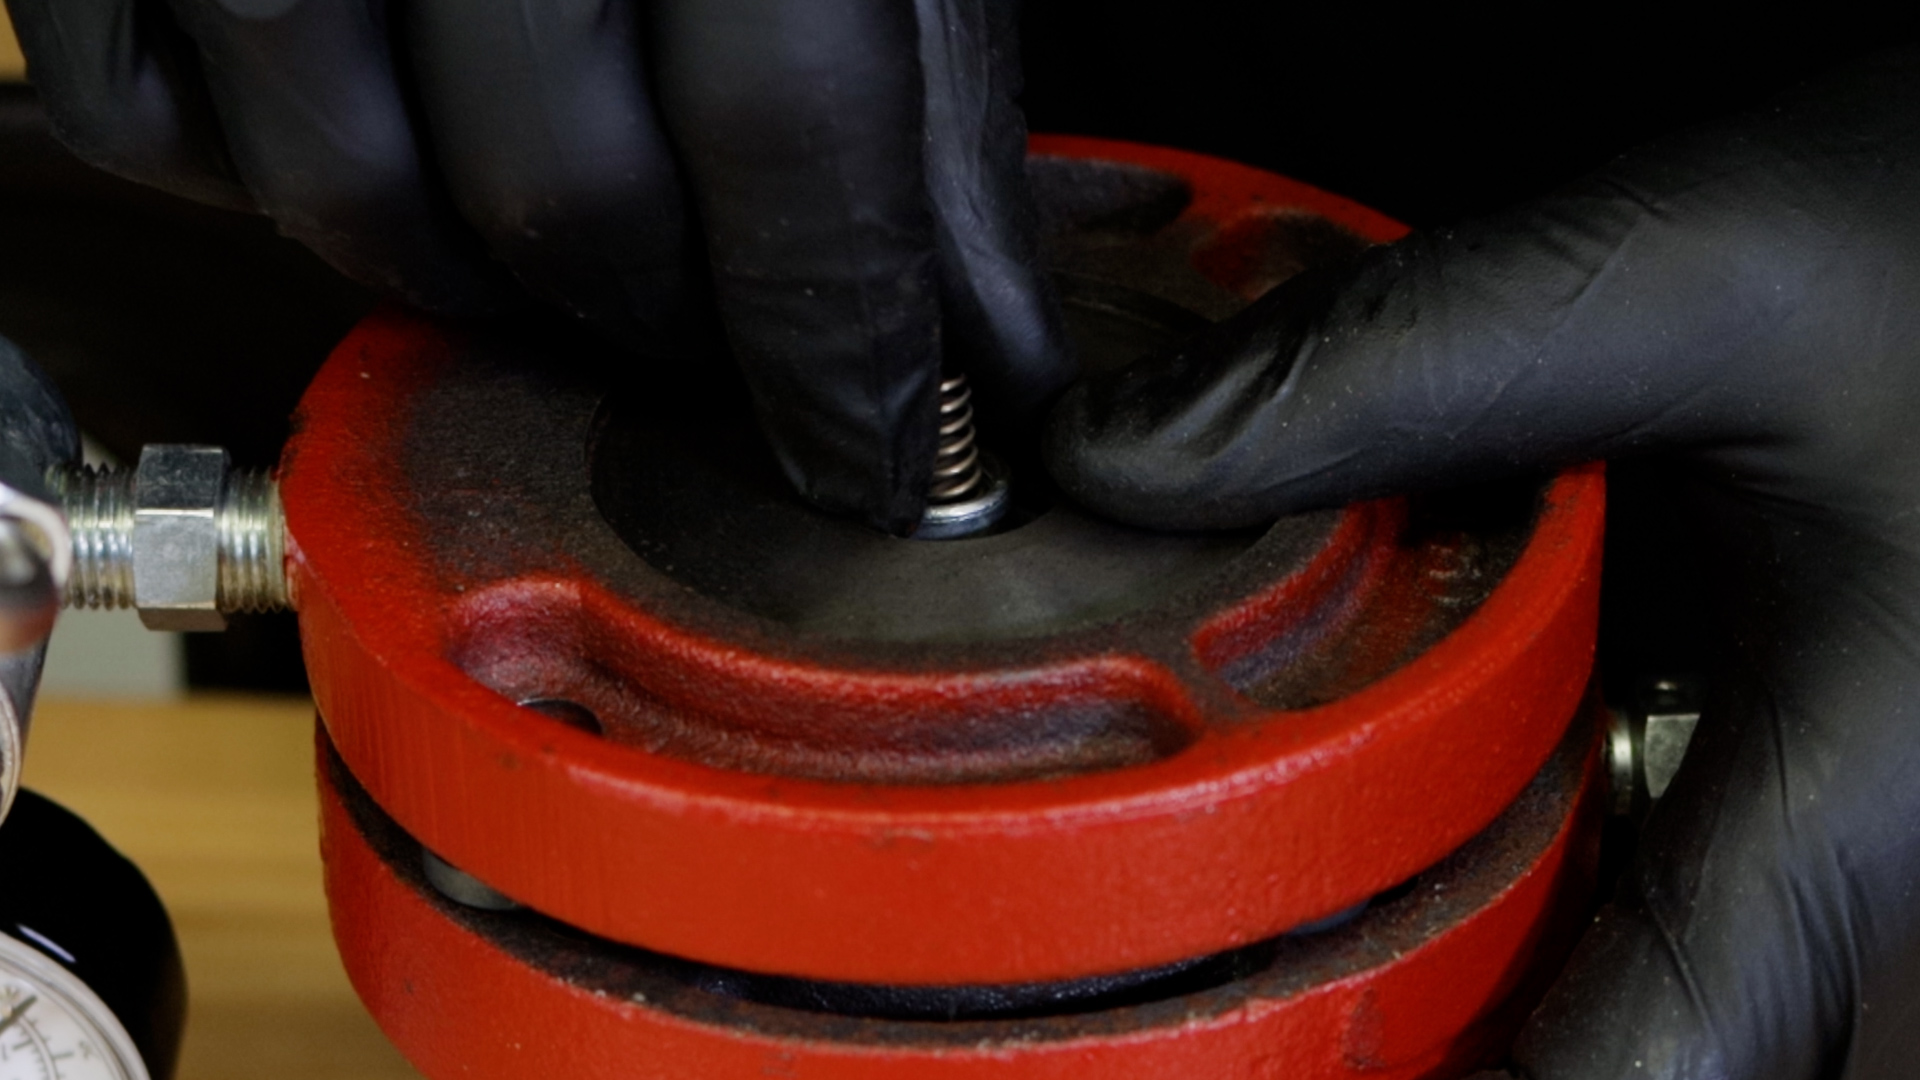
- With the new spring in place, put the upper seat assembly back on the upper diaphragm plate and tighten. If this has been done correctly, you’ll feel the resistance of the spring as you push the pilot plug down.
- Rotate the tubing 90 degrees so you can prop the pilot housing assembly upright and not damage the pilot plug.
- Loosen the bolts on the upper housing and set it aside.
- Inspect this diaphragm for any damaged, and replace it if needed.
- Inspect the gasket on the lower housing. Do not tip it over, because there is oil in it.
- Apply new grease to the gasket.
How to Reassemble a Non-Vent Back Pressure Regulator
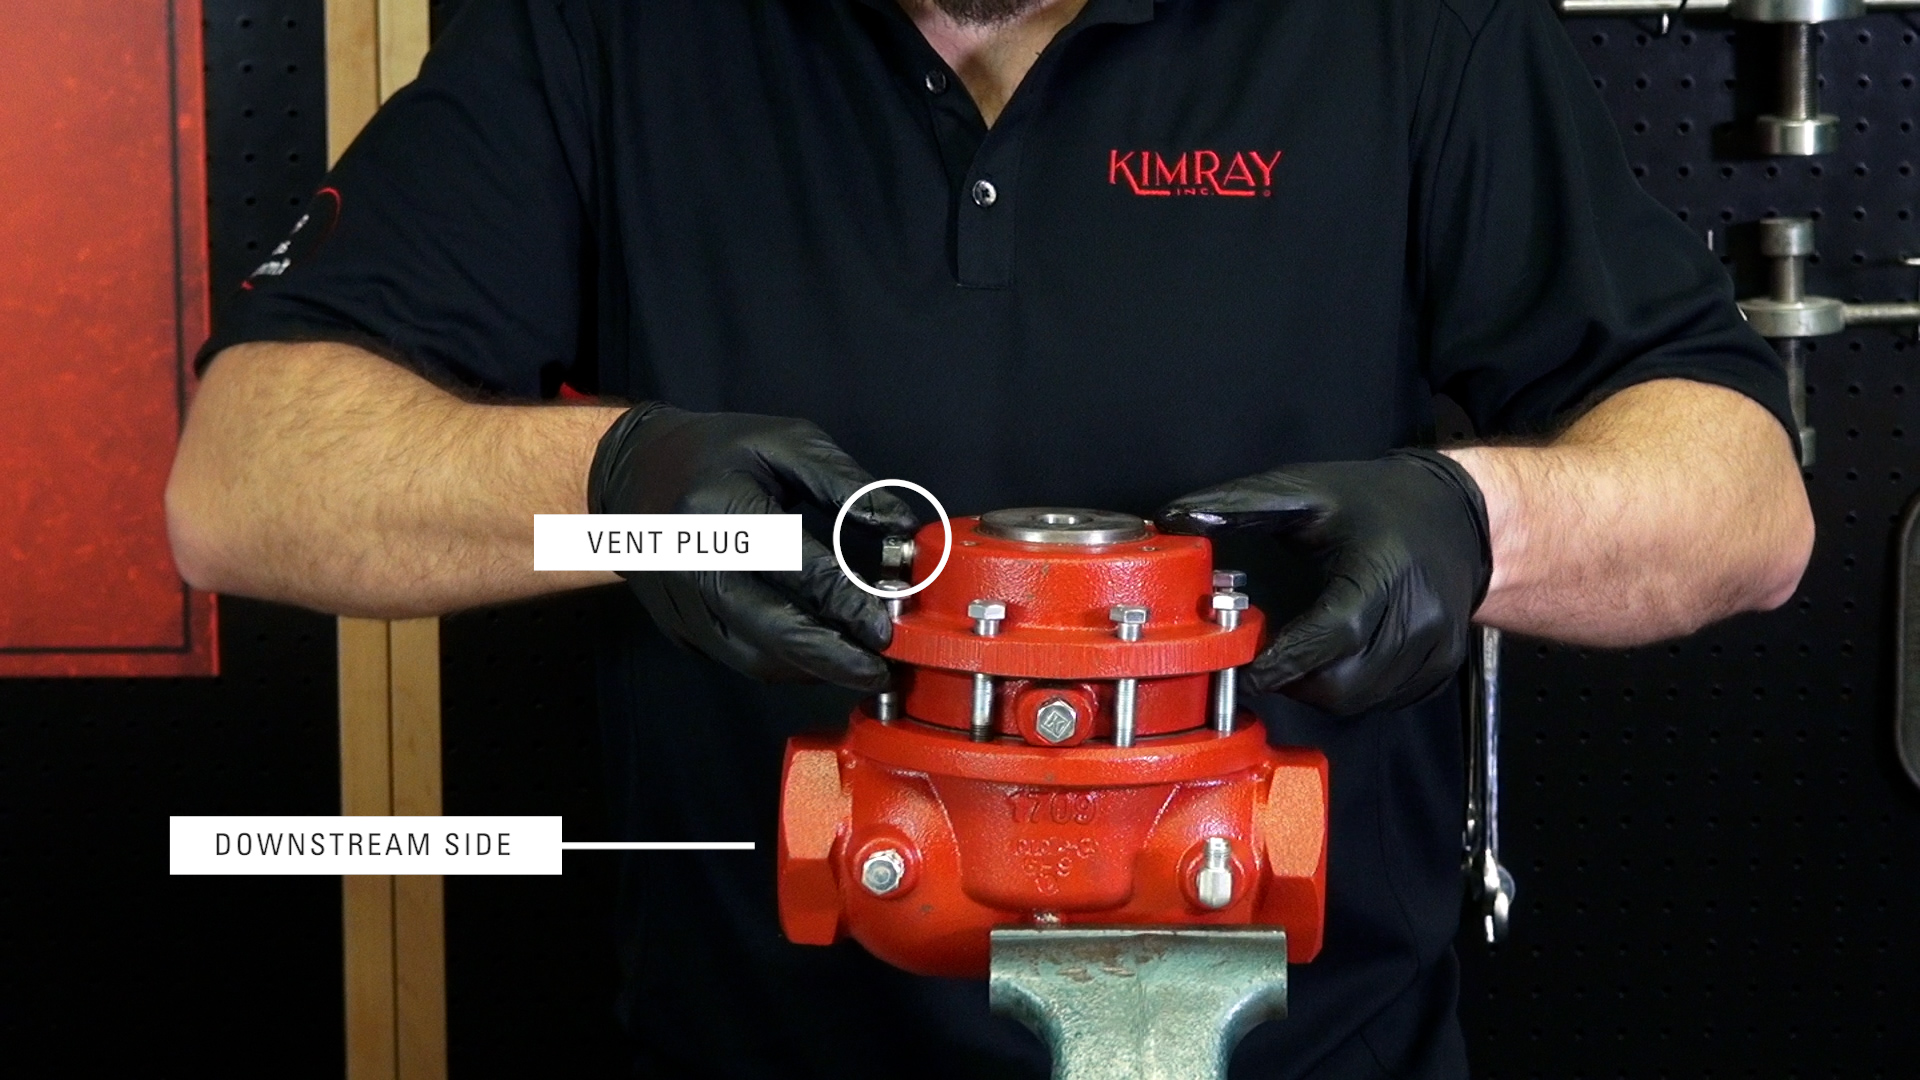
- Rotate the lower housing so that the vent plug is 90 degrees from both inlets.
- Rotate the upper housing vent plug 90 degrees to the downstream side.
- Verify that the lower diaphragm is positioned correctly.
- Hand-start the bolts through the upper housing into the body and tighten in a criss-cross pattern.
- Install the pilot housing assembly back on to the upper housing, making sure the (110) diaphragm is not pinched or off center.
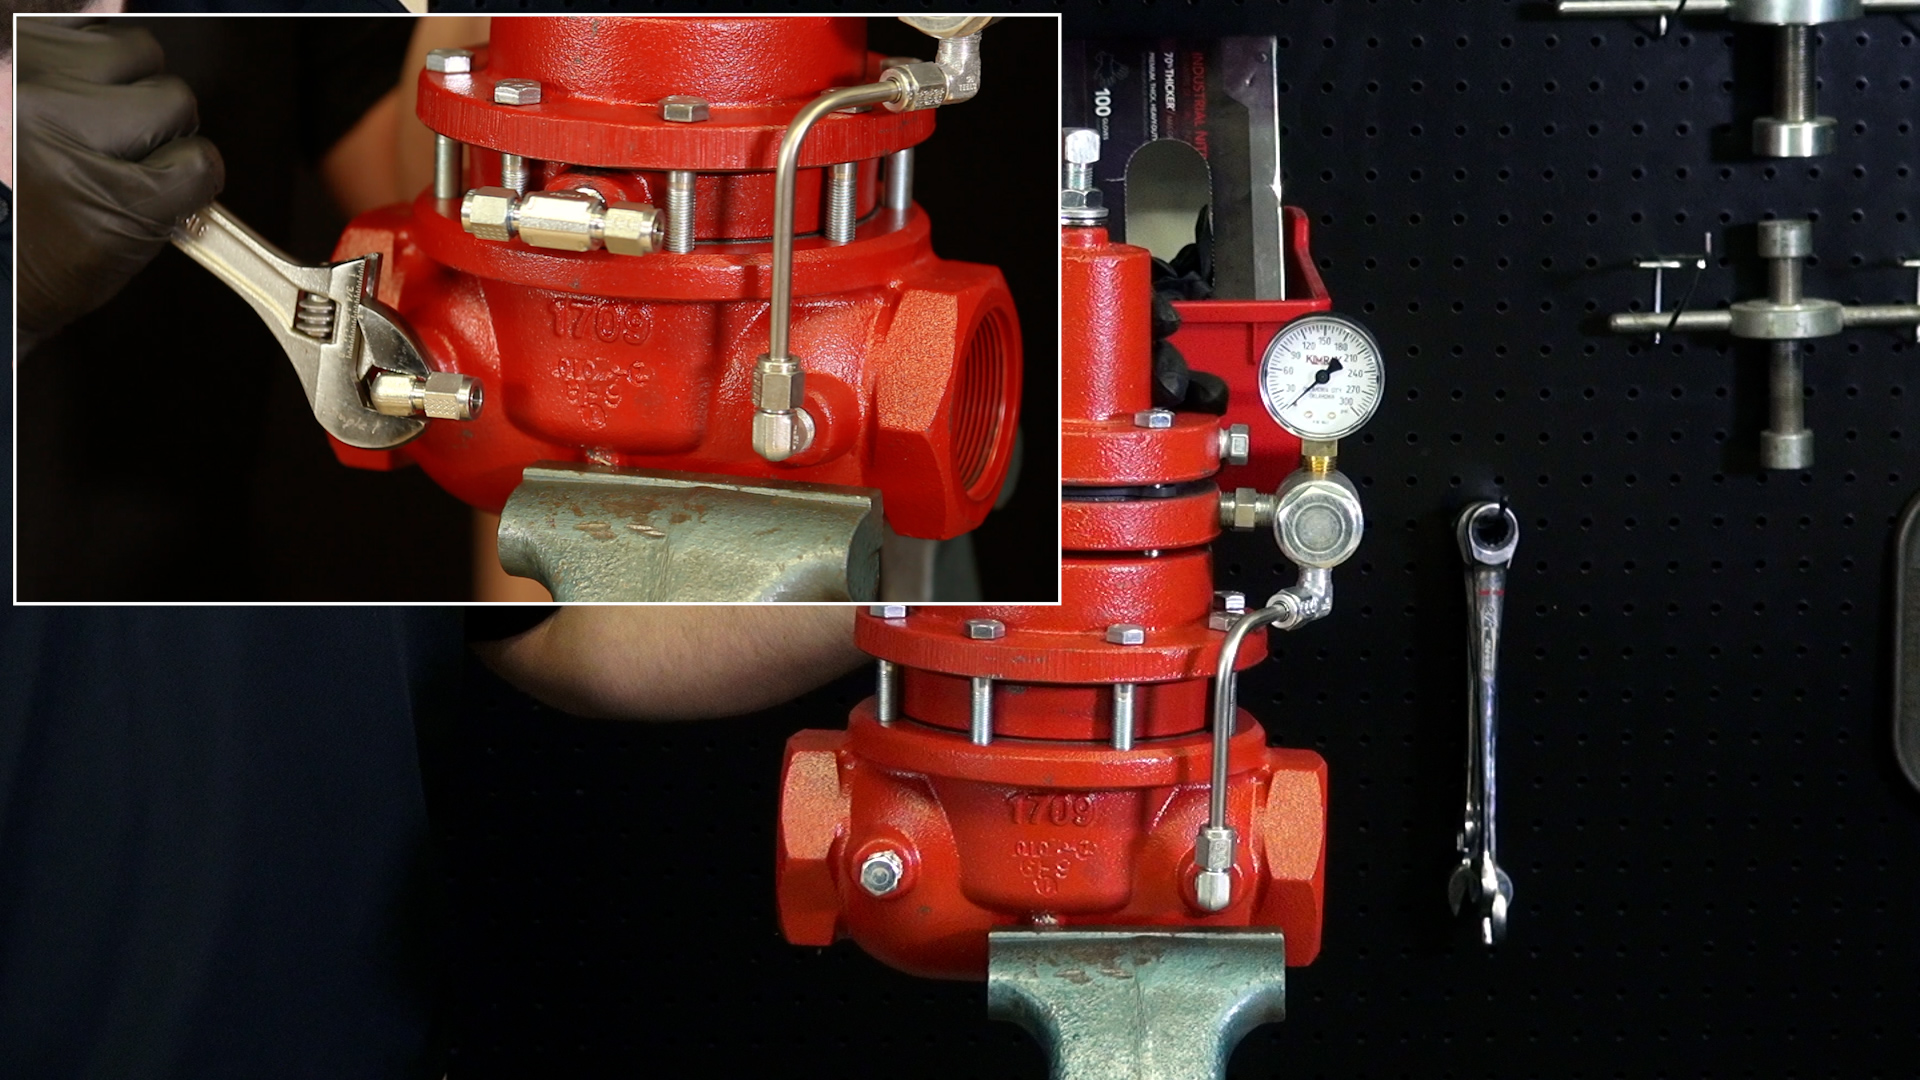
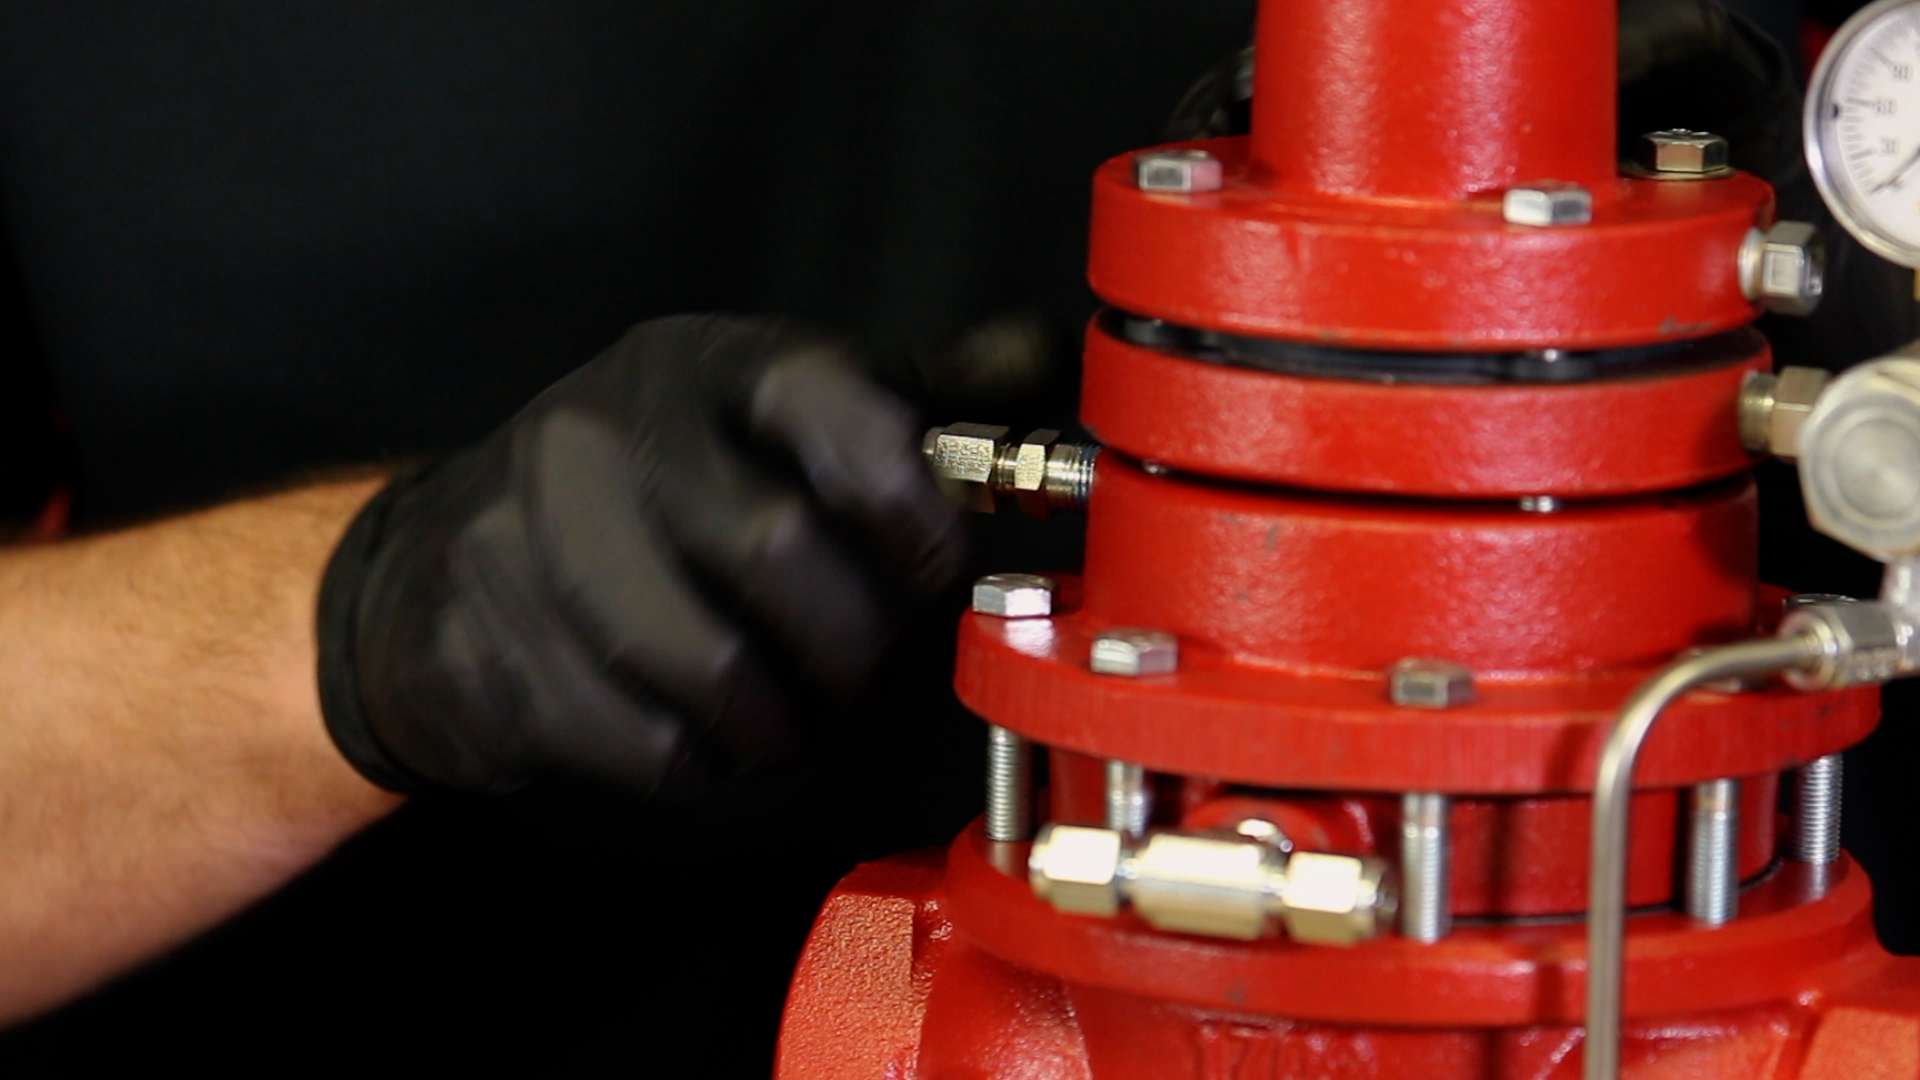
- Insert the tubing into the elbow on the body, but do not tighten it yet.
- Tighten each bonnet bolt gradually, so that as it seals, pressure on the diaphragm is applied evenly.
- Now tighten the tubing connectors.
- Remove the vent plugs from the upper and lower housings.
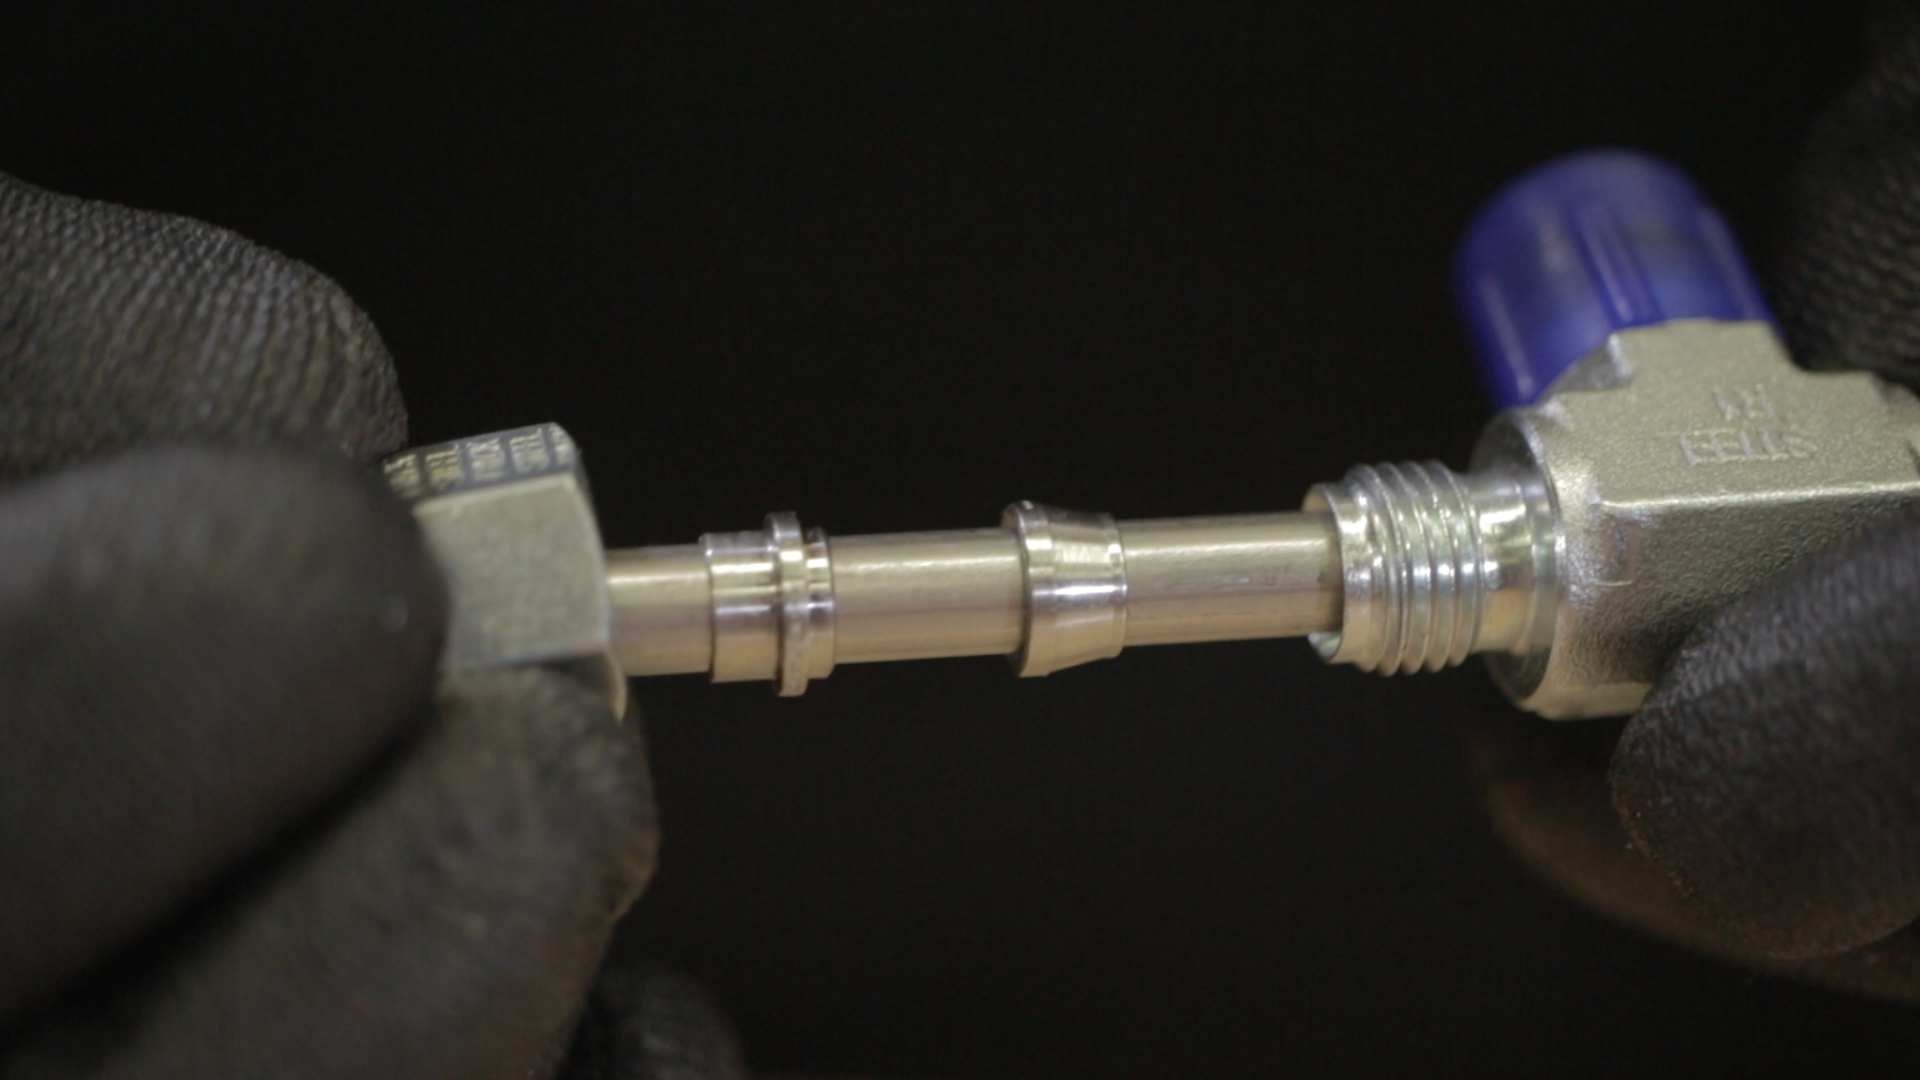
- Make sure that the ferrules on both ends of the new connector are still installed.
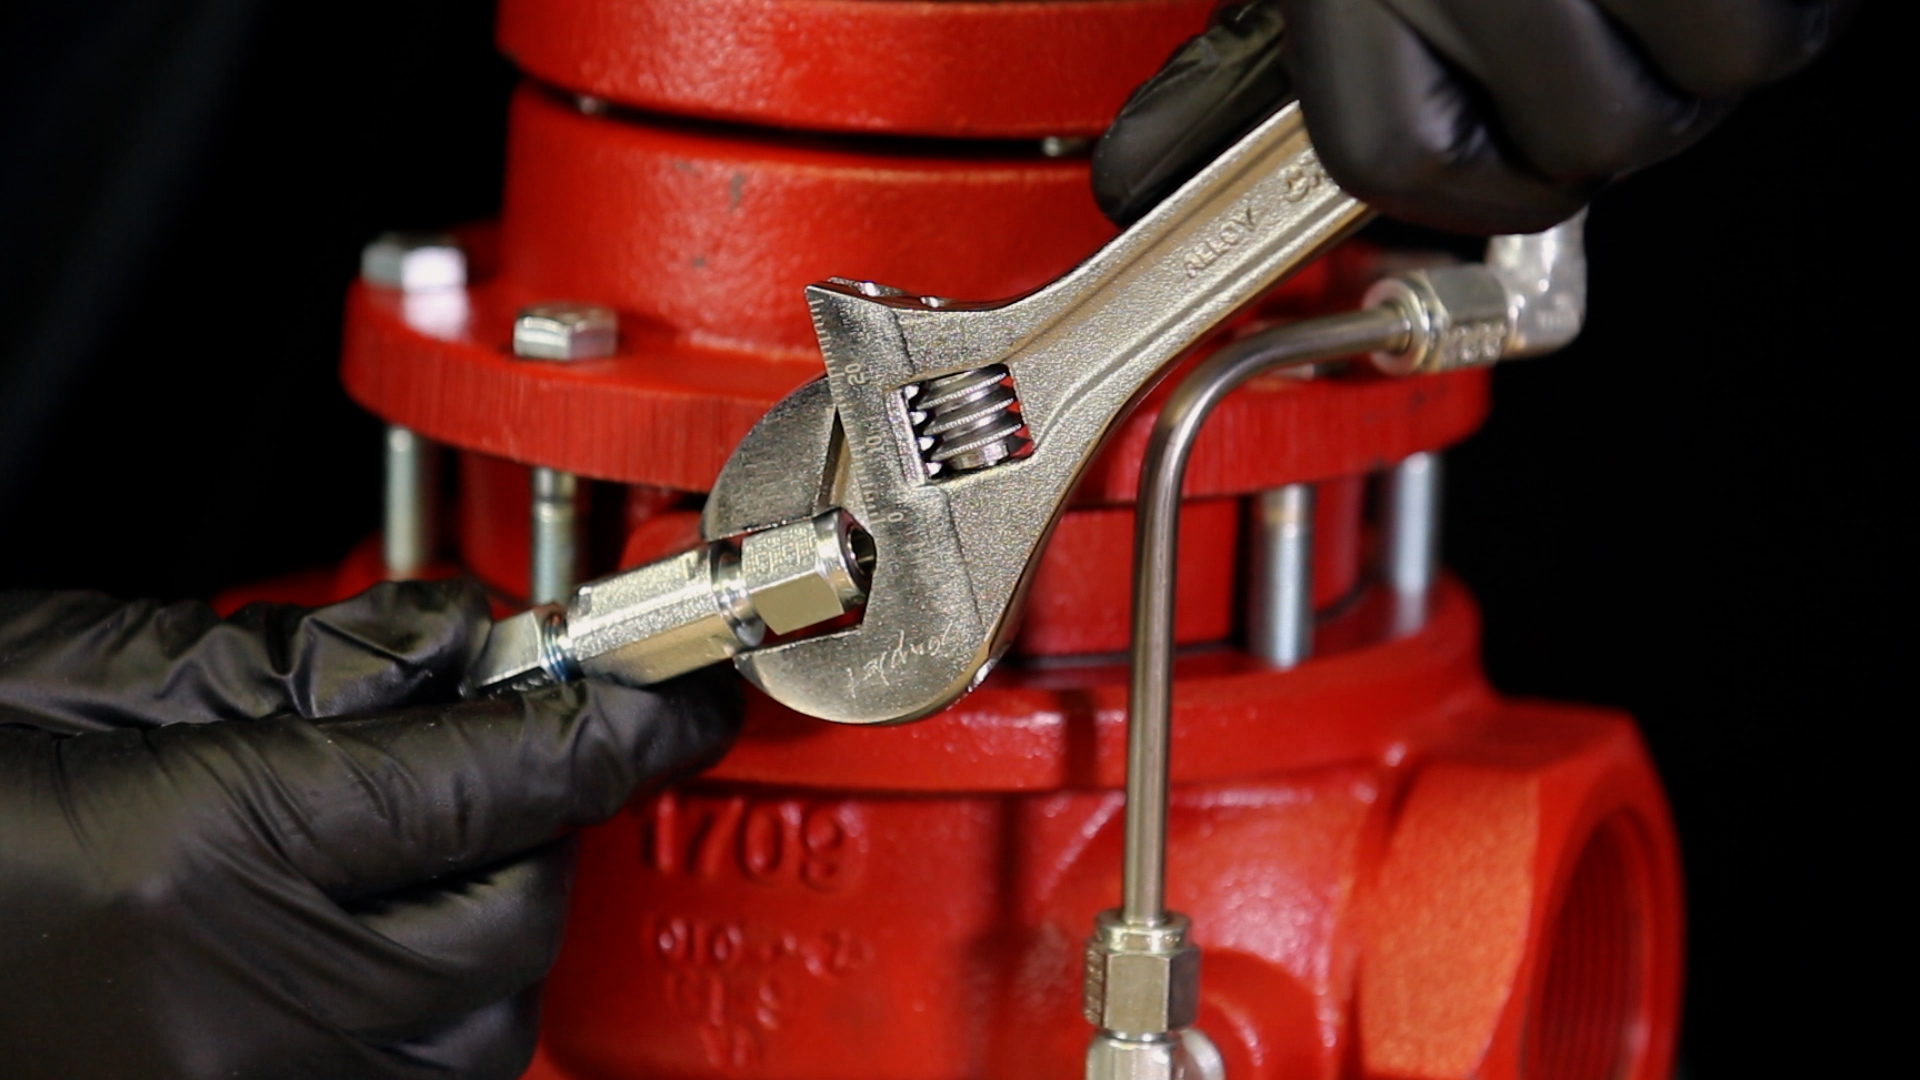
- Apply primer and Loctite to the tee threads and install it into the lower housing.
- Next, apply primer and Loctite to the connector and install it.
- Remove the plug on the downstream side of the body and apply primer and Loctite to the elbow.
- Install it so that the tube connection is facing the upstream outlet.
- After bending and cutting your tubes, be sure to pre-install the ferrules by tightening the nut to the connector with the tube firmly inserted.
- Remove the tube to inspect that the ferrule has attached correctly.
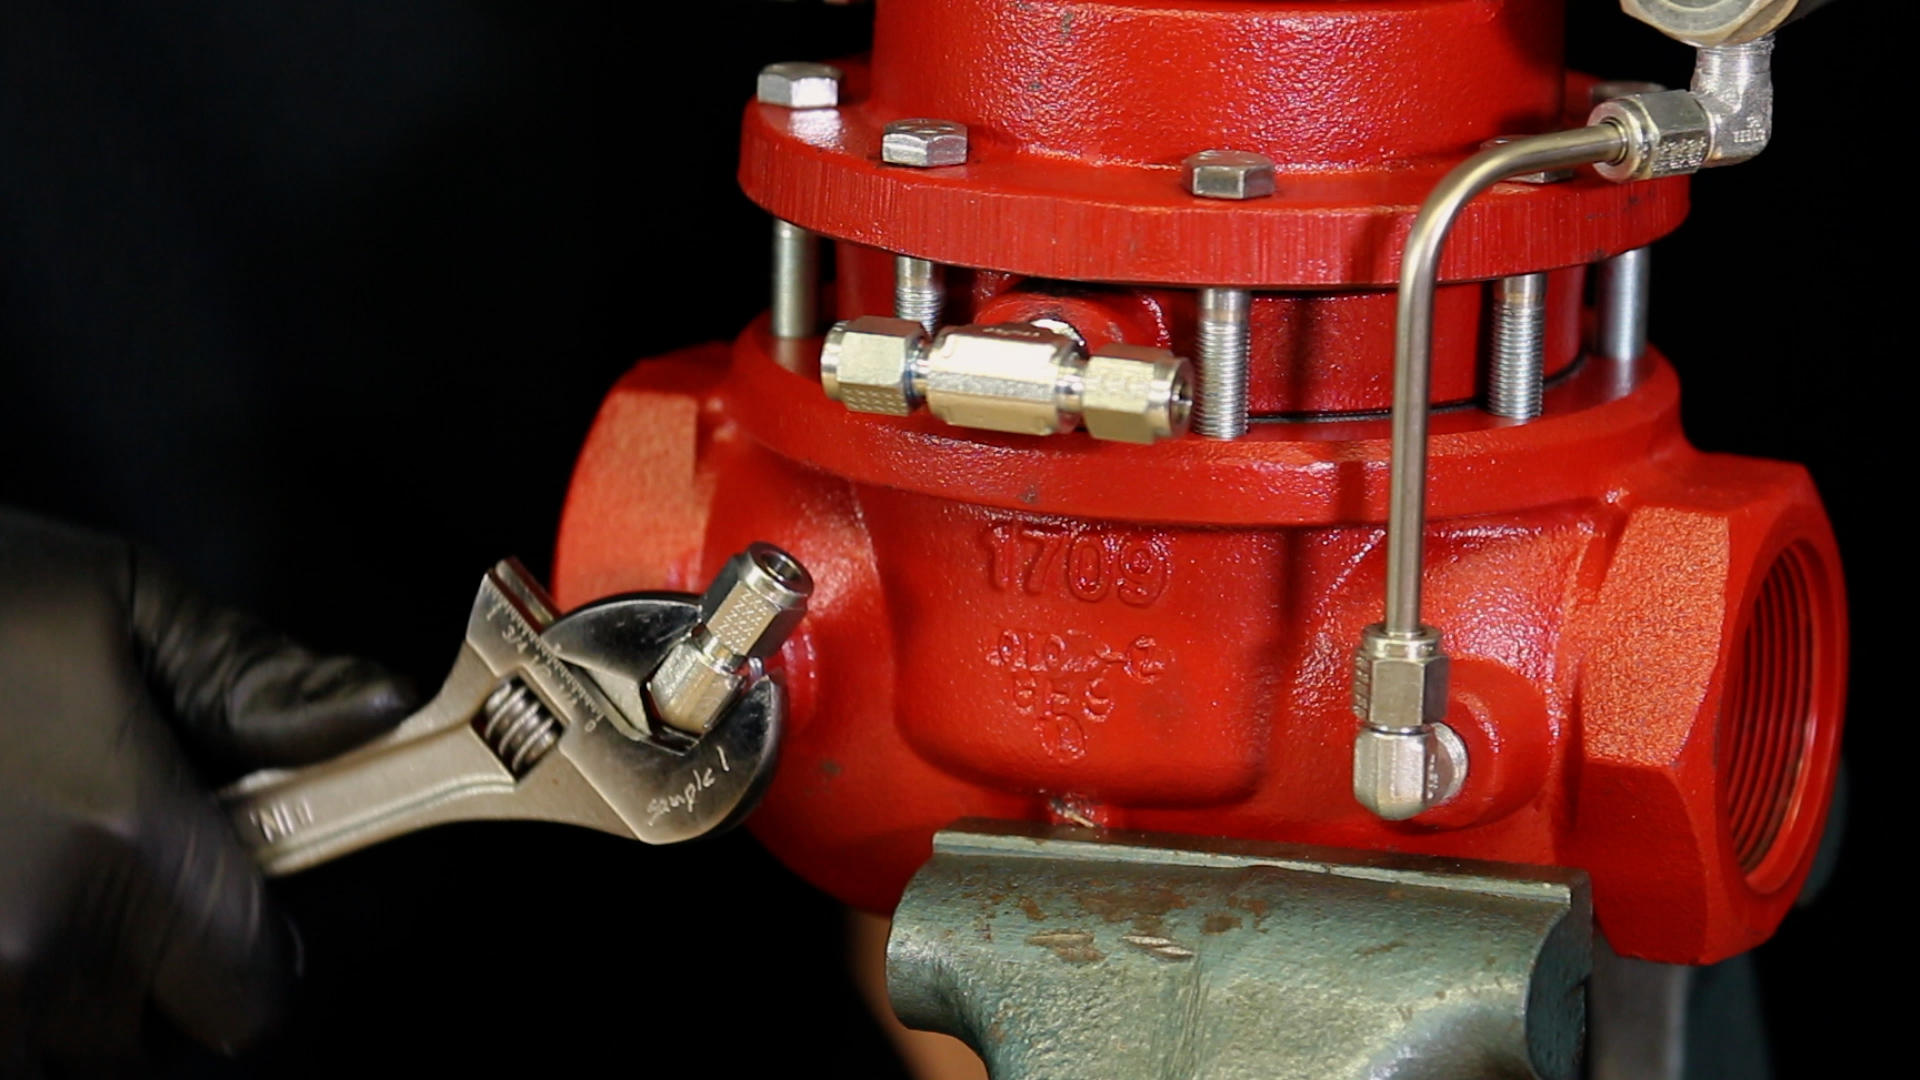
- Install the tubing.
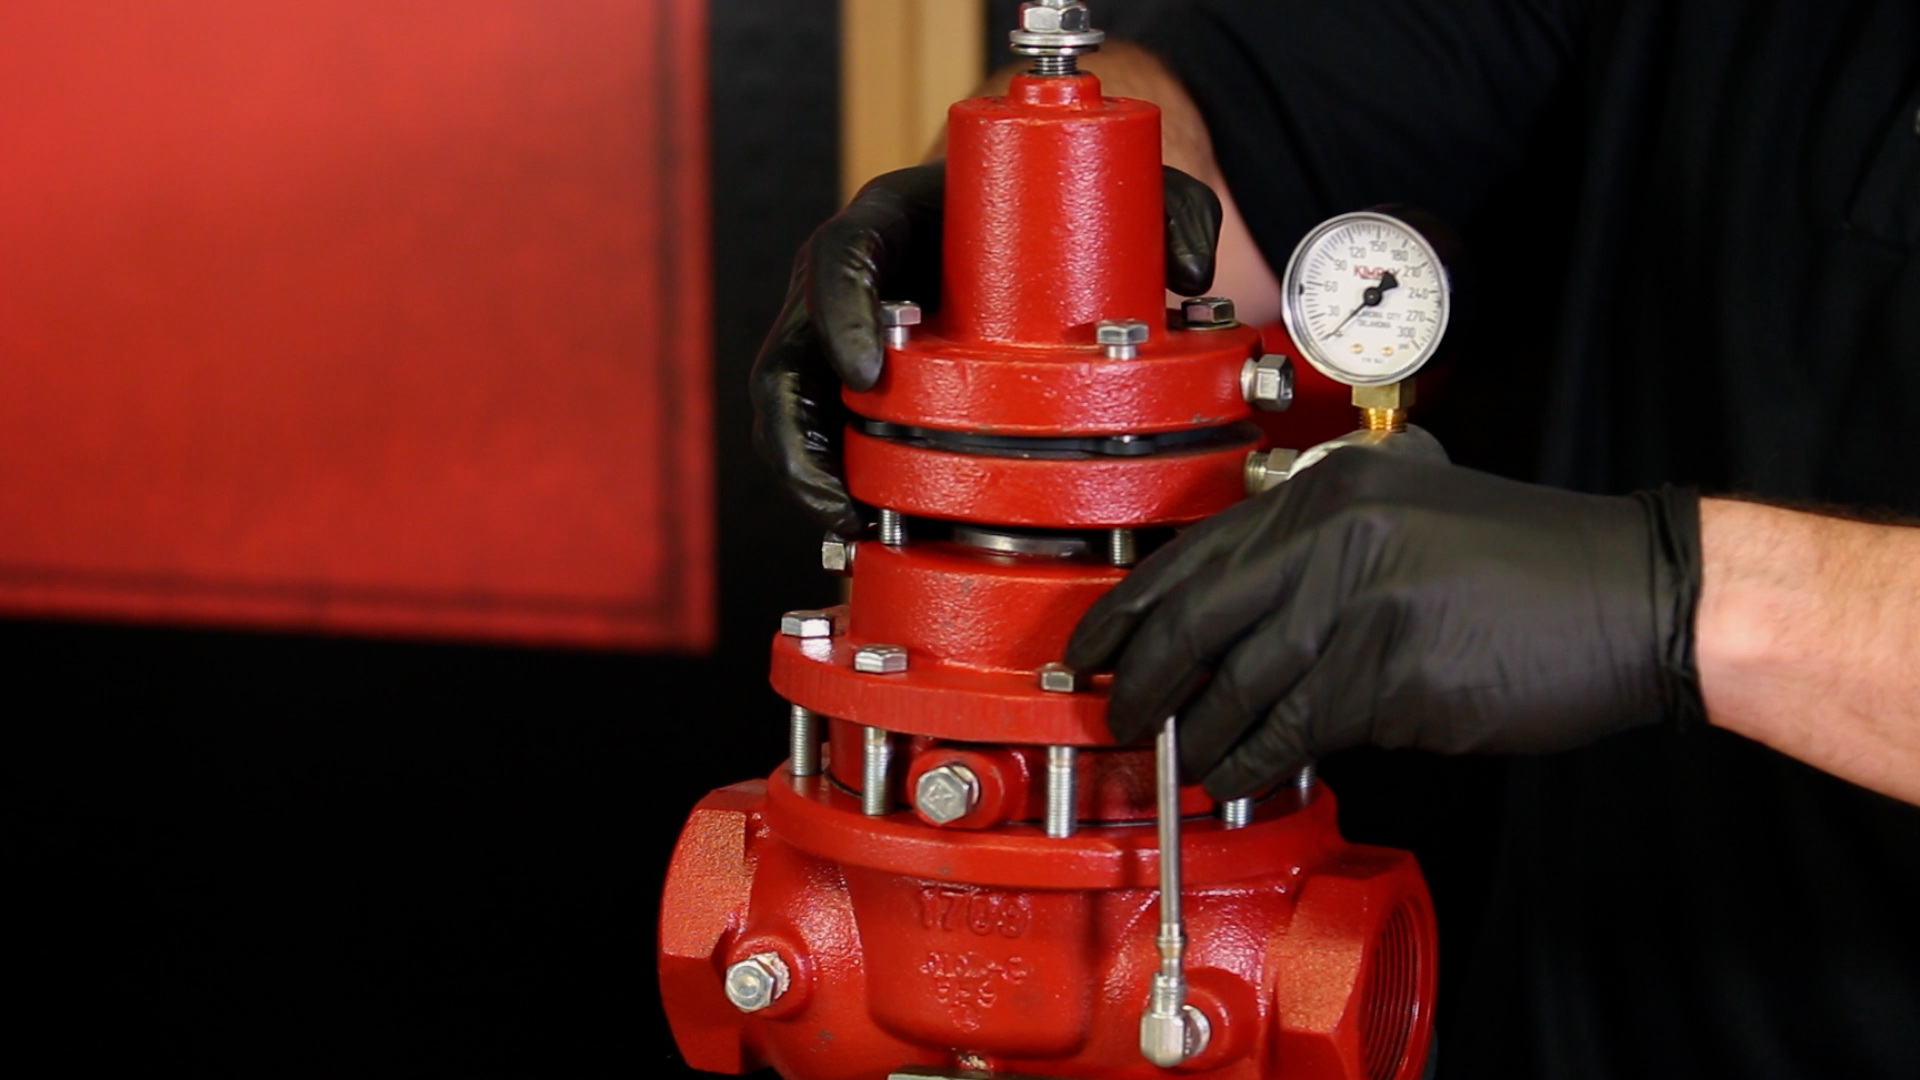
- Lastly, correct your adjustment bolt on top for your desired set point.
Now your back pressure regulator is non-venting. If you have any questions about any part of this repair process or the custom Kimray tools used, reach out to your local Kimray store or authorized distributor.
We have other solutions available to help you meet your company’s ESG goals, including electric actuators and pilots, non-vent control valves and more. For more information, check out our emissions solutions guide.