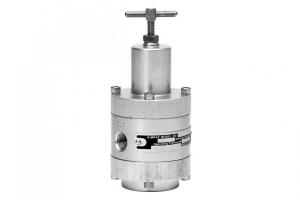
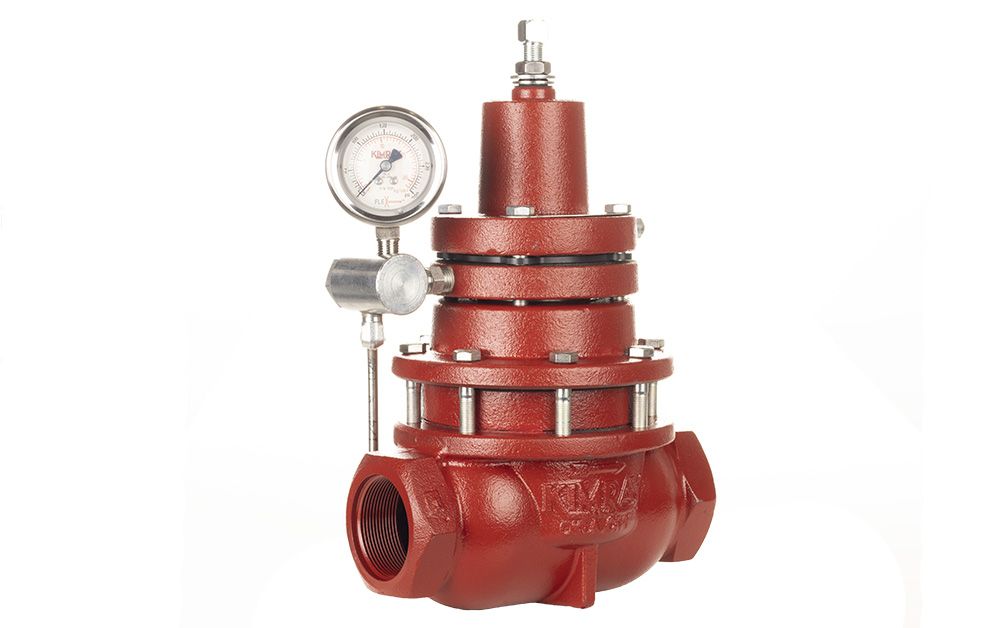
In this guide we’ll walk you through everything there is to know about high pressure control valves.
From the basics of how it works to step-by-step repairs and troubleshooting, you’ll gain a solid foundation of knowledge on how to operate and maintain Kimray’s high pressure control valves.
Use the table of contents to skip to different sections of the learning path.
One effective way to repair your control valve is to replace the valve trim.
Replacing valve trim is a simple and cost-effective option when compared to replacing an entire valve. There are two primary reasons to change your valve trim:
Your process flow rates have changed so that the original valve trim is no longer sized correctly.
You have worn out the trim in your valve.
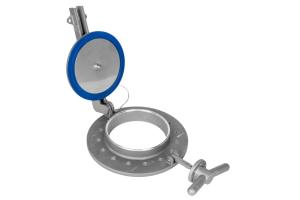
Fortunately, replacing the trim in your valve is a simple process. In this example, we'll change out the valve trim on a 2" High Pressure Control Valve.
How to Remove Control Valve Trim
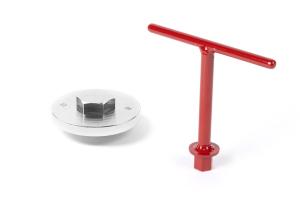
Unthread and remove the adjusting screw.
Remove the bolts on the coupling block.
Unthread and remove the four body bolts holding the topworks on.
Remove the topworks.
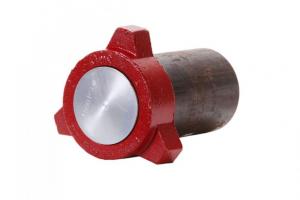
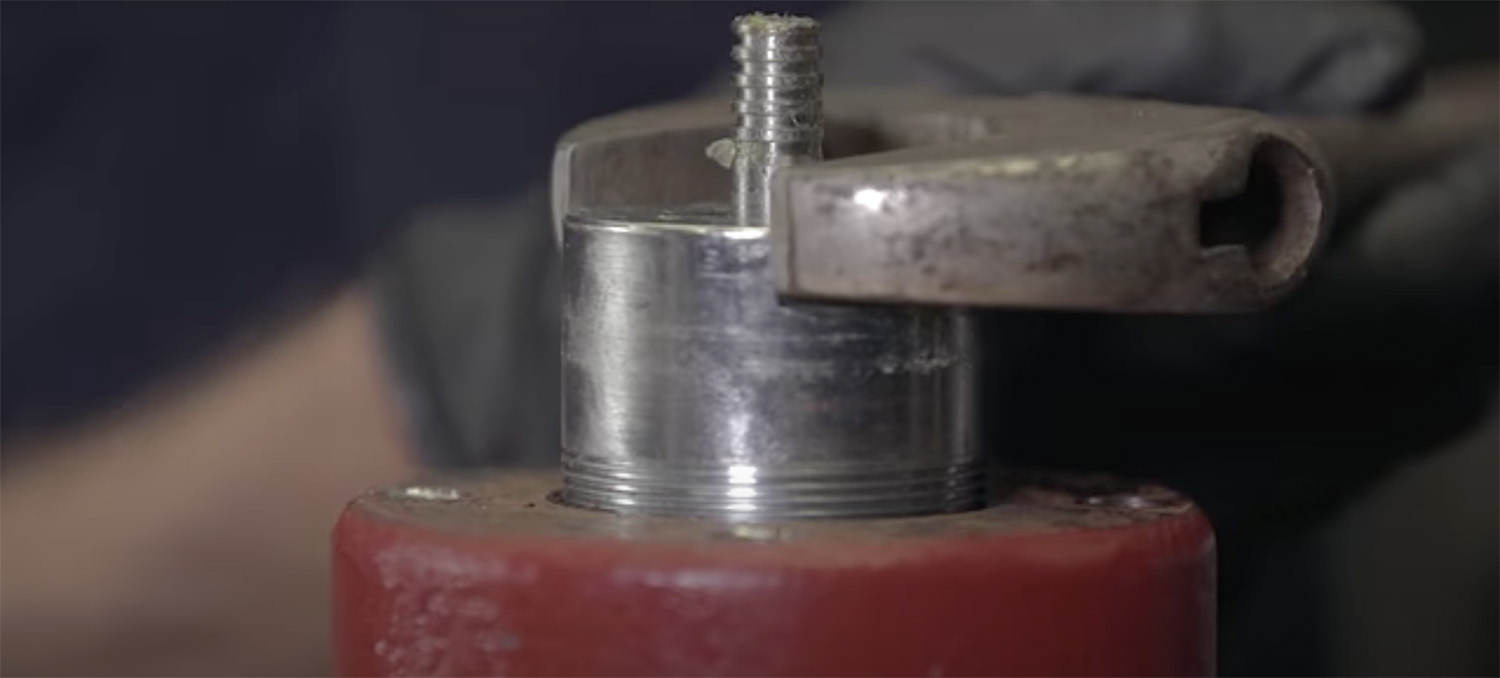
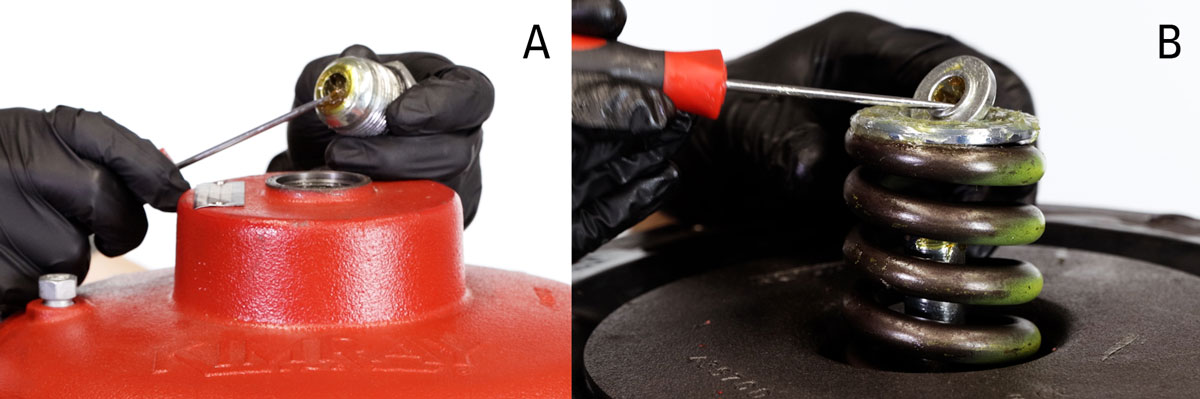
Unthread and remove the stuffing box from the valve body.
1.1 Stuffing Box Being Removed From Valve Body
When removing the stuffing box, you may hear a hissing noise. This is coming from the communication hole in the trim, which is alerting you there is still pressure in the valve body. If you hear this noise, you have a leak somewhere upstream of the valve. You need to STOP WORK IMMEDIATELY to locate and fix the leak in order to depressurize the valve.
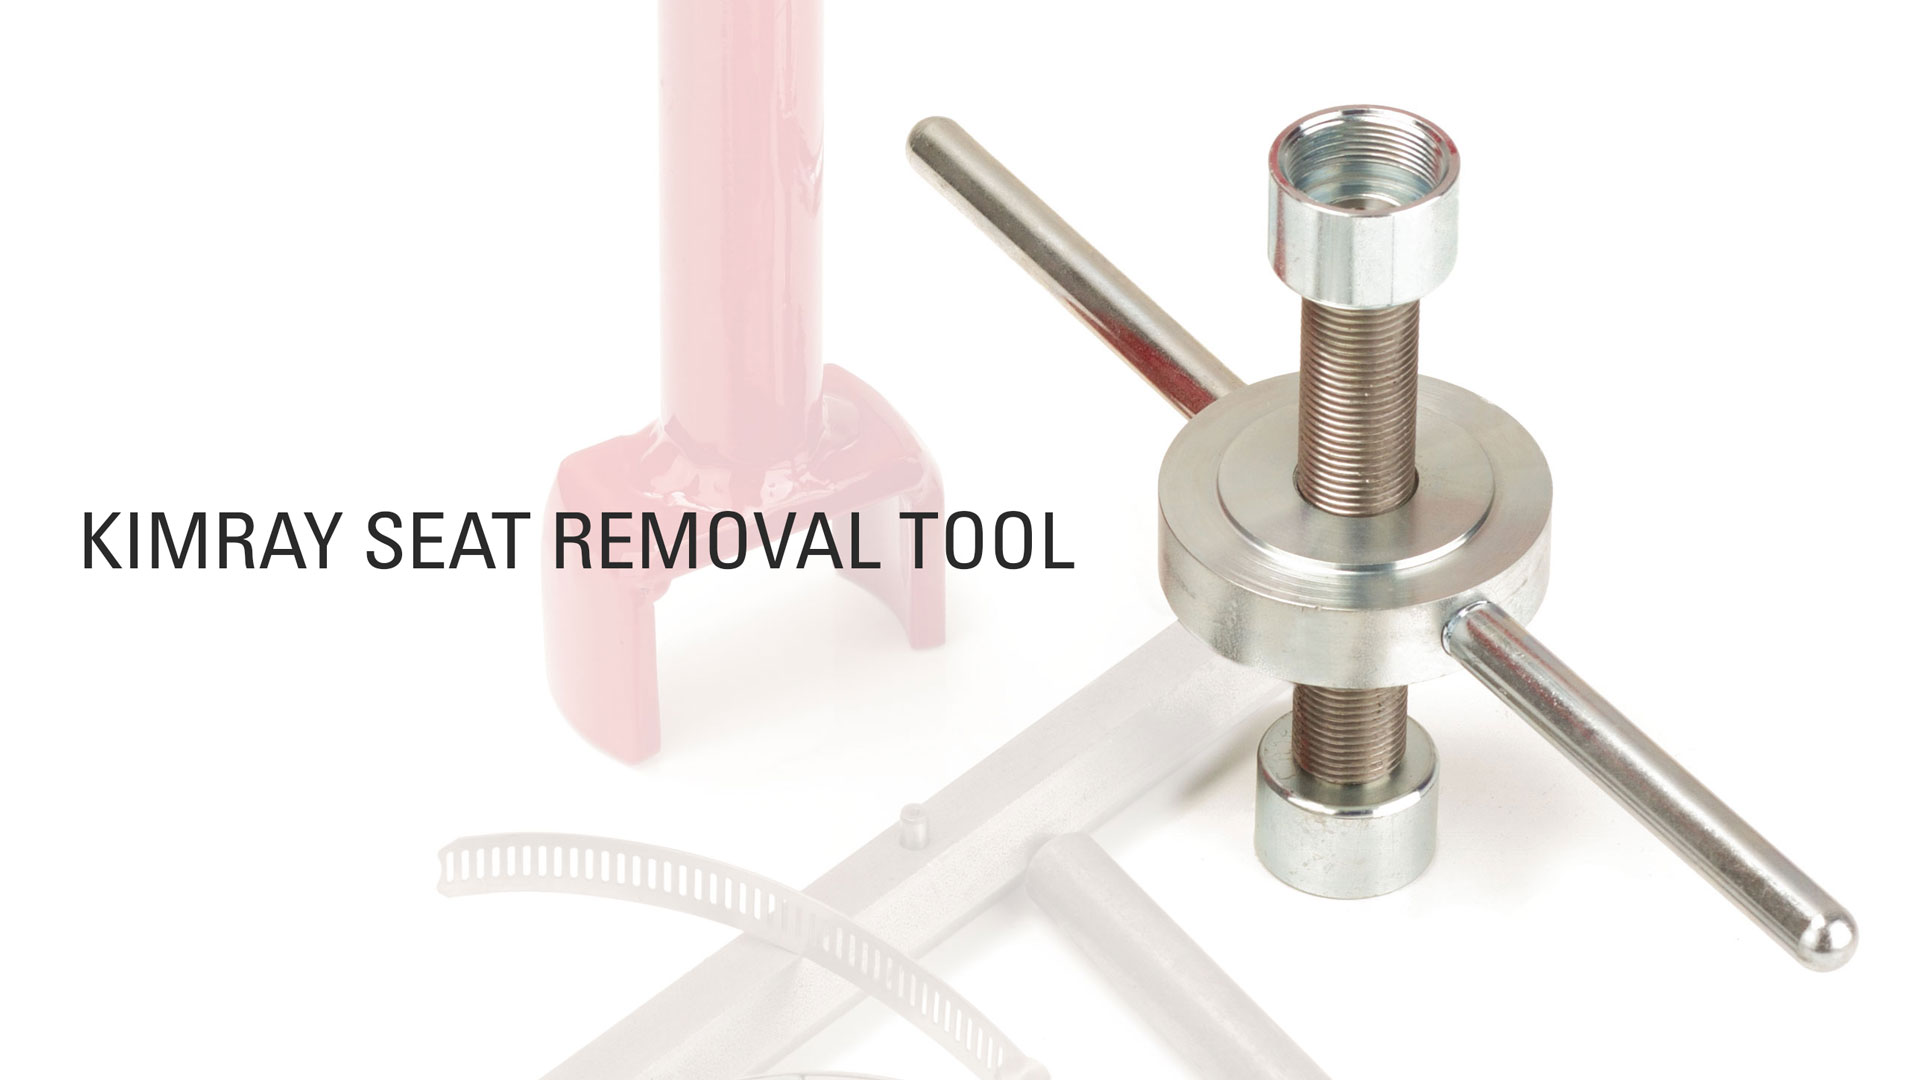
This whole piece should come out as one assembly. If it doesn’t, you can use Kimray's Seat Removal Tool. This tool threads directly onto the seat for easy removal.
1.2 Technician Using Seat Removal Tool
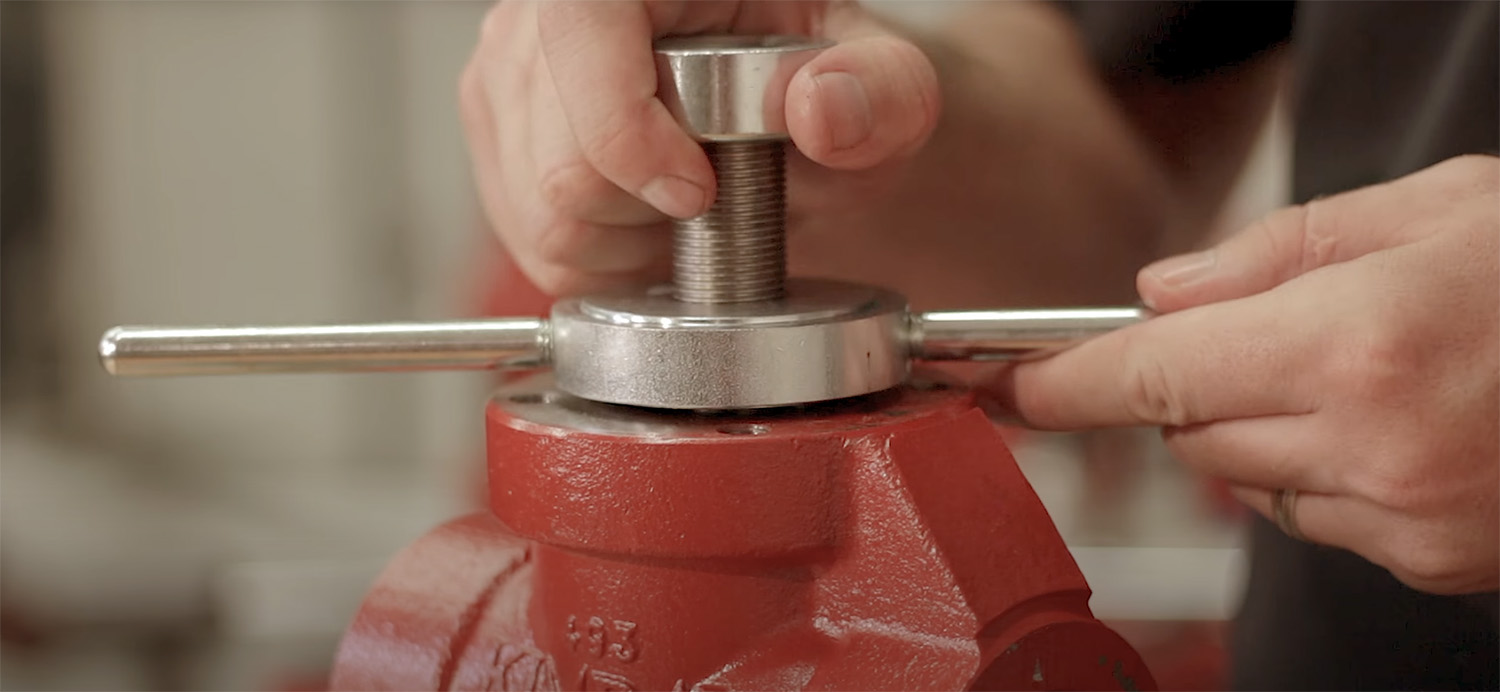
Place the stuffing box into a vice, clamping on the flats.
Unthread and remove the seat from the stuffing box.
Loosen the cage to take the spring tension off of the packing. This will prevent tearing the packing and make removal and reinstallation easier.
Finally, remove the ball and stem.
How to Install Control Valve Trim
Grease the new stem.
Install the new ball and stem. Make sure it is inserted fully into the cage to prevent potential contact with the seat.
Retighten the cage.
Grease the o-ring on the new seat.
Thread on the new seat and tighten.
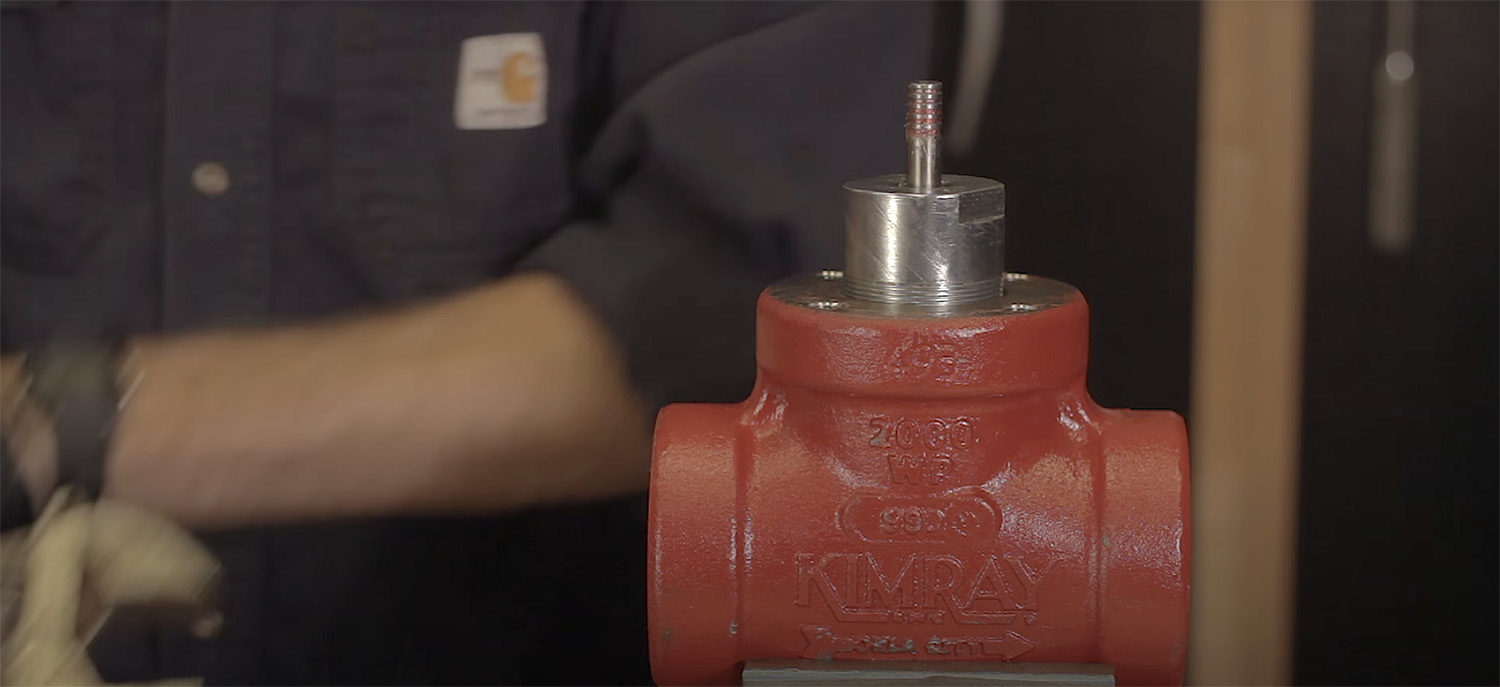
Thread the stuffing box assembly into the valve body.
1.3 Threaded Stuffing Box Ready for Topworks to be Reinstalled
Replace topworks.
Get the body bolts started, but do not tighten fully.
Put the coupling block back on. Make sure to replace the travel indicator with indicator included with the replacement trim.
Tighten the body bolts fully.
Tighten the adjusting screw.
Now that you’ve changed the trim size of your control valve it’s ready to handle your new flow conditions.
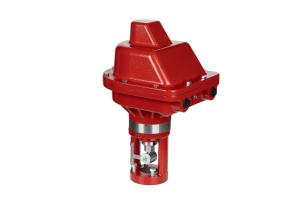
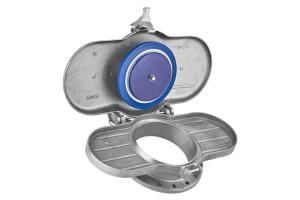
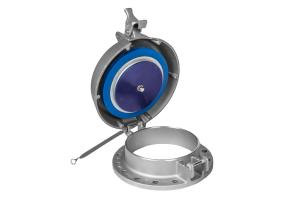
2. How to Repair a Stem-Guided High Pressure Control Valve
In this article and video, we show how to repair and rebuild a 2" Stem Guided High Pressure Control Valve, as well as how to easily change or convert the actuator fail position from fail open to fail close.
This Kimray control valve disassembly and assembly uses a Kimray repair kit.
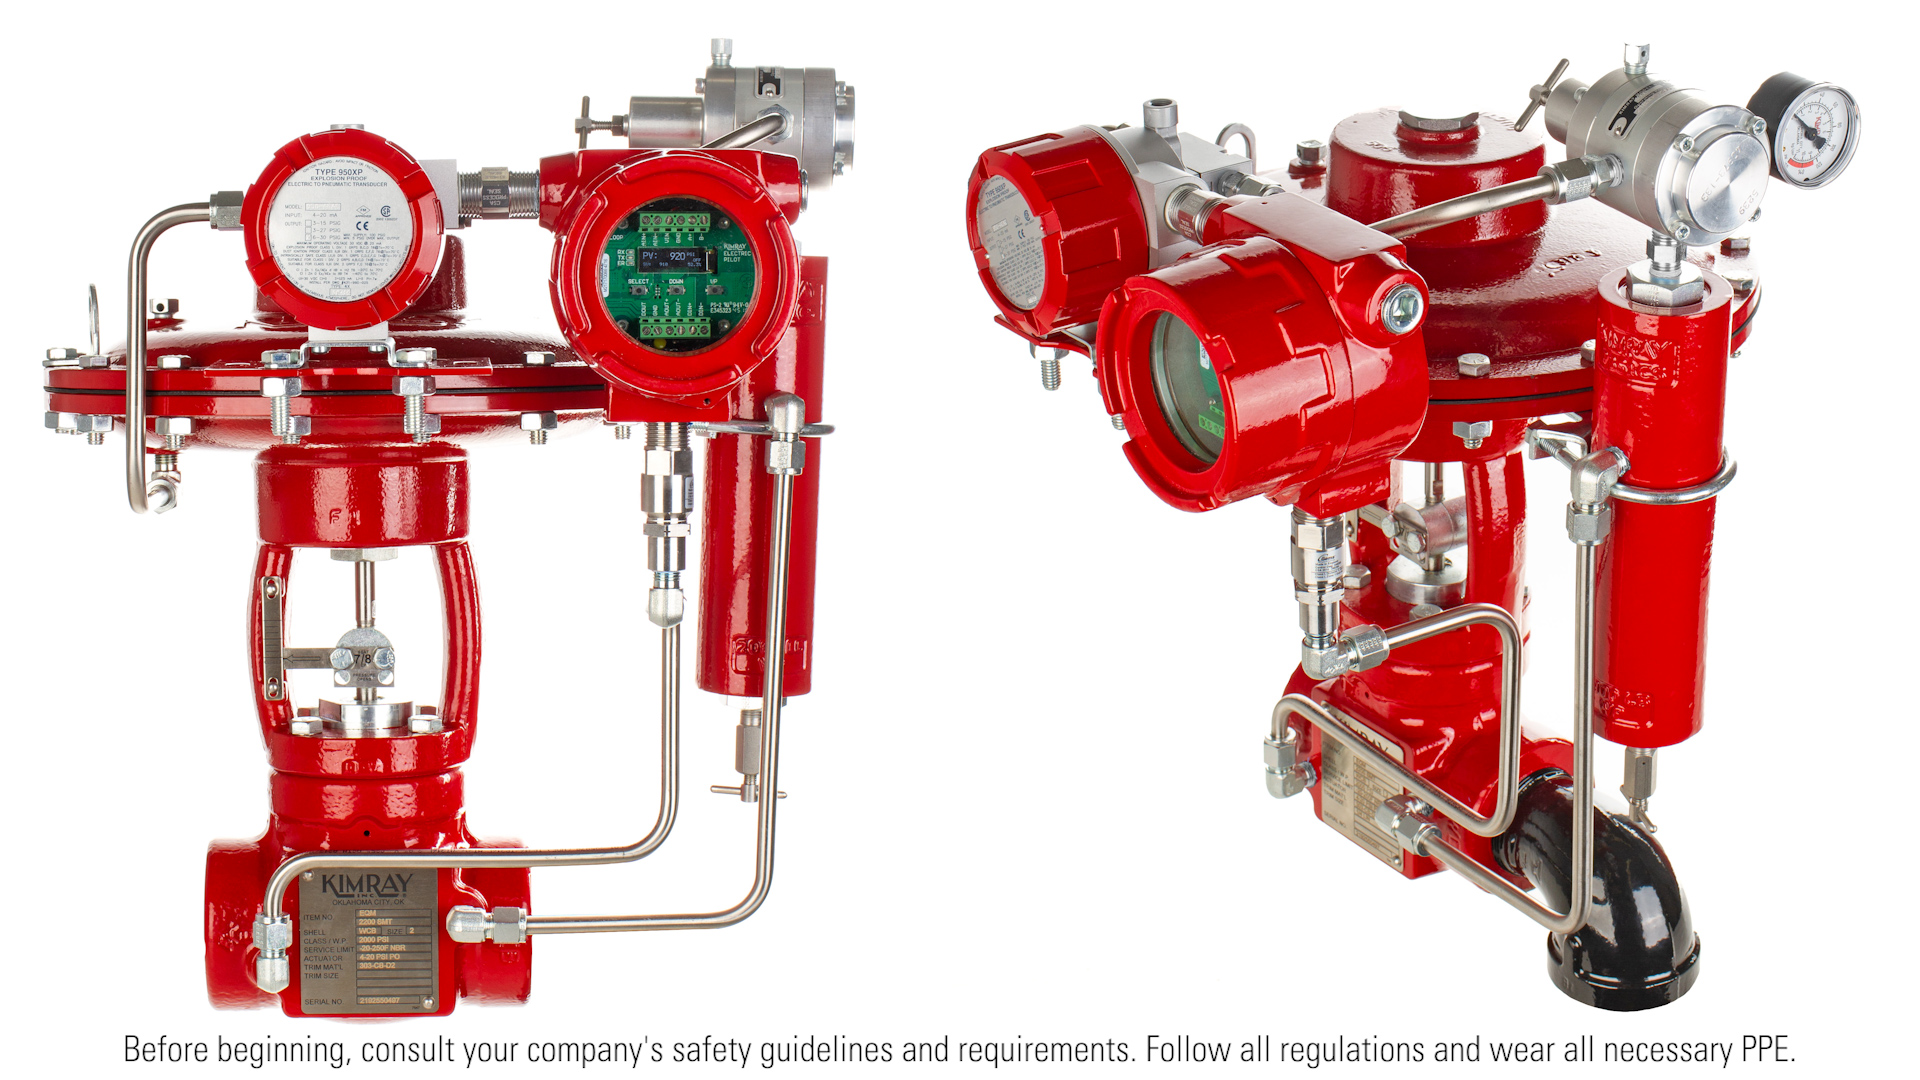
Before beginning, consult your company's safety guidelines and requirements. Follow all regulations and wear all necessary PPE.
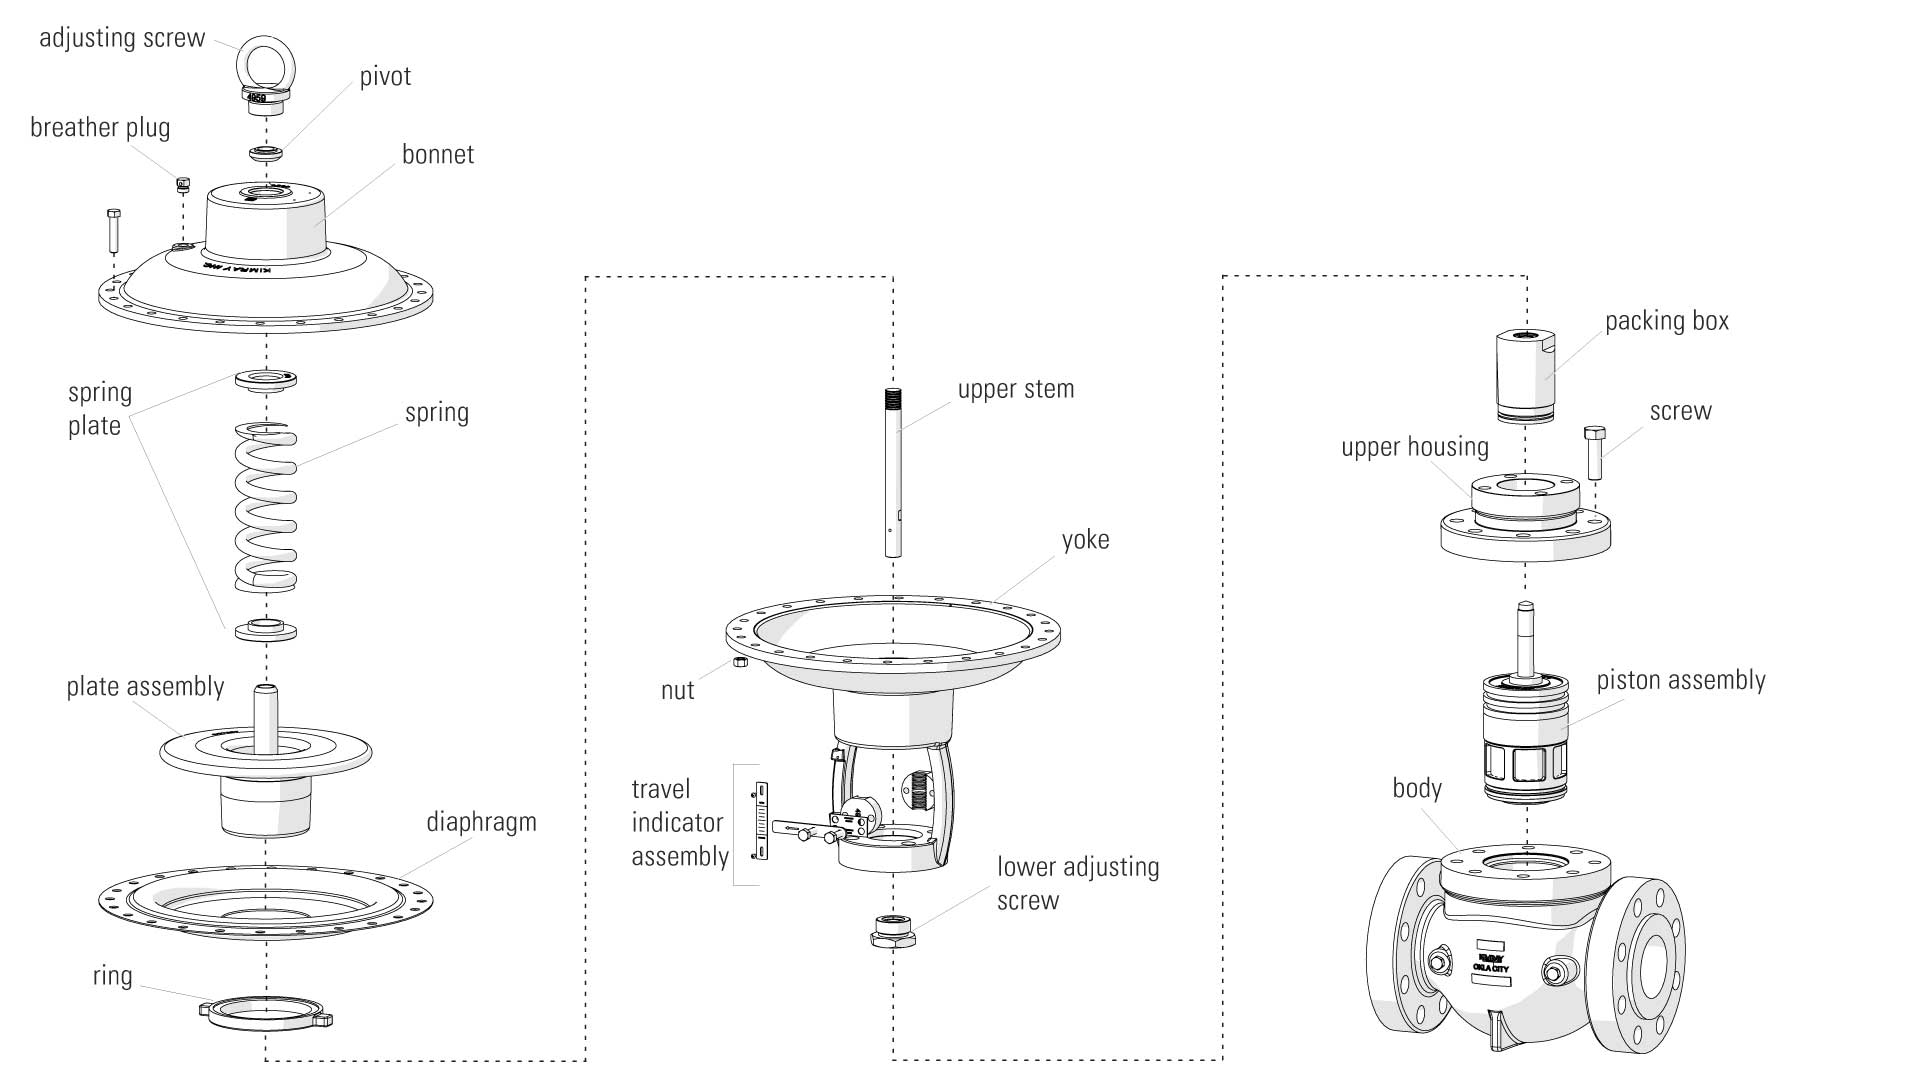
2.2 Stem Guided High Pressure Control Valve Assembly Diagram
How to Disassemble a Stem Guided High Pressure Control Valve
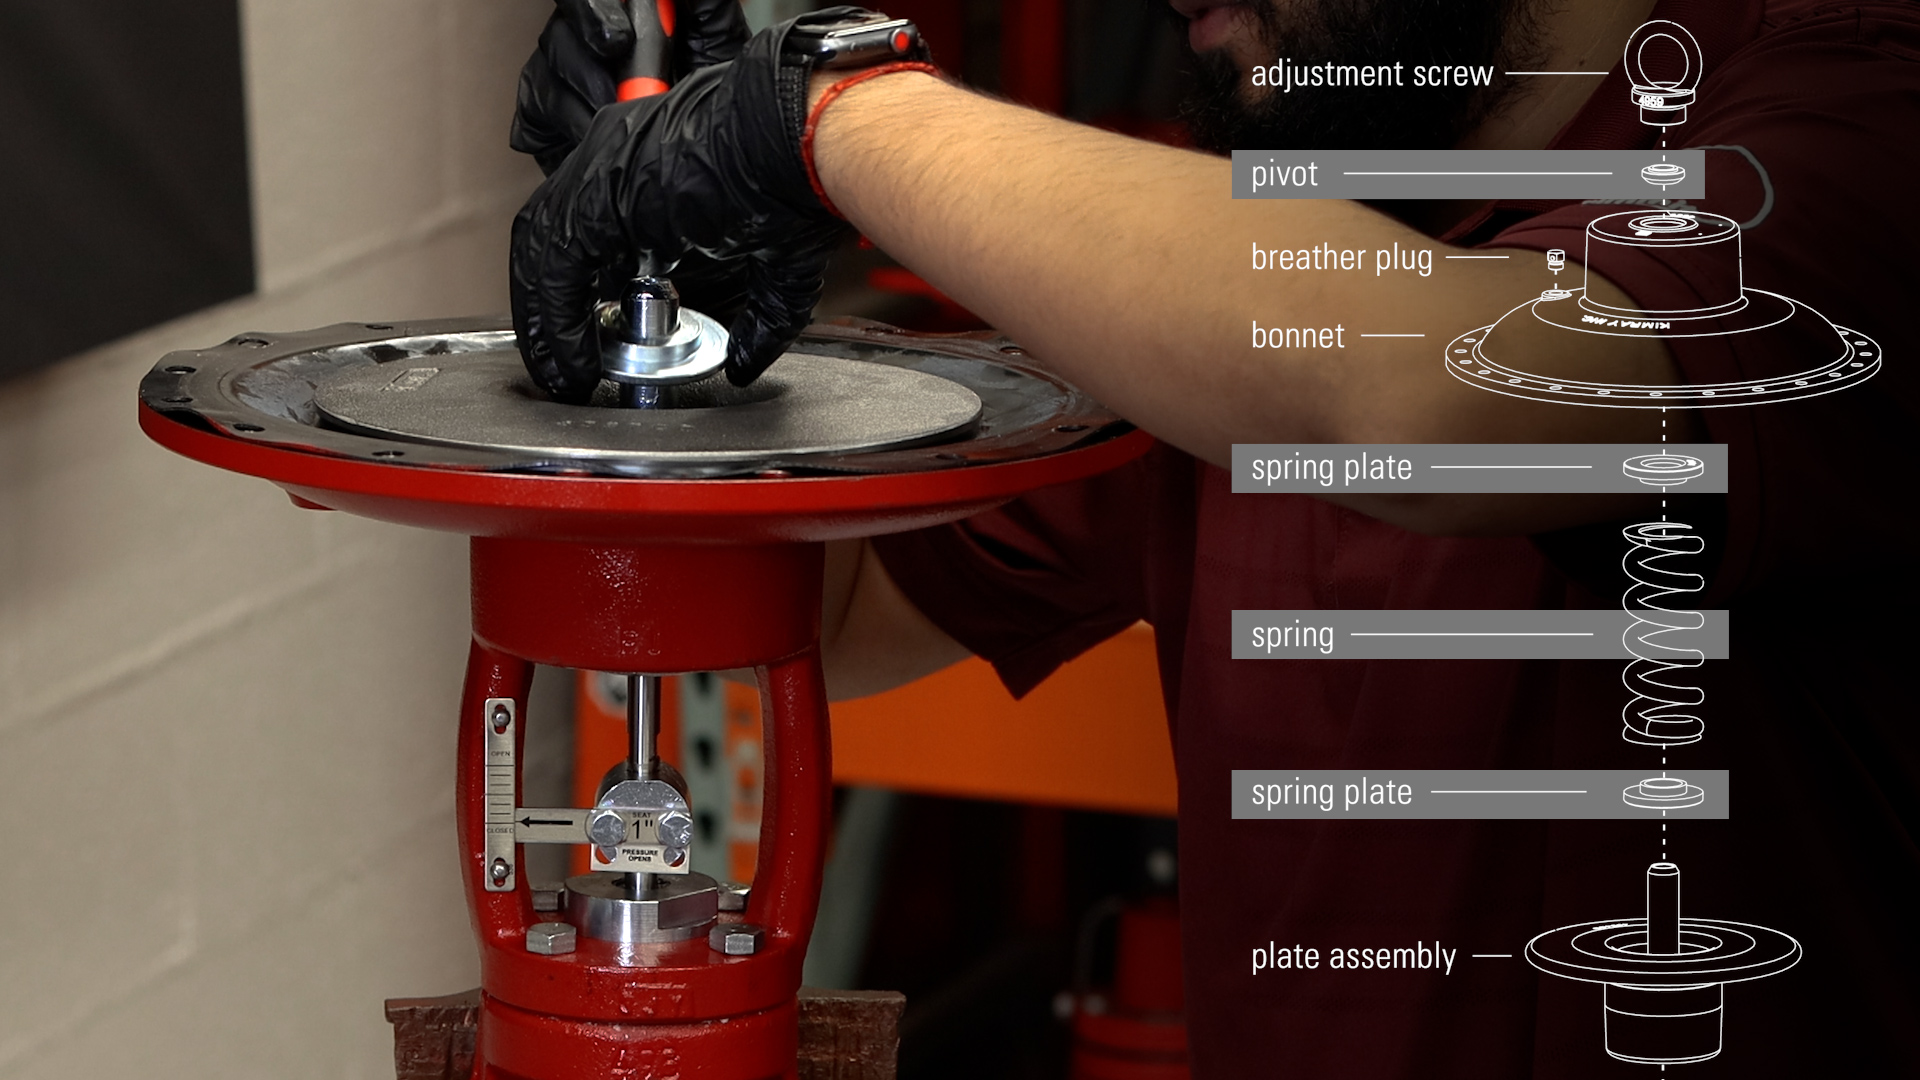
Start by removing the upper adjustment screw. The pivot may also come off with the adjustment screw. If it does not, we will take it out later.
Next, remove the breather plug and upper bonnet bolts.
Remove and discard the O-ring from your upper adjustment screw.
Remove the bonnet, pivot, upper spring plate, spring, and lower spring plate.
2.3 Parts to Remove
Next, unthread the diaphragm plate from the upper stem.
There are two flats on the upper stem to put a 3/8" wrench to stabilize it while you unthread the diaphragm plate.
Now remove your diaphragm and diaphragm plate.
Use a 7/16" wrench to loosen your coupling block bolts and remove your coupling block.
Next, remove the four bolts from your yoke base and empty all the oil out of your yoke.
Remove the upper stem, you may need a mallet for this.
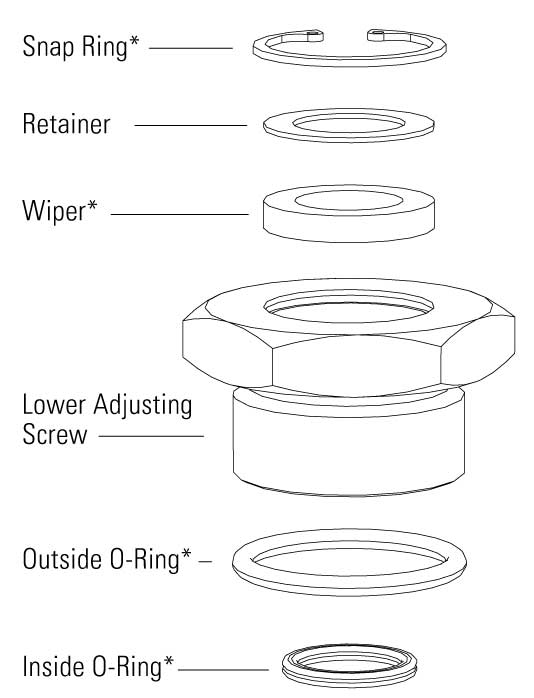
Flip the yoke over and remove the lower adjustment screw with a 1 3/8" socket and extension.
On the lower adjustment screw, remove and discard the snap ring. Then remove and keep the retainer. Discard the wiper, outside O-ring and inside O-ring.
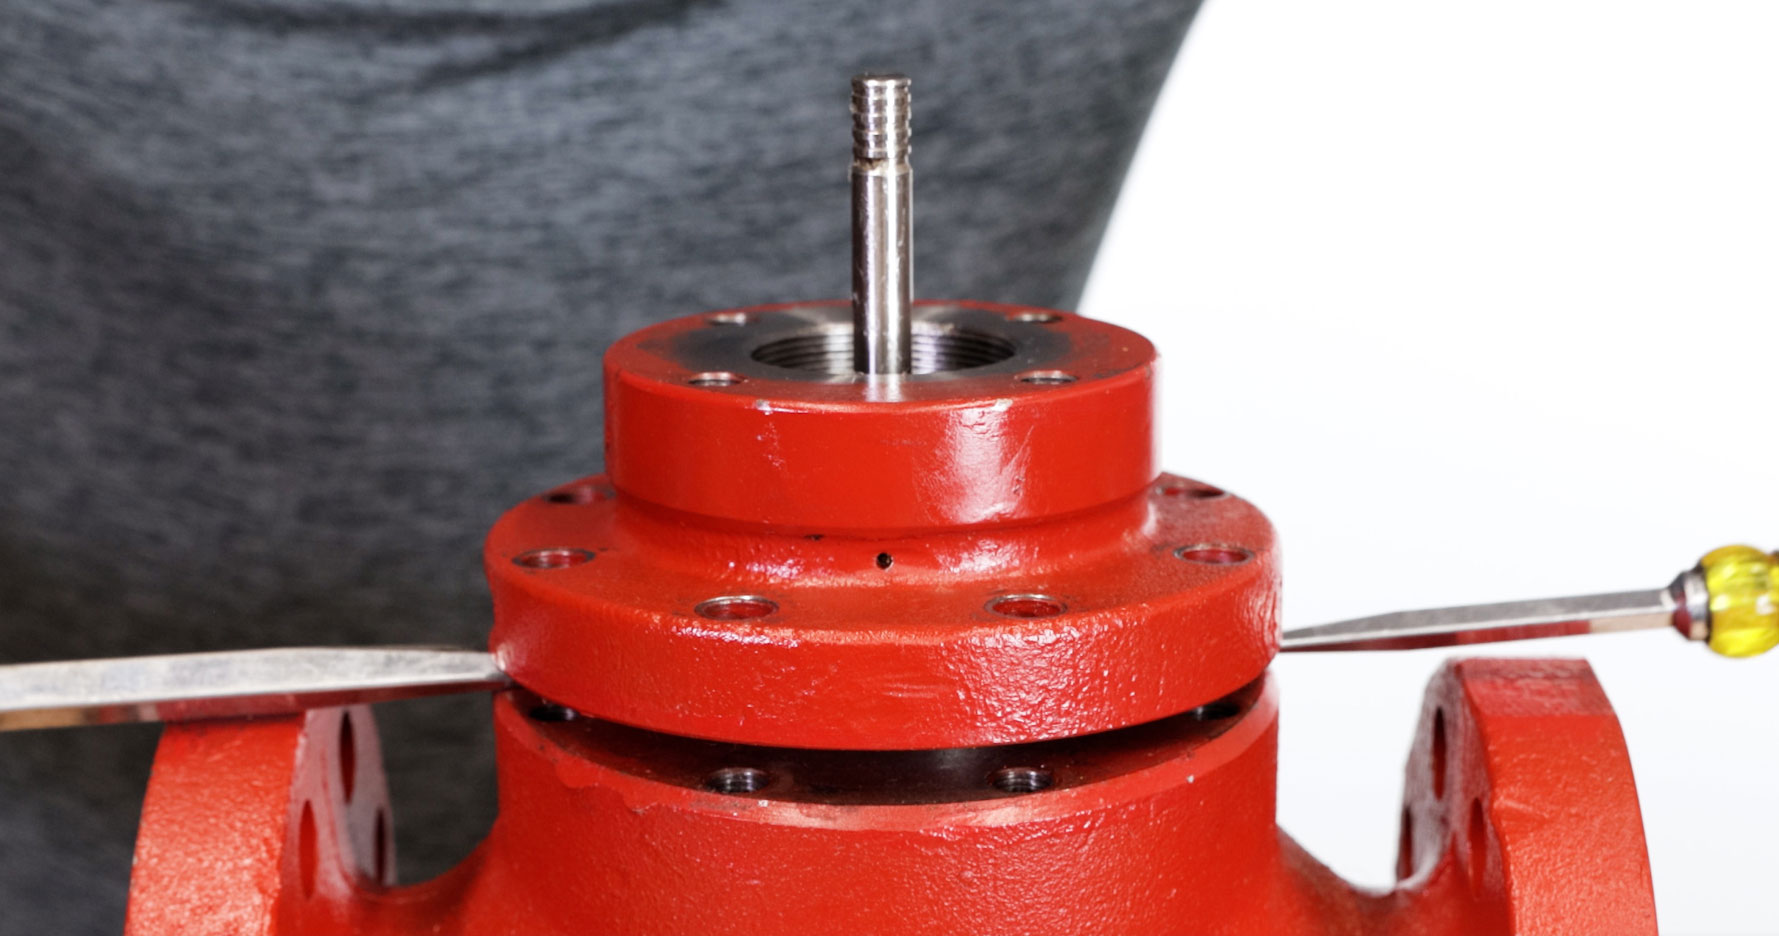
Use a large wrench on the two flats to remove the stuffing box assembly from the body and mount it in a vise.
2.4 Lower Adjusting Screw Diagram
If the seat separates from the cage inside the valve body, use a Kimray Seat Removal Tool. Another problem could be that the cage comes unthreaded from the stuffing box and stays in the valve body. Flip the Kimray Seat Removal Tool over, thread it onto the cage and remove it all in one piece.
2.5 Kimray Seat Removal Tool
Insert a screwdriver through the cage to hold it still while you remove the seat with a wrench.
Then use the screwdriver to loosen the cage by a few rotations while keeping the threads engaged. This will remove tension from the stem so you can pull it out. You may need to use a mallet.
Now you can take the cage off completely.
Next, remove the spring, follower, and packing from the stuffing box as well as the O-ring on the outside.
Remove and discard the O-ring from the seat.
Turn the stuffing box over and use a pair of snap ring pliers to remove the snap ring.
Remove and save the retainer but discard the felt wiper.
2.6 Stuffing Box Assembly Diagram
The diaphragm needs to be inspected for any abnormal wear like punctures or swelling. If it is damaged, you will need to order a replacement because it is not included in the repair kit. It’s also good to inspect the part of the diaphragm under the diaphragm nut. However, to remove this or to replace the diaphragm, you will need the Kimray Diaphragm Nut Removal Tool.
Put the Kimray Diaphragm Nut Removal Tool on the diaphragm nut and put the diaphragm plate into the vise.
Now you can inspect the diaphragm fully and remove and replace it if needed.
At this point, you're ready to reassemble the valve.
How to Reassemble a Stem Guided High Pressure Control Valve
Start with the stuffing box assembly. Install the felt wiper, retainer, and snap ring.
Then put the O-ring on the outside.
Slide the packing rings on the packing sleeve.
Coat the inside of the stuffing box with grease and push the packing sleeve into the assembly.
Next, put in your follower and the spring, then mount the assembly in a vise.
Push down on the cage and use a screwdriver to engage the threads. Do not tighten the cage completely. This will allow you to install the trim through the stuffing box assembly later.
Insert the stem into the assembly and use a mallet to tap the lower stem as far down as possible so it will meet the upper stem during assembly.
Put the O-ring on the seat and tighten it onto the cage with a crescent wrench.
Now put the valve body into the vise.
Grease both O-rings on the stuffing box assembly and tighten the stuffing box into the valve body.
To assemble the topworks, start by putting together the lower adjustment screw.
Insert the felt wiper followed by the retainer and snap ring.
Then attach the outer O-ring and inner O-ring.
Grease the lower adjustment screw O-ring and install it into the yoke.
Put the pivot stem into the vise. Be careful not to damage it.
Grease the diaphragm plate and install the diaphragm.
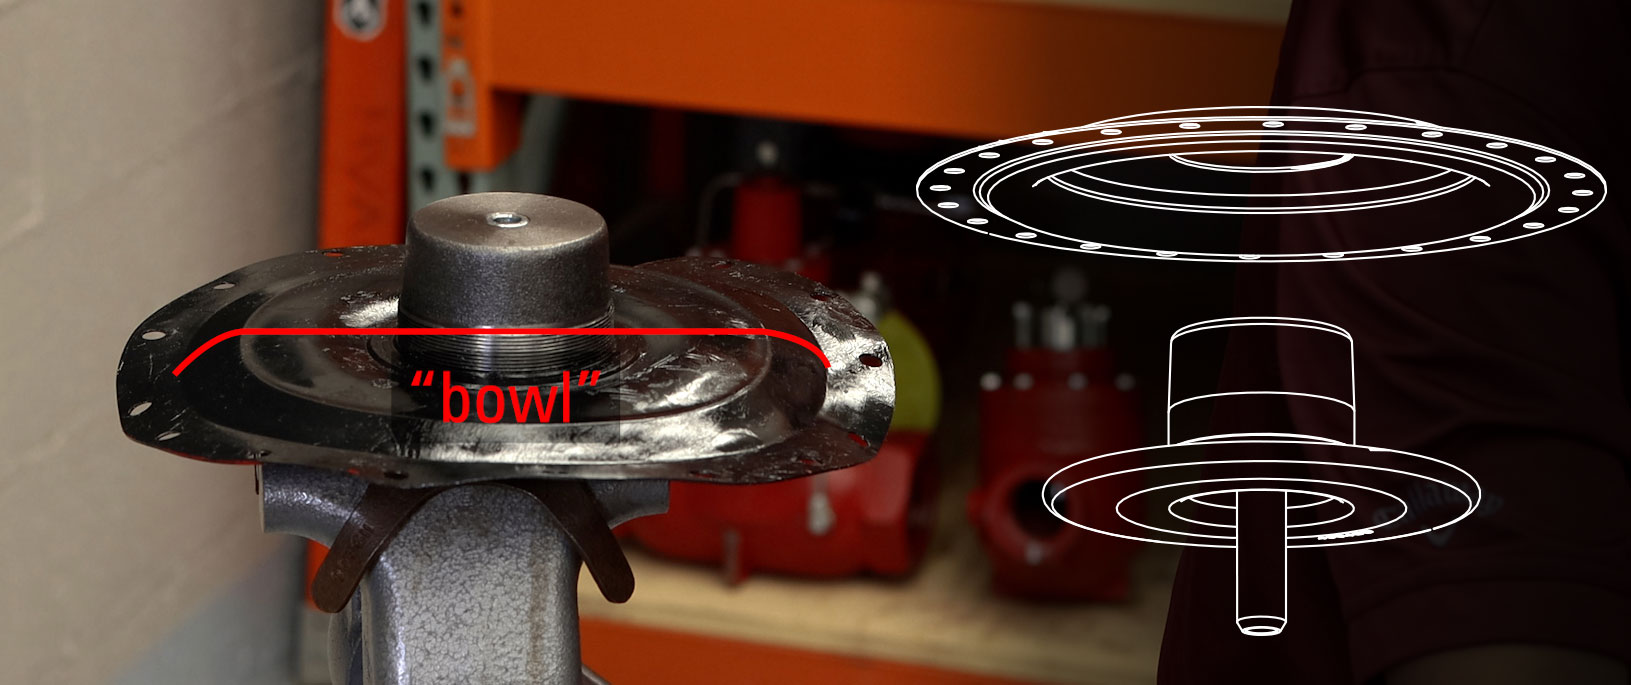
The "bowl" of the top works diaphragm should always face the diaphragm plate for both fail open and fail close positions. control valve diaphragm bowl shape
2.7 Bowl-Shaped Diaphragm
Grease the diaphragm and attach the diaphragm nut.
Use the custom Kimray tool to tighten it fully. Do not overtighten it because it will cause the diaphragm to bulge.
Now put the valve body back in the vise.
2.8 Actuator Fail Position Choice
How to Assemble for Fail Close Position
Grease the inner O-ring in the lower adjustment screw and then insert the upper stem.
Add oil inside the yoke.
Apply Loctite to the threads on the upper stem
Attach the diaphragm assembly. Use a 3/8" wrench on the flats to keep it from rotating.
Grease the bottom of the pivot sleeve.
Install the lower spring plate, spring, and upper spring plate.
Then grease the top of the spring plate.
Replace the bonnet aligning the diaphragm holes with the bolt holes.
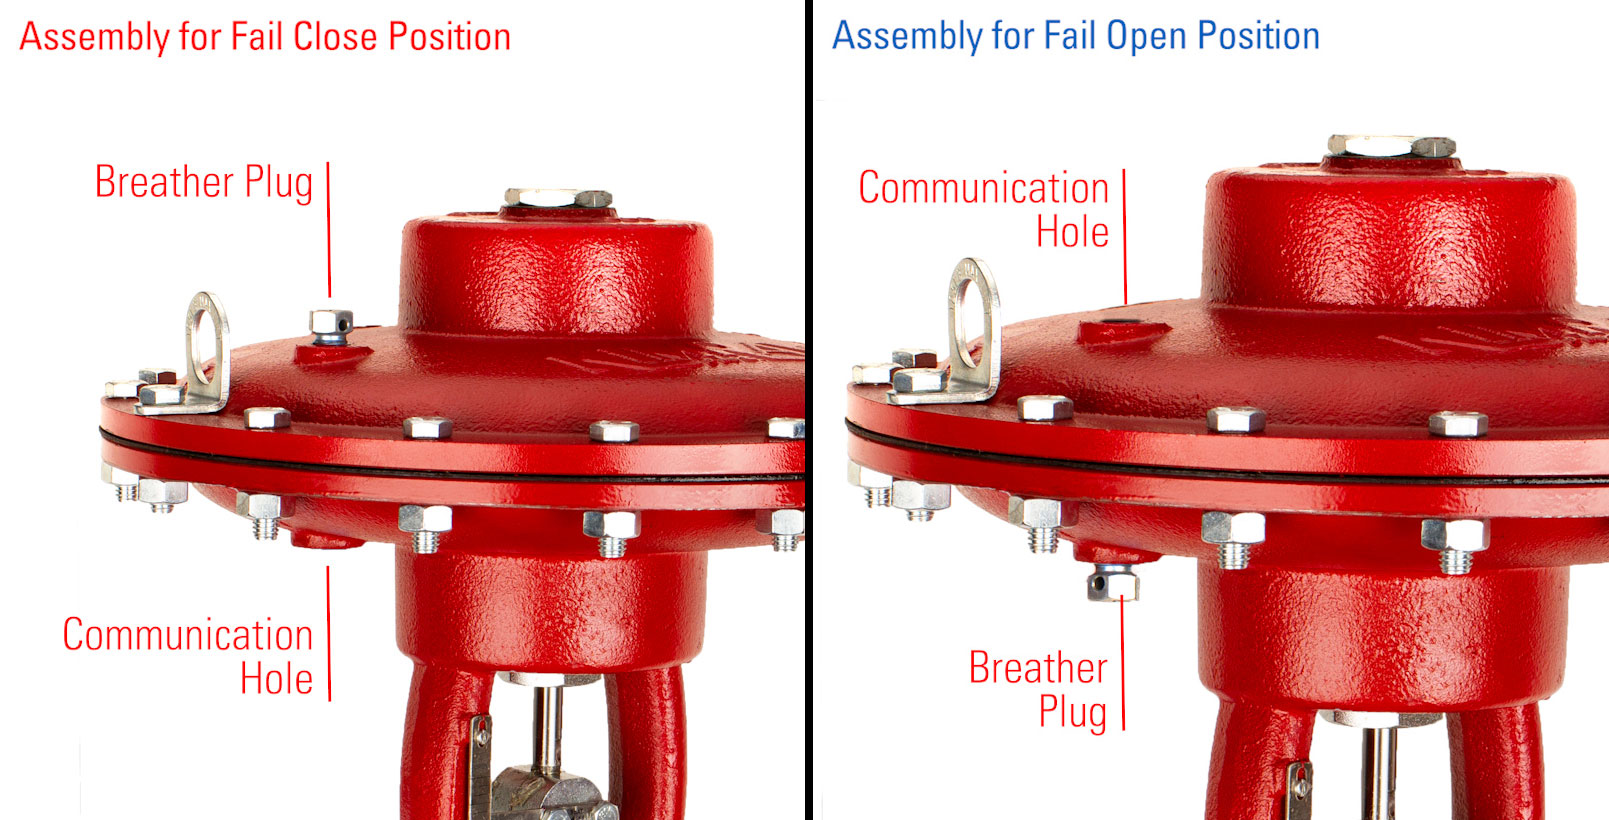
Also align the breather plug with the communication hole.
How to Assemble for Fail Open Position
Apply Loctite to the threads and insert the upper stem into the other side of the pivot sleeve.
Use a 3/8" wrench to hold the stem.
Install the pivot on the lower adjustment screw with the bevel side facing up.
Add grease, then install the lower spring plate, spring and upper spring plate.
Grease the upper spring plate and the upper stem to prevent damaging the O-ring in the lower adjustment screw and then install the assembly.
Replace the bonnet aligning the diaphragm holes with the bolt holes.
Also align the breather plug with the communication hole.
Final Assembly Steps for either fail position (shown in video as Fail Closed)
Mount the topworks actuator on the valve body and tighten the four lower bolts.
Tighten the bonnet bolts in a star pattern to apply pressure evenly.
Place the O-ring on the upper adjustment screw and grease the top to hold your pivot in place.
Then grease the O-ring and thread it into the bonnet and tighten with a wrench.
Make sure your breather plug is clear of any debris. For fail close, install it on the top of the bonnet. For fail open, install it on the bottom.
Attach the coupling block with the flat side on top and the rounded side on bottom.
Change the indicator tag to match your fail position.
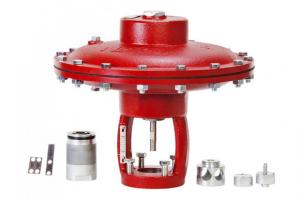
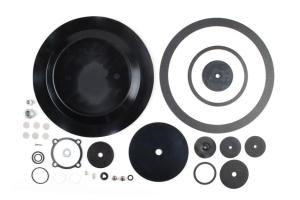
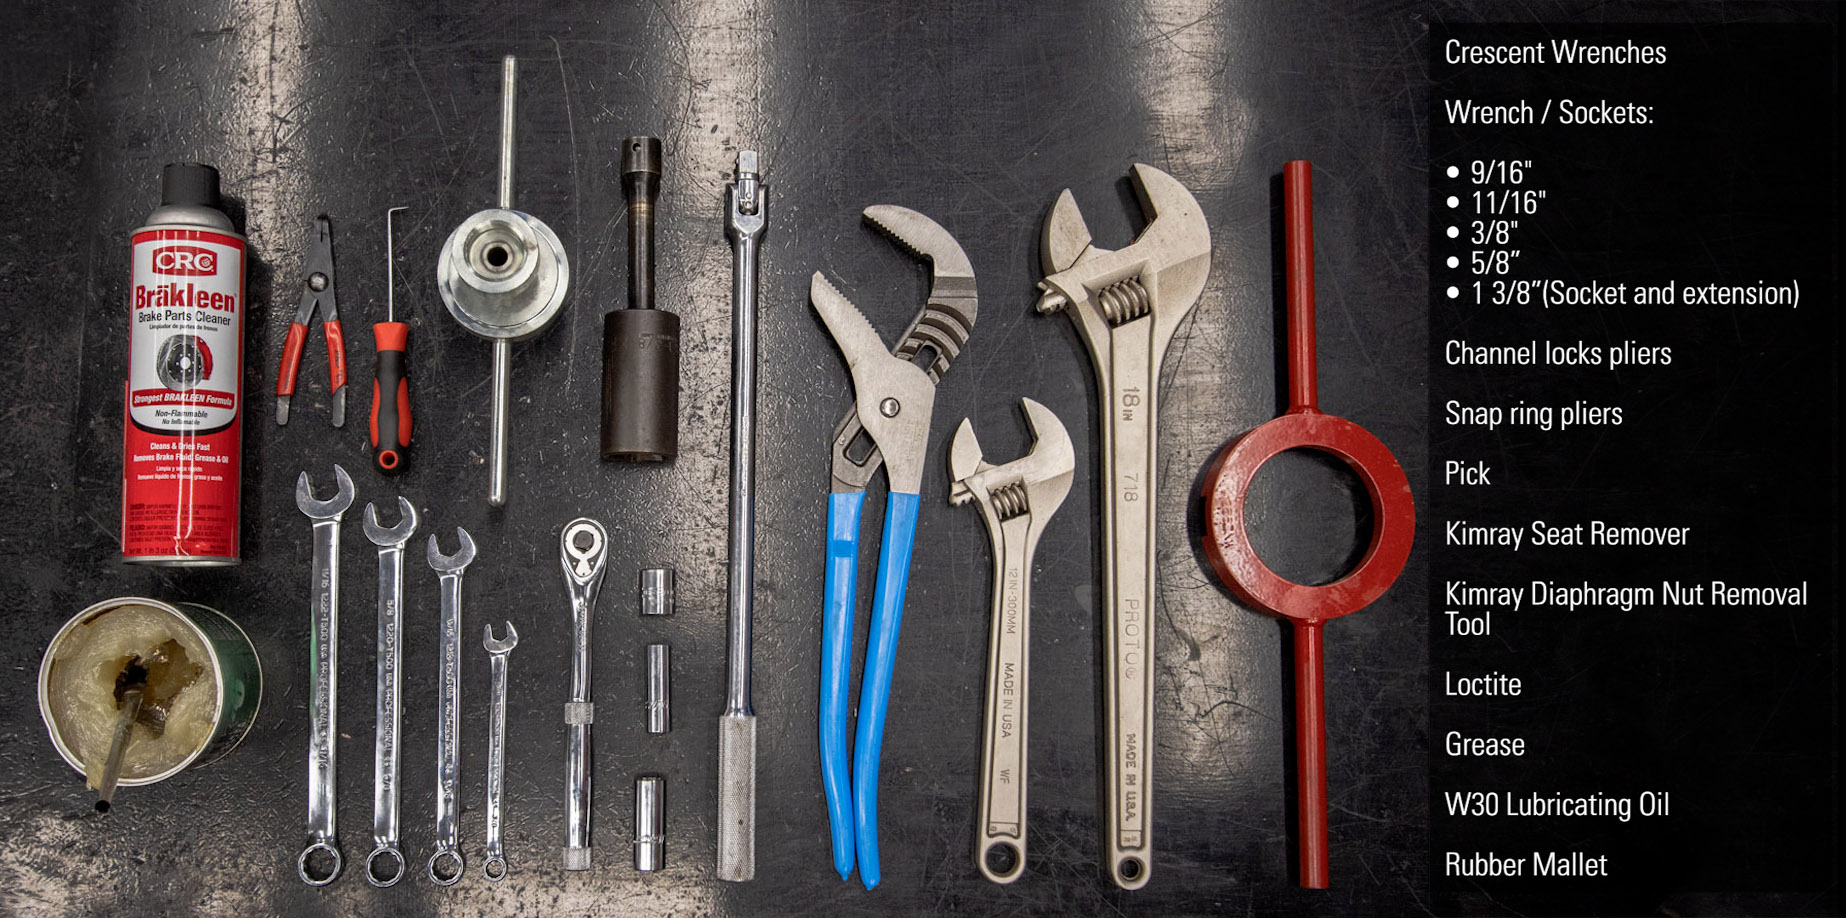
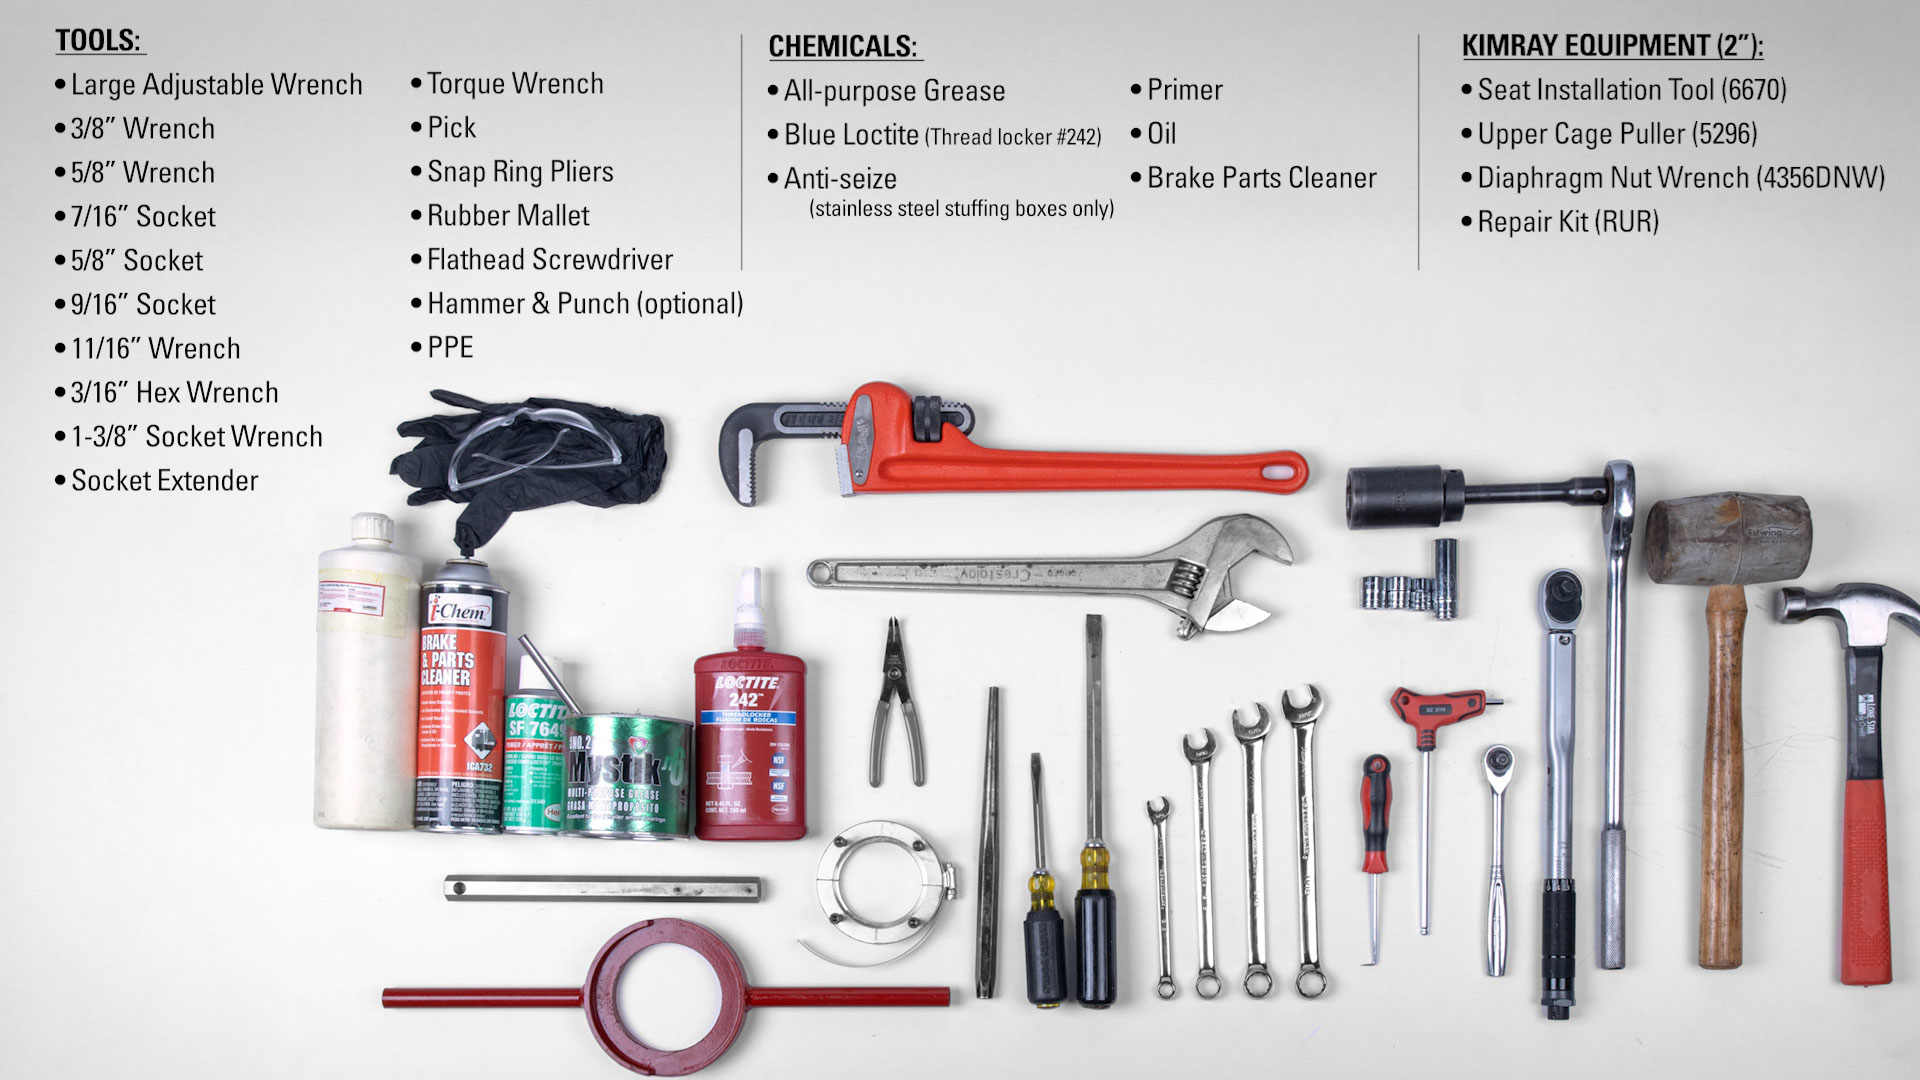
For this job, you will need the following tools, equipment, and chemicals. There are also a couple of commonly replaced parts like the diaphragm and trim set pieces that are not in the repair kit.
3.01 List of Tools, Chemicals, and Equipment Needed for Cage Guided HPCV Repair
Tools
Large Adjustable Wrench (adjusting screw & stuffing box)
All-purpose Grease Blue Loctite/Thread locker #242 Primer Oil Brake Parts Cleaner Anti-seize (for stainless steel stuffing boxes only)
Nitrile gloves are highly recommended when working with and handling greases and chemicals to prevent skin irritation. Before any service, be certain that the valve is fully isolated and that all pressure upstream and downstream has been relieved. Use bypass valves or fully shut off the process. Be sure that any operating or instrument gas lines have been disconnected.
3.02 Assembly Line Art for Cage Guided HPCVs
How to Disassemble a Cage Guided High Pressure Control Valve
Adjusting Screw, Pivot, Breather Plug, Bonnet, Spring Plates & Spring
Start by removing the adjusting screw with an adjustable wrench.
Remove the pivot from the adjusting screw. Sometimes the pivot will separate and sit on top of the spring plate. If so, we’ll remove it later.
3.03 Pivot Shown Attached to Adjusting Screw or Spring Plate
Remove and discard the O-ring from the adjusting screw.
Next, use a 9/16” wrench to remove the breather plug.
Use a 9/16” wrench or socket and 11/16” wrench to remove the bonnet bolts, then remove the bonnet.
If the pivot separated from the adjusting screw, it can now be removed, followed by the upper spring plate, spring, and lower spring plate.
Travel Indicator
Remove the bolts from the travel indicator block with a 7/16” wrench.
Then remove the block and indicator tag from the stem.
Diaphragm Assembly
Next, use a 3/8” wrench on the flats of the upper stem while you unthread the diaphragm plate.
Yoke & Lower Adjusting Screw
Use a 9/16” wrench to remove the four bolts from the yoke base.
Slide the yoke up from the upper housing and empty the oil into an appropriate container.
Flip the yoke over and remove the lower adjusting screw with a 1-3/8” socket and extension.
Slide out the upper stem from the lower adjusting screw.
Use a pick to remove and discard the large O-Ring on the outside of the adjusting screw as well as the smaller O-Ring inside.
Use snap ring pliers to remove and discard the snap ring.
Next, remove the retainer washer, but keep this piece.
Last, remove and discard the wiper.
Stuffing Box
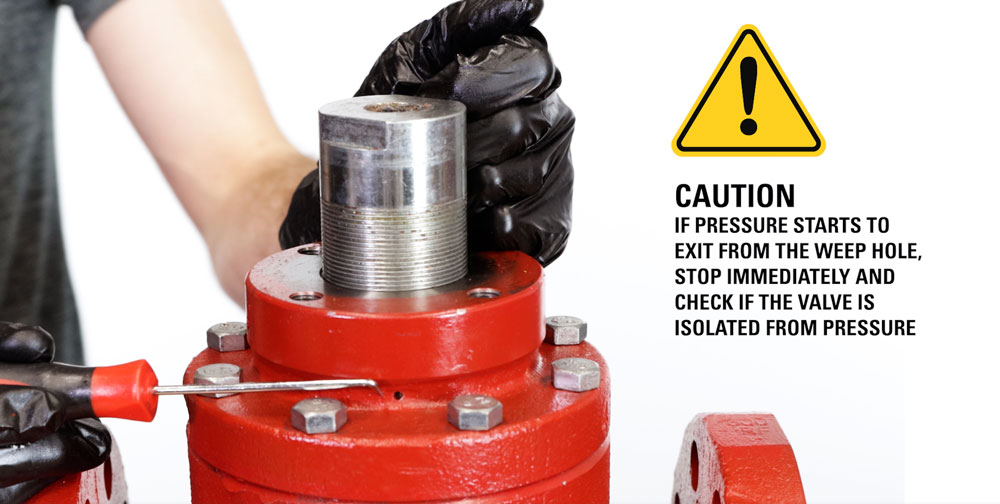
Use a large adjustable wrench only on the flats of the stuffing box to unthread the assembly by turning counterclockwise.
Use caution—if pressure starts to exit from the weep hole, stop immediately and check if the valve is isolated from pressure.
3.04 Caution About Weep Hole on Valve Body
Remove the spring. This may be inside the valve body.
Using a pick, pull out and save the packing follower.
Turn the stuffing box over and use snap ring pliers to remove and discard the snap ring.
Remove and save the retainer washer.
Then discard the felt wiper.
Use a pick to remove and discard the packing rings and sleeve.
Remove and discard the outside O-ring with a pick.
Upper Housing
3.05 Upper Housing Removal with Screwdrivers
Next, use a 5/8” wrench to remove the upper housing from the valve body.
You may need to use one or two flathead screwdrivers or a similar tool to pry them apart.
Plug Assembly
The plug assembly includes the cage and piston assembly inside of it.
3.06 Three Methods to Remove the Cage from the Body
To remove the assembly from the body, you may be able to simply pull up on the stem. You can wrap the stem in a clean rag for a better grip.
If that doesn’t work, first remove the O-Ring from the cage assembly. Then use two flathead screwdrivers to lift out the cage. Be very careful to not to damage the cage. If the cage loses its shape, it will have to be replaced.
We recommend using the Kimray cage puller. With the O-ring removed, mount the cage puller by sliding each half over the cage, followed by the clamp and then tightening the screw. Tighten the bolts on the cage puller one at a time to lift the cage assembly out of the body.
Remove the second O-ring from the cage assembly.
Remove the O-ring on the seat. This may also have gotten stuck in the valve body.
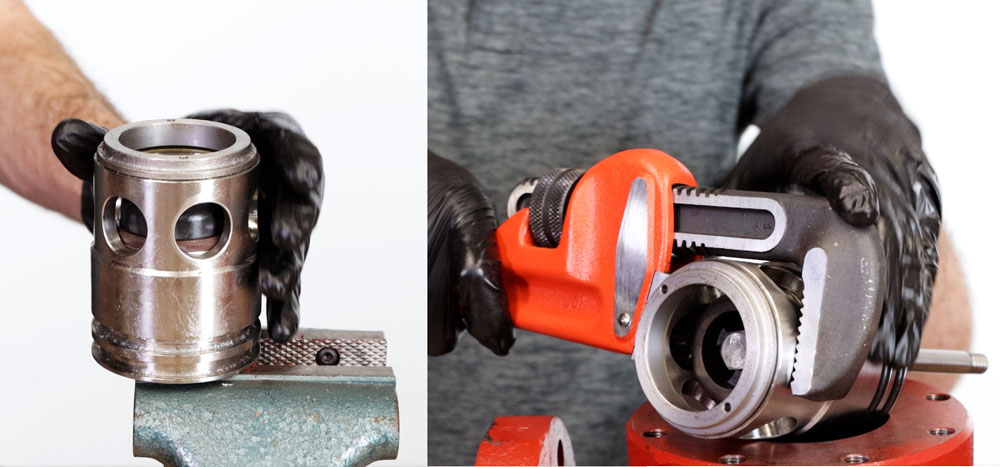
Put the plug assembly in a vise, being careful not to damage it by overtightening. You could also use a pipe wrench to grip the cage instead of a vise if you choose.
3.07 Methods Shown for Holding the Cage and Piston in Place - Vise and Pipe Wrench
Use the Kimray seat removal tool to remove the seat. If you do not have this tool, use caution as it can be damaged if removed improperly.
Remove and discard the seal ring from the seat.
Next, separate the piston assembly from the cage. You may need to use a rubber mallet for this.
Put the two flats of the piston assembly into a vise with brass jaws.
Use a 5/8” socket wrench to unthread the bolt from the ratio plug.
Remove the ratio plug and seat disc.
Discard the O-ring. It may be on the piston instead.
Remove and discard the small O-ring in the piston.
Remove the quad ring and two backups inside the cage.
Diaphragm Assembly
3.08 Diaphragm Removal by Hammer and Punch or Kimray Tool
The diaphragm needs to be inspected for any abnormal wear like punctures or swelling.
It’s also good to inspect the part of the diaphragm under the diaphragm nut. If you don’t have the tool, you can flip the diaphragm assembly over and remove the diaphragm nut, using a hammer and punch.
Put the Kimray Diaphragm Nut Tool on the diaphragm nut. Then put the diaphragm plate into the vise. After removing the nut, you can inspect the diaphragm fully and replace it if needed. It is not included in the repair kit. If it is damaged, you will need to order a replacement.
How to Inspect and Clean a Cage Guided High Pressure Control Valve
Before assembling the valve, you need to inspect a few of the key components that are often affected due to the severe impact of particles that flow through the valve. If any of these parts are damaged, you will need to order a replacement.
Verify that the cage has not lost its shape.
Next, inspect the piston for signs of corrosion on the outside surface.
Also check for scoring or scratches on the inside of the seat.
If the ratio plug has scratches, corrosion or wear, it will need to be replaced.
Lastly, inspect all threads for nicks, burrs and flats. A thread repair tool may be used for light damage.
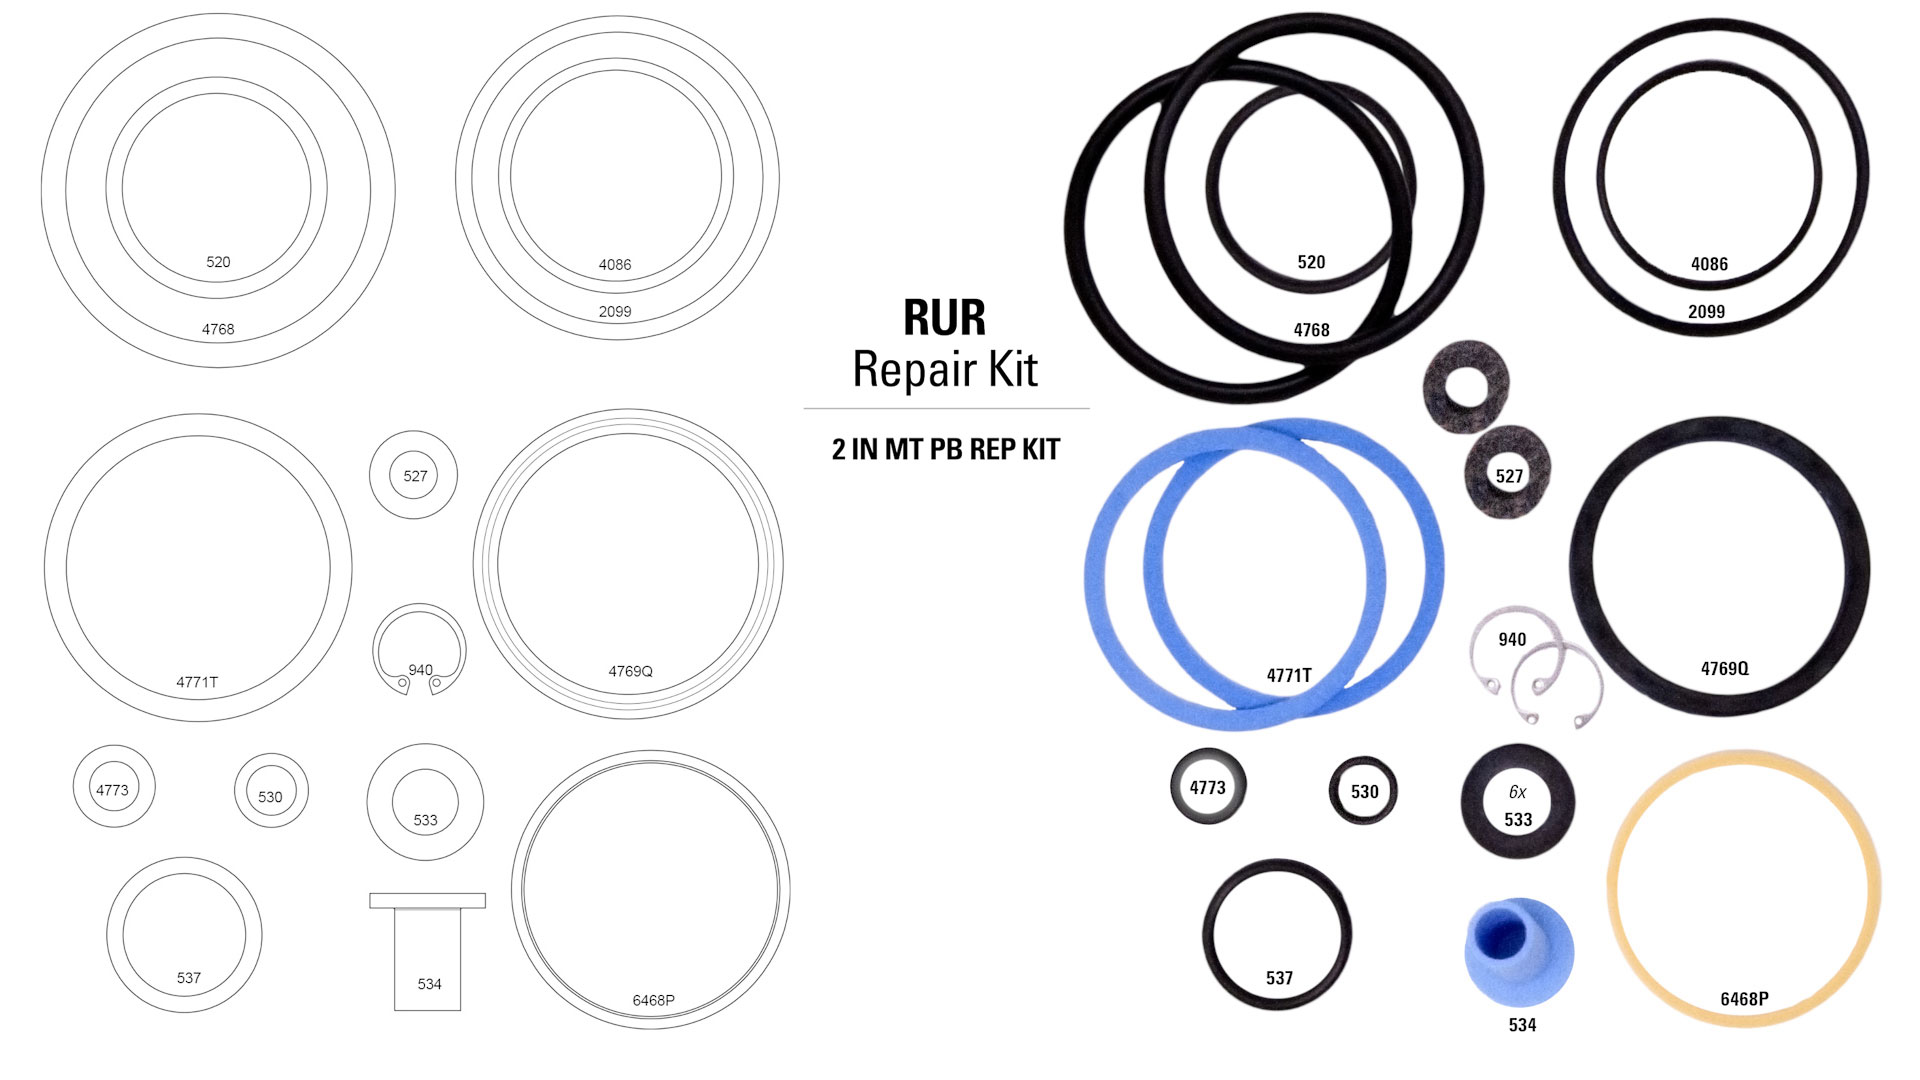
If there are multiple components that are worn and will need to be replaced, you may consider ordering a complete plug assembly. This will save you time and money, making the repair much easier. Complete plug assemblies are listed on the tech specs page. See our video about trim set options for more details.
3.09 RUR Repair Kit Shown with Line Art and Photo of Parts
How to Assemble a Cage Guided High Pressure Control Valve
Diaphragm Assembly
To begin assembly, thread the diaphragm over the diaphragm plate. The bowl of the diaphragm should always face the diaphragm plate.
Then add grease to the lower threads of the diaphragm plate.
Thread the diaphragm nut on by hand.
Place the diaphragm nut tool on the diaphragm nut. Flip it over and place the diaphragm plate in a vise with brass jaws to fully tighten.
Plug Assembly
With the two flats of the piston in the vise with brass jaws, install the O-Ring (4086) and lightly apply grease.
Mount the seat disc on top of the piston with the beveled side facing up.
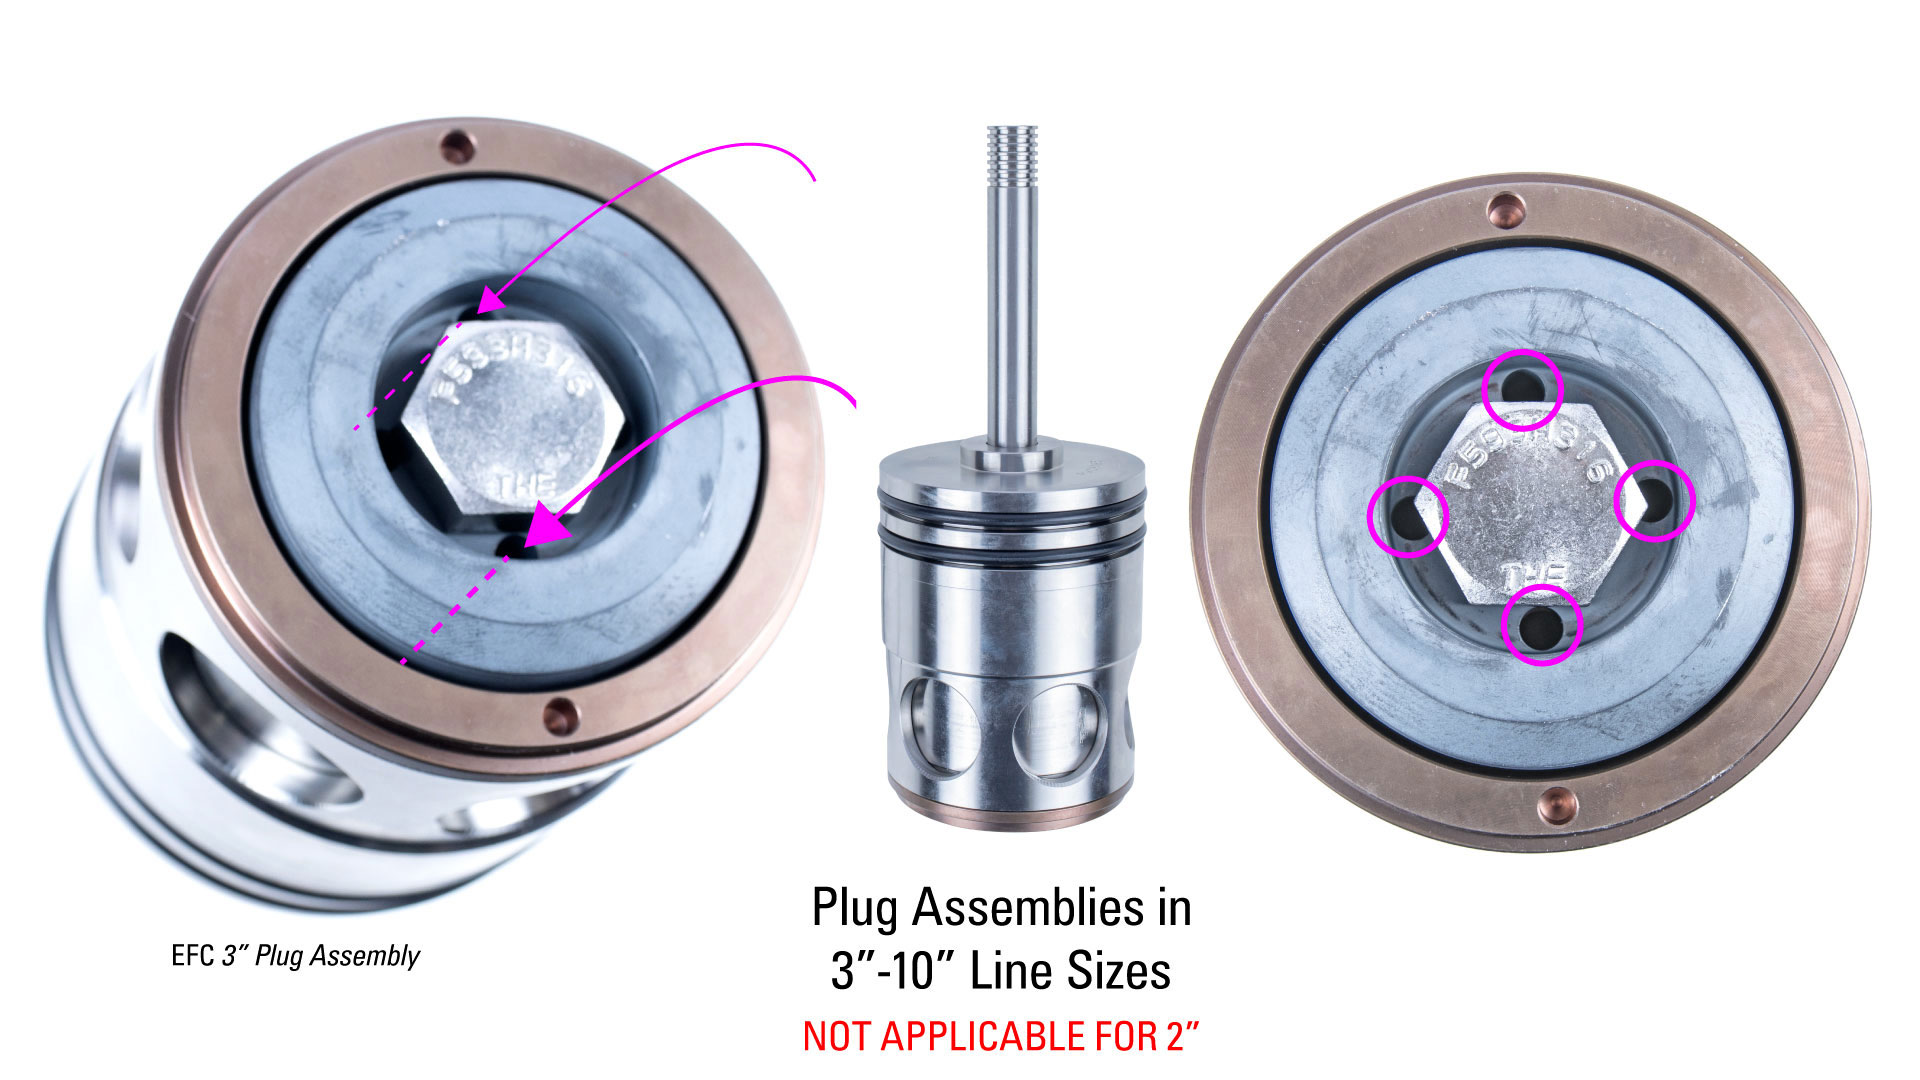
Insert the ratio plug bolt through the ratio plug and install the O-Ring (4773) around the bolt. plug assembly photo of bottom for alignment of ratio plug and piston
Apply Loctite to the threads and tighten it with a 5/8” socket to until it comes to a complete stop.
3.10 Plug Assembly Photo of Bottom for Alignment of Ratio Plug and Piston
In all models except the 2” line size, you will need to align the holes in the piston and ratio plug.
Remove the piston assembly from the vise and replace it with the valve body.
Next, Install both O-rings (4768) on the outside of the cage.
Then install the back up (4771T), quad ring (4769Q) and second back up (4771T) into the cage.
Add grease to the two backups and quad ring inside the cage.
Insert the piston assembly into the cage.
Install the seal ring (6468P) onto the seat.
Thread the seat onto the cage assembly and use the Kimray seat tool to fully tighten it.
Apply grease to the bottom of the seat so that the (2099) O-ring stays in place.
Also grease the two O-rings on the outside of the cage.
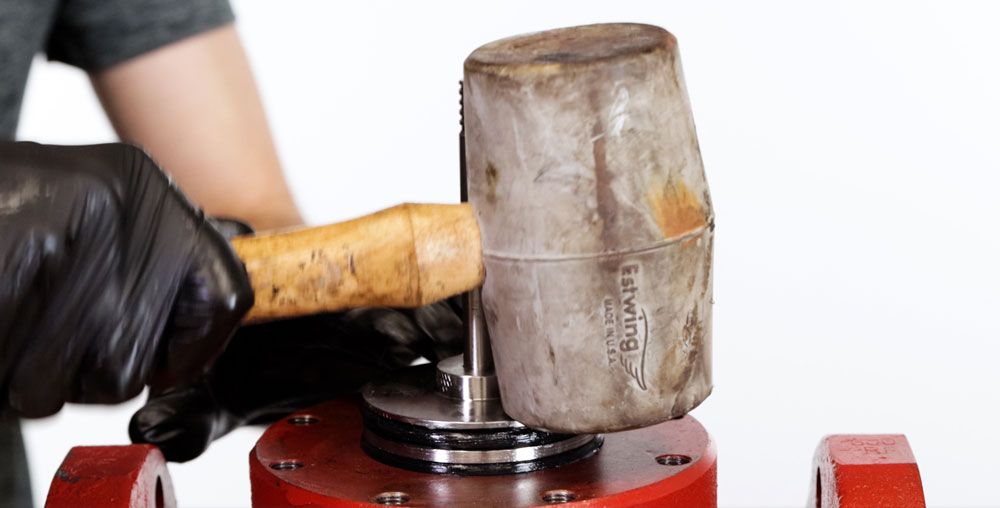
Put the entire assembly into the valve body and use a mallet to tap it into place. Do not strike the stem, only the top of the cage.
3.11 Use a Mallet to Tap Assembly Into Place
Upper Housing
Mount the upper housing to the body, facing the safety relief hole on the same side as the tapped holes on the body.
Tighten the bolts to 25-30 ft-lbs. in a crisscross pattern to avoid any misalignment. Do not overtighten.
Stuffing Box
Insert the new felt wiper (527) followed by the retainer washer and new snap ring (940).
Put the new O-ring (520) on the outside of the stuffing box.
Slide the (533) packing rings over the (534) packing sleeve.
Coat the inside of the stuffing box with grease and push the packing sleeve into the assembly.
Next, put in the packing follower.
Fill the stuffing box with grease then insert the spring.
Also add grease to the outer O-ring, being careful not to grease the threads.
If your stuffing box is stainless steel (S6 in the product code), use anti-seize on the threads of the stuffing box to prevent galling or seizing. Otherwise, make sure the threads are clean.
Thread the assembly back onto the upper housing. Use an adjustable wrench on the flats to fully tighten in place. Do not use a pipe wrench on the stuffing box and do not overtighten.
Lower Adjusting Screw & Yoke
Place a new O-ring (537) on the outside of the adjusting screw
Then install a new O-ring (530) inside.
Insert a new felt wiper (527).
Followed by the retainer washer.
Use snap ring pliers to attach the new snap ring (940).
Apply grease to the outer O-ring.
Install it into the yoke with a 1-3/8” socket and extension.
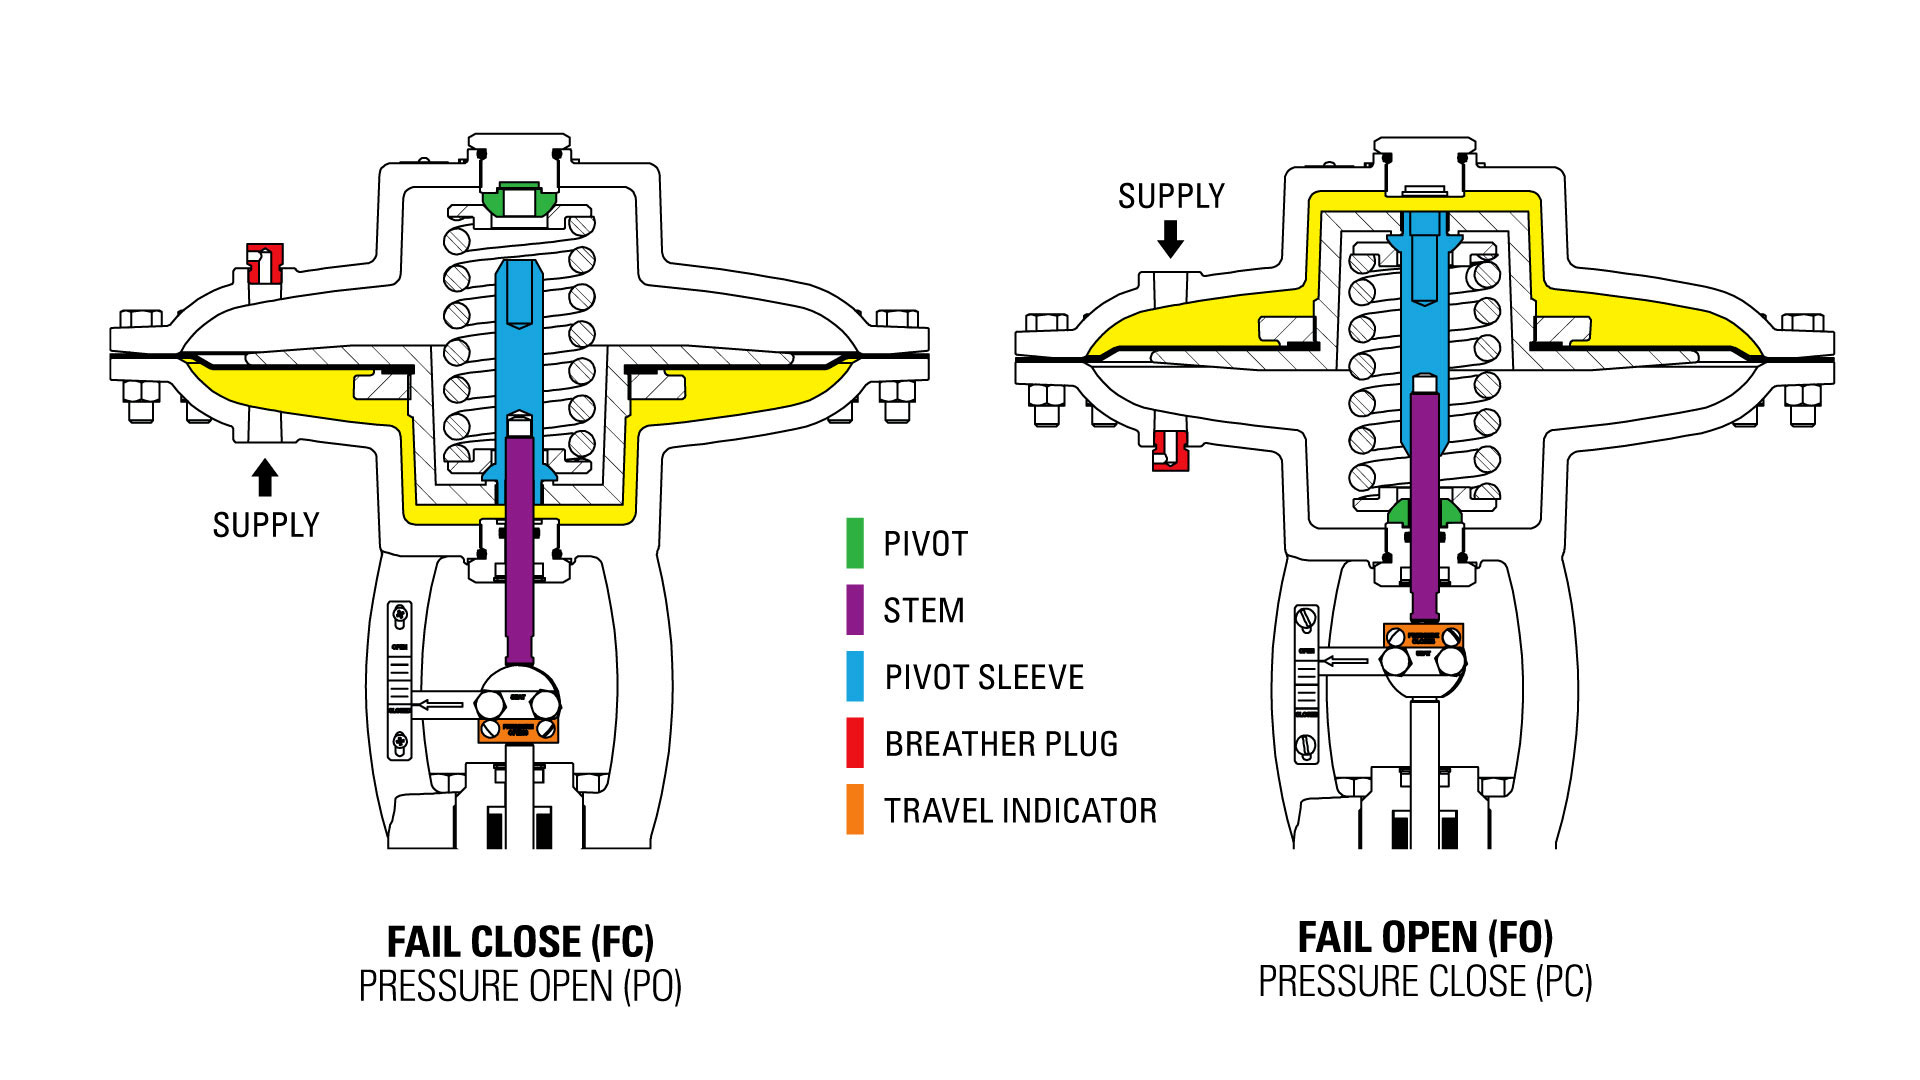
How to Assemble for Fail Open or Fail Close
3.12 Illustration for Fail Close and Fail Open Operation
Now you have the option to assemble for fail open (pressure close) or fail close (pressure open) operation.
Assembly for Fail Open (Pressure Close / PC)
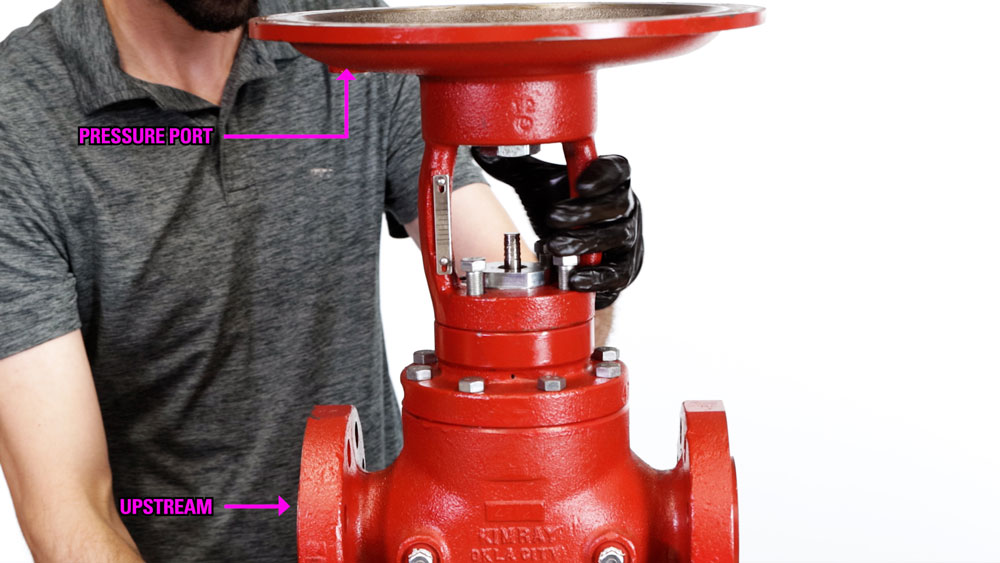
To assemble for fail open operation, first mount the yoke on the valve body and fully tighten the four bolts. Align the pressure port with the upstream side to keep the same original orientation.
3.13 Align Pressure Port with Upstream Side
Apply Loctite to the threads of the upper stem and insert it into the pivot sleeve with a 3/8” wrench.
Add a dob of grease inside the yoke assembly, enough to block the hole in the bottom.
Add oil inside the yoke to fully cover the lower adjusting screw.
Install the pivot on the lower adjusting screw with the bevel side facing up.
Install the lower spring plate, spring and upper spring plate.
Grease the upper spring plate.
Install the diaphragm assembly, pushing the stem through the lower adjusting screw.
Replace the bonnet, aligning the pressure port and breather plug hole.
3.14 Align Pressure Port and Breather Plug Hole
Install the bolts and lifting rings using a 9/16” and 11/16” wrench and tighten to 25-30 ft-lbs. Use a crisscross pattern and do not overtighten.
Place the (537) O-ring on the upper adjustment screw.
Add grease around the O-ring and thread it into the bonnet with an adjustable wrench.
Install the breather plug into the bottom pressure port, so that the hole faces the bonnet.
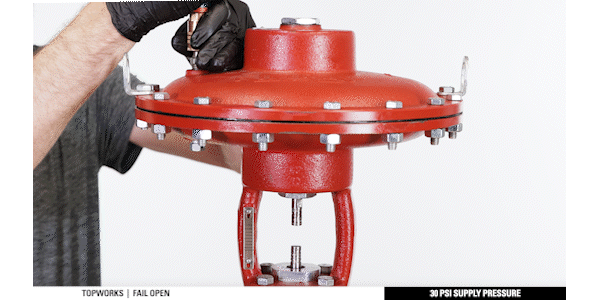
Apply 30 psi of supply pressure to lower the stem.
3.15 Apply 30 psi of Supply Pressure to Lower the Stem
Attach the indicator tag and travel indicator onto the coupling block with the flats on top. Use a 7/16” socket to tighten the bolts.
You can now remove the supply pressure, and your repair is complete
Assembly for Fail Close (Pressure Open / PO)
For a fail close orientation, first mount the yoke on the valve body and only hand start the four bolts. This will make it easier to align the upper and lower stem later when attaching the coupling block.
Align the pressure port with the upstream side to keep with the same original orientation.
Apply primer and Loctite to the threads of the upper stem.
Insert it into the pivot sleeve on the flat side of the diaphragm plate.
Use a 3/8” wrench on the stem flats to tighten it to the diaphragm plate.
Add a dab of grease inside the yoke assembly, enough to block the hole in the bottom.
Add oil inside the yoke to fully cover the lower adjusting screw.
Take the diaphragm assembly and push the stem through the lower adjusting screw.
Grease the bottom of the pivot sleeve
Then install the lower spring plate, spring, and upper spring plate.
Add grease to the top of the upper spring plate.
Replace the bonnet, aligning the pressure port and breather plug hole.
Install the bolts and lifting rings using a 9/16” and 11/16” wrench and tighten to 25-30 ft-lbs. Use a crisscross pattern and do not overtighten.
Make sure the spring plate is aligned.
3.16 Make Sure the Spring Plate is Aligned
Place the (537) O-ring on the upper adjustment screw.
Add grease around the O-ring and in the divot of the pivot.
Place the pivot on the screw and thread it into the bonnet with an adjustable wrench. Do not fully tighten it yet to make it easier to attach the coupling block.
Attach the indicator tag and travel indicator onto the coupling block with the flats on top. Use a 7/16” socket to tighten the bolts.
Now you can fully tighten the 4 housing bolts.
Install the breather plug on the top of the bonnet, so the breather hole faces the bonnet.
4. How to Reverse a High Pressure Control Valve Topworks from Fail Close to Fail Open
A High Pressure Control Valve is a versatile solution that features field-reversible topworks for easy field conversions.
Why Reverse a High Pressure Control Valve Topworks?
Do you need to reverse the function from fail open to fail close for a different application?
For example, maybe you have been using the valve as a suction controller on the inlet of a compressor. In this case you had it set to fail open.
Now you want to use it for back pressure service, to hold pressure on a three-phase separator—in which case you would want the valve set up to fail open.
How to Reverse a High Pressure Control Valve's Fail Position
Remove the upper adjustment screw and bonnet bolts.
Remove the bonnet, upper spring plate, spring, and lower spring plate.
Before you loosen the coupling block, put a wrench on the flats of the upper stem. Then loosen the diaphragm plate.
Next, put your fingers underneath the diaphragm and diaphragm plate and lift up to get your lower stem in the right position.
Remove your coupling block.
Put your fingers underneath the diaphragm and diaphragm plate to remove the upper stem. Then rotate the diaphragm plate back and forth so that you don’t shear the o-ring in the lower adjustment screw when you’re pulling the stem out.
Remove the upper stem.
Reinstall the upper stem into the other side of the pivot sleeve.
Take the pivot off of the upper adjustment screw. Then install it on your lower adjustment screw with the beveled side facing up.
Install the lower spring plate, spring, and upper spring plate.
Before sliding the upper stem back through the lower adjustment screw, put a dab of grease on it to prevent damaging the o-ring in the lower adjustment screw.
Be sure that you install the coupling block where both of the flat side surfaces are facing up and that you change your indicator plate from pressure open to pressure closed - the same as changing from fail closed to fail open.
Before your re-install the bonnet, make sure that the diaphragm lines up with the bolt holes.
Re-install all of your bonnet bolts.
Once all of your bonnet bolts are tightened, you can reinstall your upper adjustment screw.
Move the breather plug from the top side of the actuator to the bottom side.
That’s how to convert the topworks on a High Pressure Control Valve for a different application.
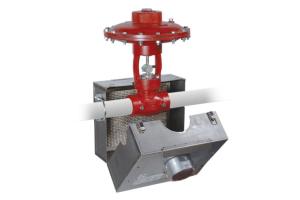
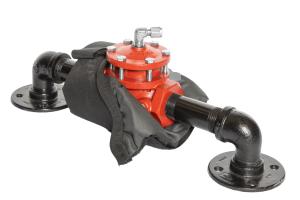
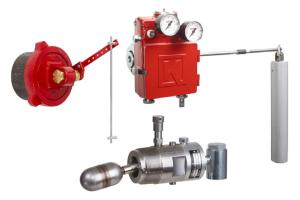
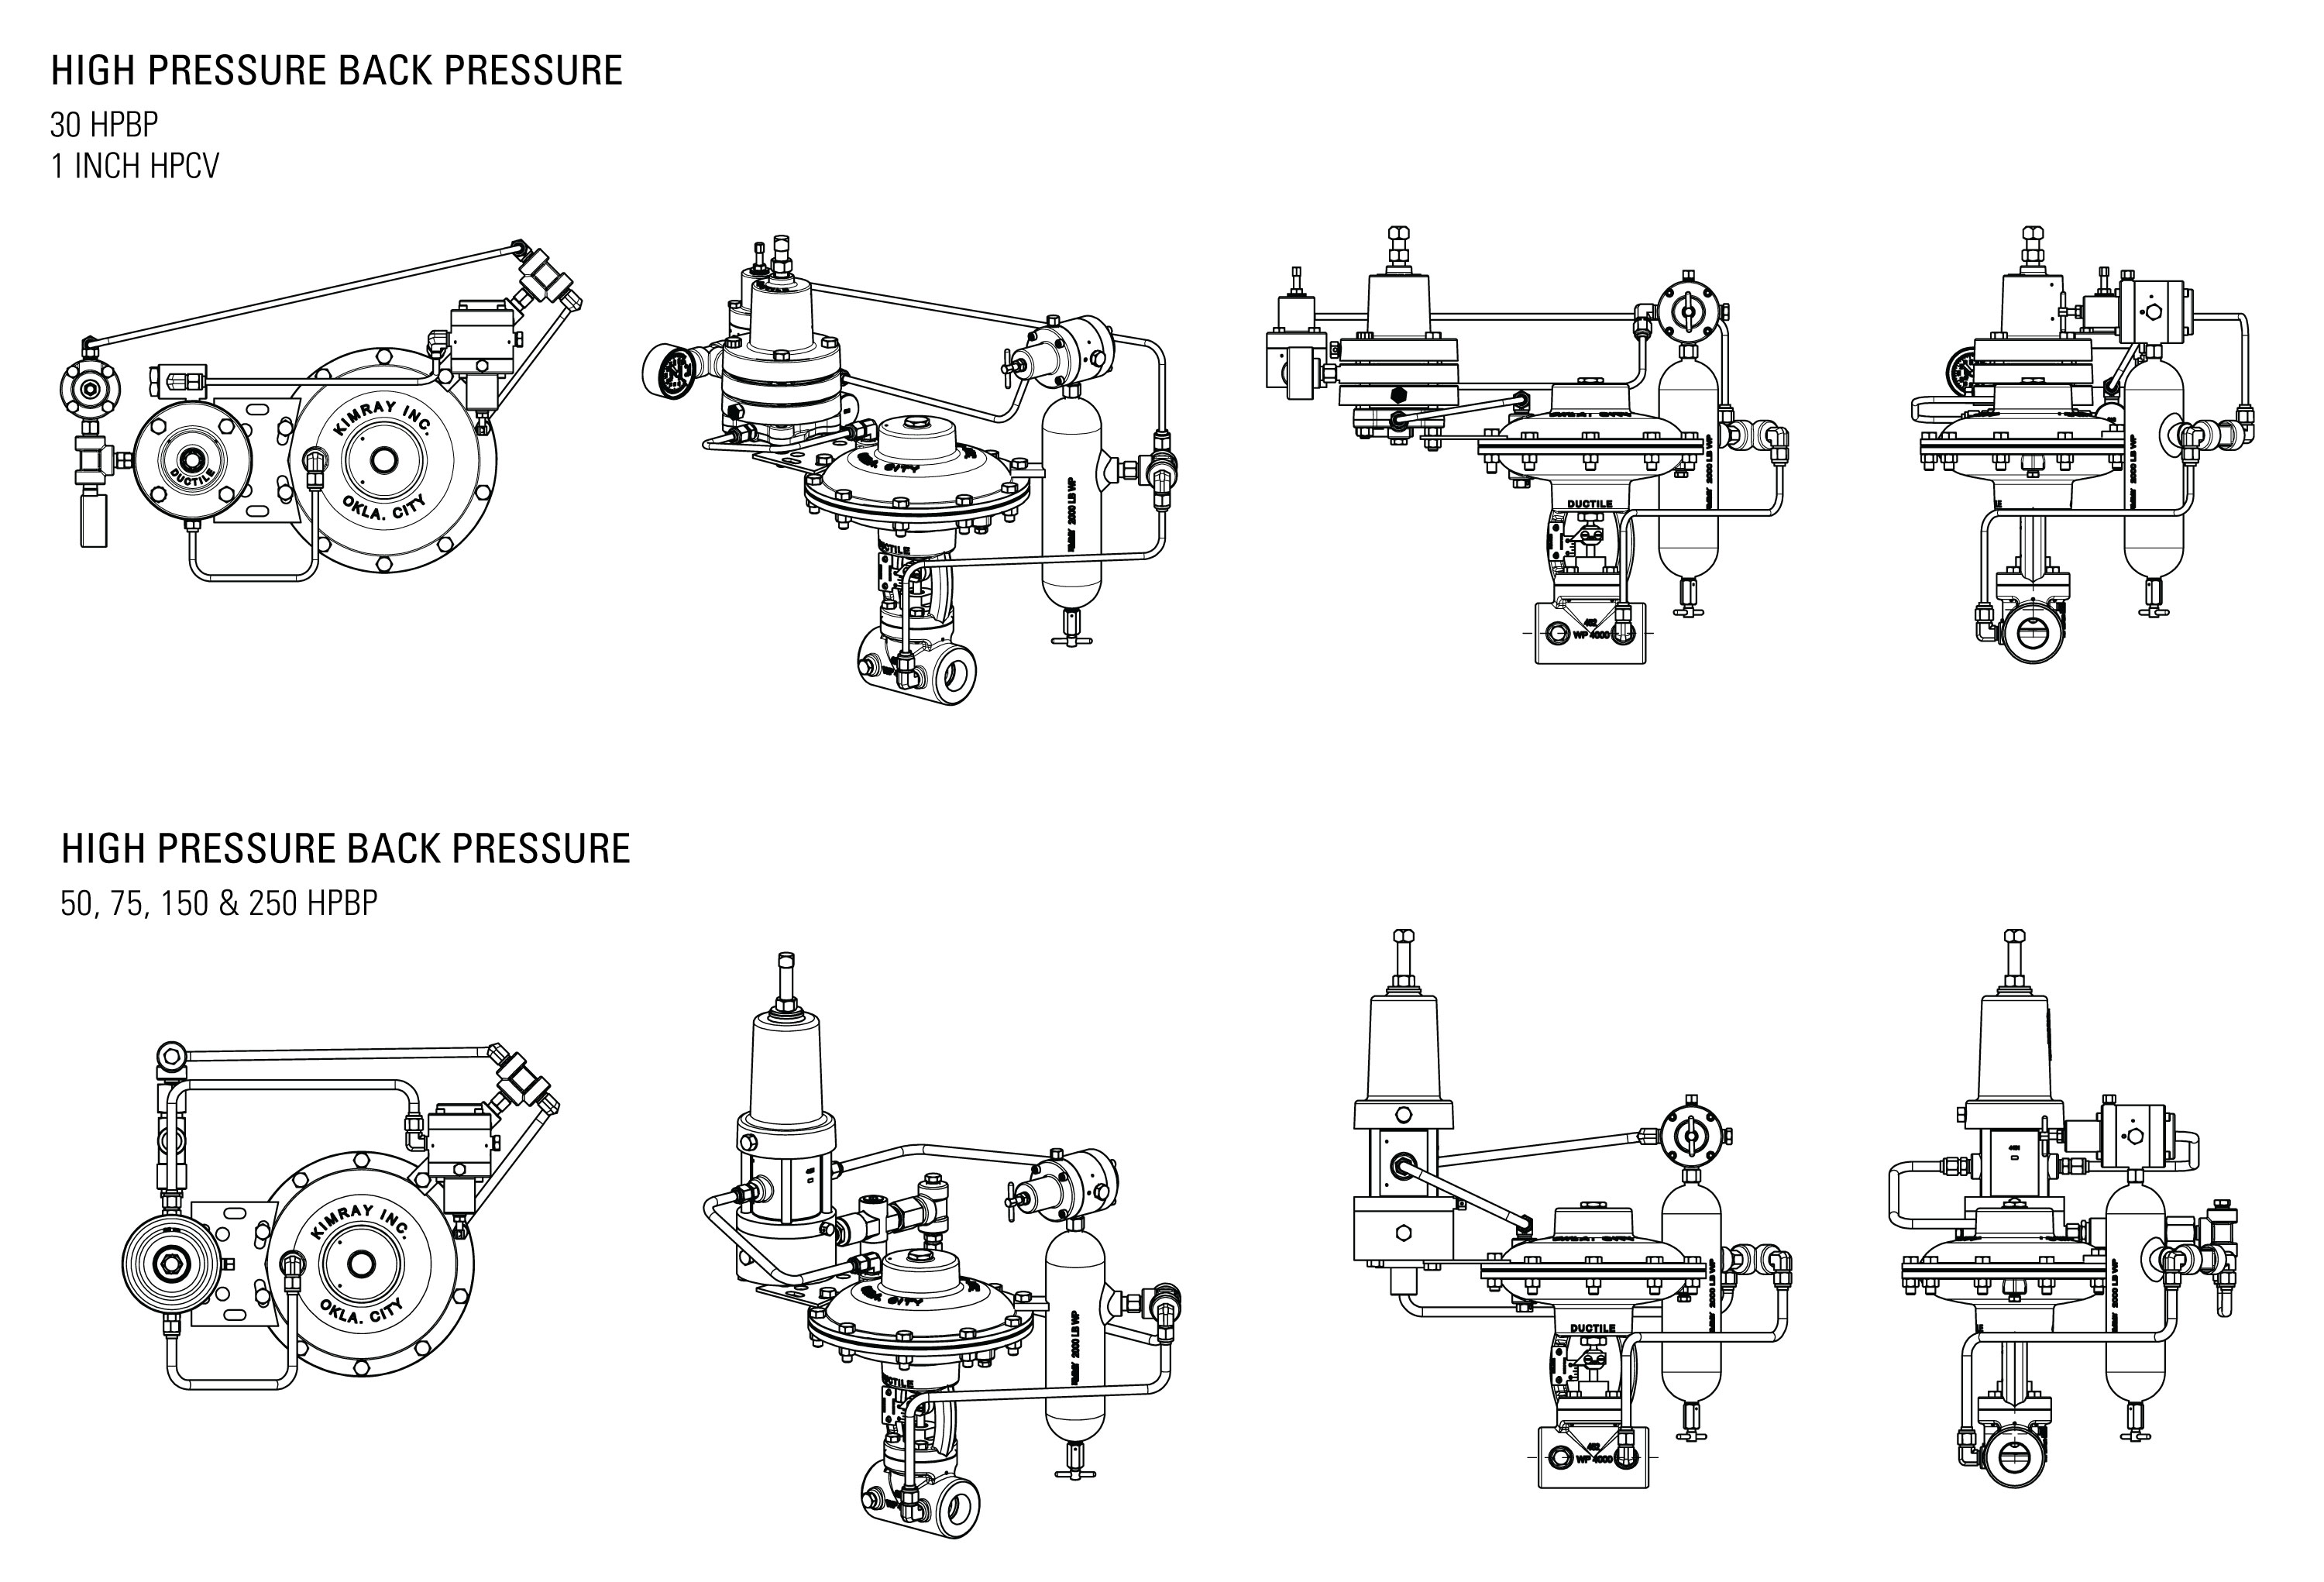
5. How to Build a High Pressure Control Valve Package for Back Pressure
Oil and gas producers use high pressure control valve packages to regulate natural gas flow at their well site.
In a Back Pressure application, High Pressure Control Valve Packages are set up to hold upstream pressure "back" on production vessels and release it downstream when a set point is reached.
This is opposed to a Pressure Reducing application, where the package is set up to reduce the gas pressure, but also allow it to flow through at a consistent, pre-determined flow rate.
To use it in a back pressure application, you'll need to add a handful of complementary components.
If you order the package from us, we'll help you spec it out and then deliver it fully assembled and ready to install.
If you purchase these parts individually, however, you can watch the video above, where Kyle shows you how to assemble a high pressure regulator package for back pressure.
Note: Before you get started, you'll want to put on your appropriate PPE and be sure to follow all of your company's safety requirements.
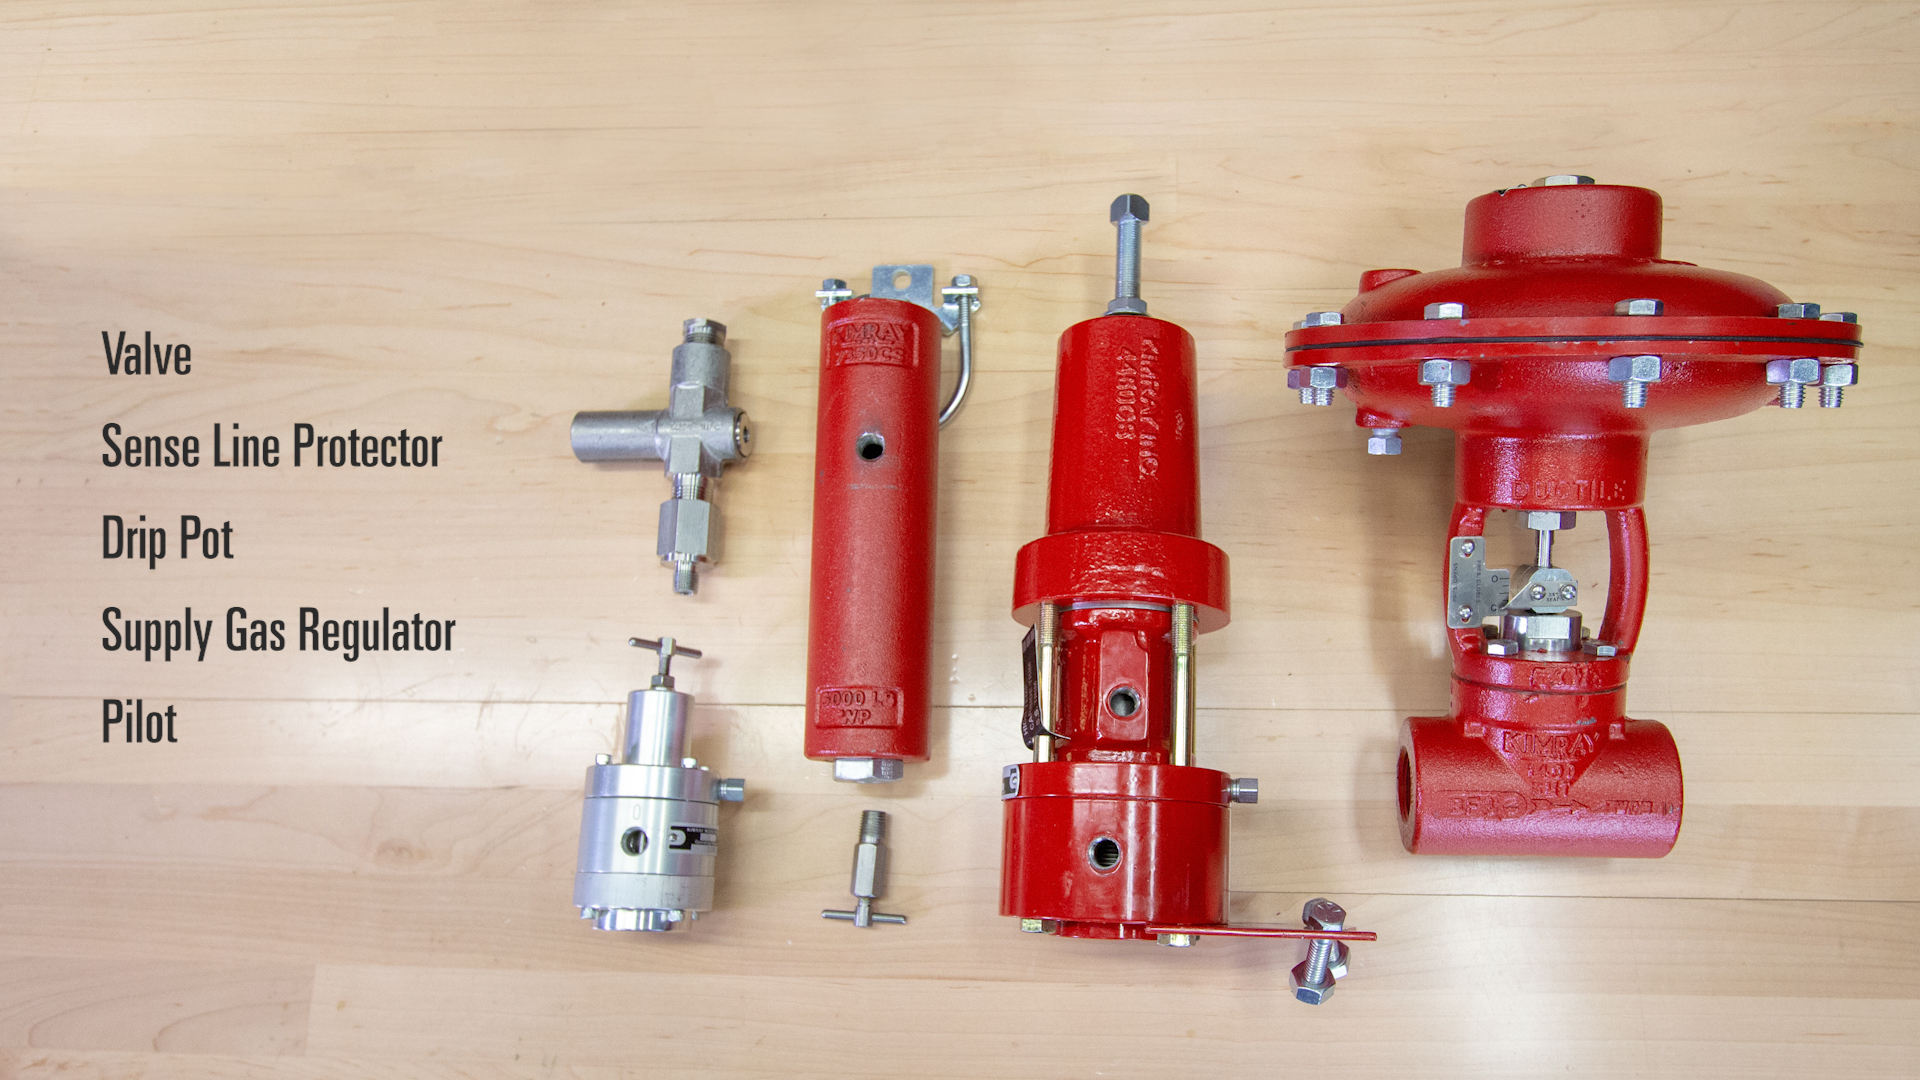
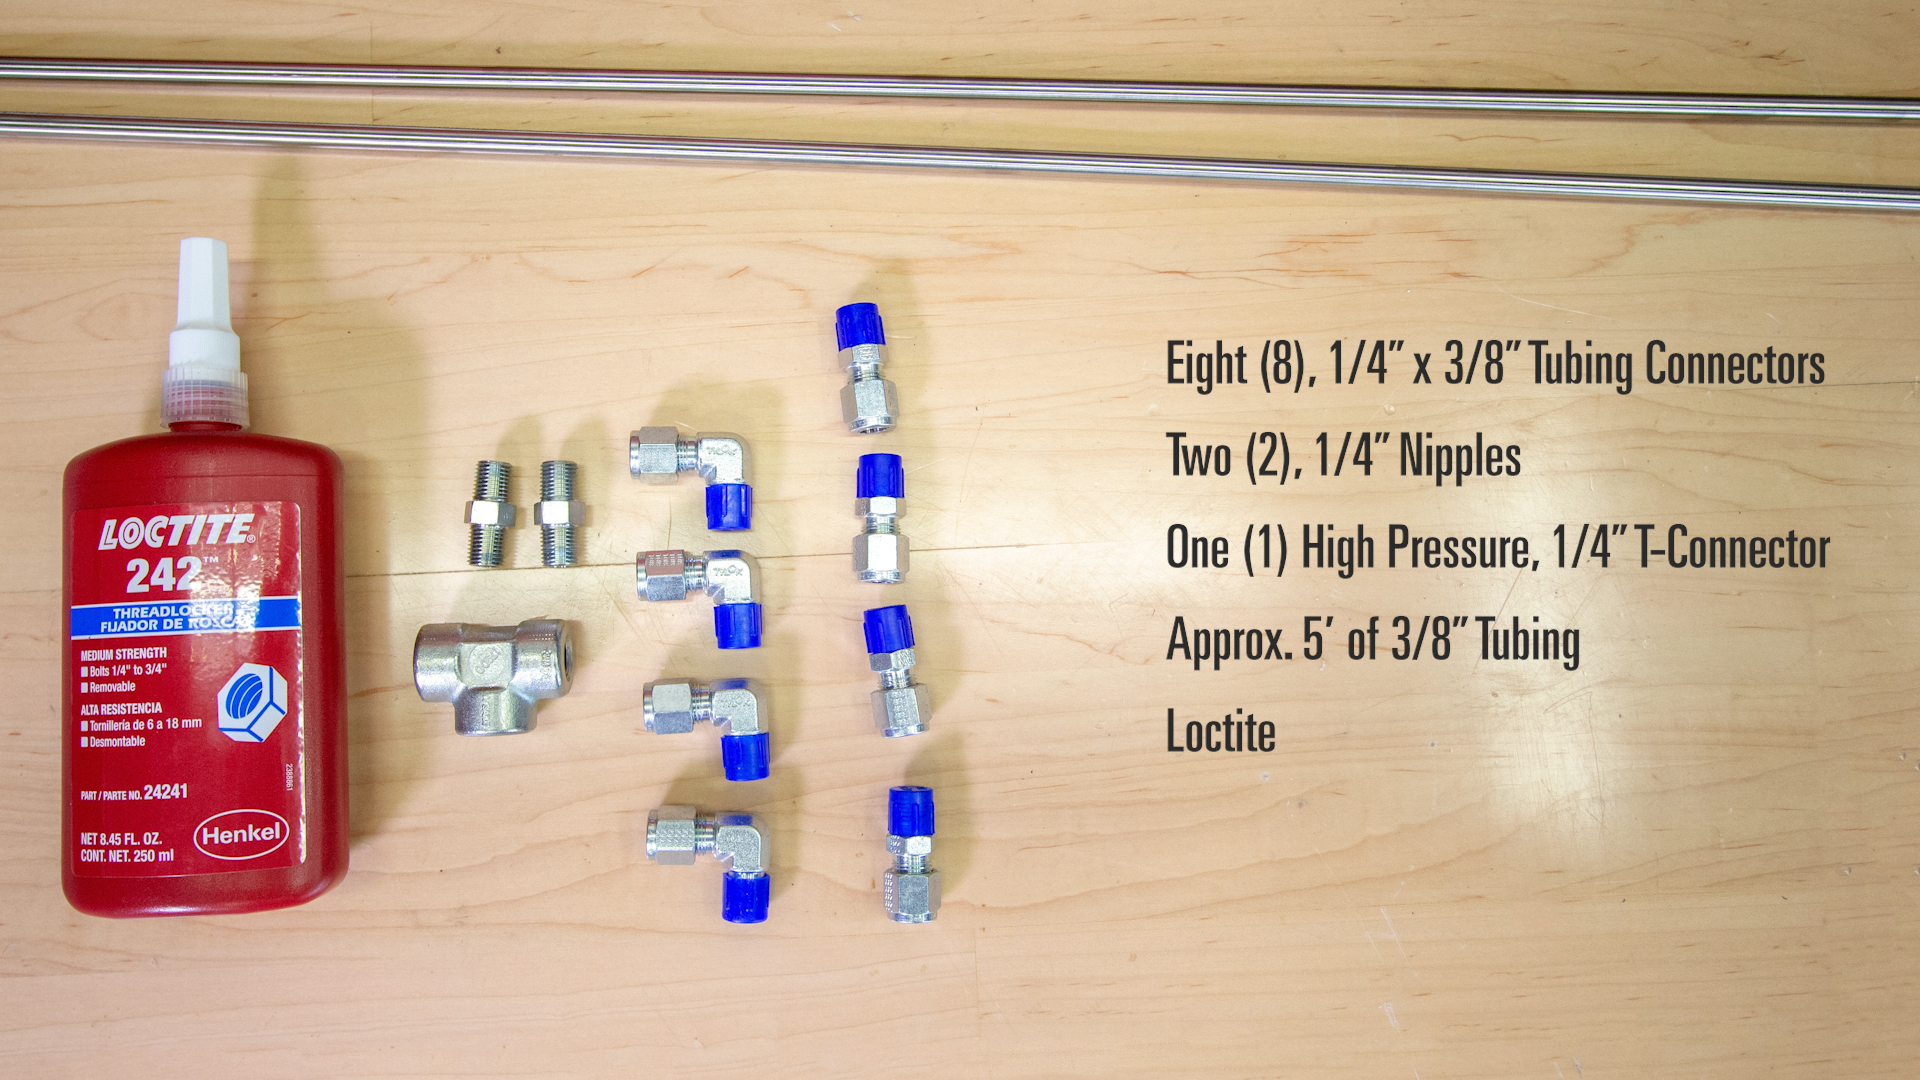
Parts of a High Pressure Back Pressure Package
5.1 Parts of a High Pressure Back Pressure Package
Depending on how you choose to arrange the components, the number of elbow and straight connectors will vary, but we've listed the minimum below:
(8+) 1/4" x 3/8" Tubing Connectors
(2) 1/4" Nipples
(1) High Pressure 1/4" T–Connector
Approximately 5' of 3/8" Tubing
Loctite
Tools Needed
5.3 Tools Needed
Finally, to put the package together, you’ll need the following tools:
Vise
Tubing Benders
Tubing Cutters
1/2" Wrench
5/8" Wrench
11/16" wrench
9/16" Wrench (for bonnet bolts)
Channel Locks
Crescent Wrench
If you assemble these packages regularly, you will already have a standard for how to arrange your assembly—whether all of the parts on one side or if it’s more symmetrical.
Knowing this in advance makes it easier to attach the tubing connecters and nipples to the parts before adding them each to the valve.
The way Kyle builds this package in the video will have the components closer together, facing the front of the valve and on the upstream side. We use less tubing this way and avoid creating areas where someone may try to use to lift. From our experience, this arrangement is typically most successful.
5.4 Pilots for a High Pressure Back Pressure Package
How to Build a High Pressure Back Pressure Package
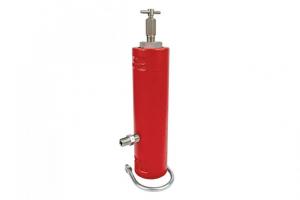
Thread the needle valve into the bottom of the drip pot.
Connect the SGR to the drip pot with a ¼” nipple and Loctite.
Mount the valve body in a vise.
Back pressure valves need to be fail open (pressure close). All of our Kimray valves come standard as fail close, so if you’re building a back pressure package yourself, you’ll need to flip the top works before you begin.
Remove a bolt from the bonnet on the upstream side and attach the drip pot and SGR on the valve.
Now we’ll install the pilot to the front of the valve by removing two bonnet bolts, and attaching the bracket included on the pilot.
Next, install a nipple into the outlet of the sense line protector with Loctite. Connect that into the sensing port of the pilot. Attach the ¼” T into the sense line protector inlet.
Install one tubing connector into the T, and another into the upstream side of the valve body.
Bend, cut and install the tubing from the upstream of the valve to the T.
Install a tubing connector on the T, and another on the drip pot inlet. Connect these together with tubing.
Attach tubing connectors to the outlet of the supply gas regulator and the supply side of the pilot and install the tubing.
The supply gas regulator cuts down the supply gas to the required 30PSI of the pilot. This is preset, so you won’t have to adjust it.
Attach tubing connectors to both the output of the pilot and the top of the valve bonnet. Cut, bend and install the tubing.
Finish by installing a pressure gauge on the supply gas regulator. (Another gauge can be installed on one of the two sensing ports on the pilot. This is to see your sense pressure.)
The output of the pilot sends a pneumatic signal to the valve diaphragm, closing the valve.
Note: For this package, you may be using a 30 HPG pilot instead of a high pressure pilot. For this configuration, the assembly will be the same, but the tubing lengths and angles will look different.
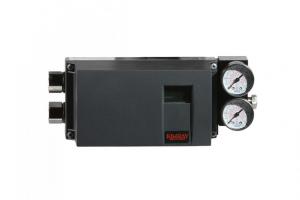
6. How to Build an Electric Valve Controller
The Electric Valve Controller package is a compact, easy-to-use solution for oil and gas automation, including remote monitoring and control of your production.
In this video and article, we'll show you have to assemble an Electric Valve Controller package. This placement of components will provide the smallest footprint and the most efficient use of tubing.
6.1 Electric Valve Controller
Before you get started, you’ll want to put on your appropriate PPE and be sure to follow all your company’s safety requirements.
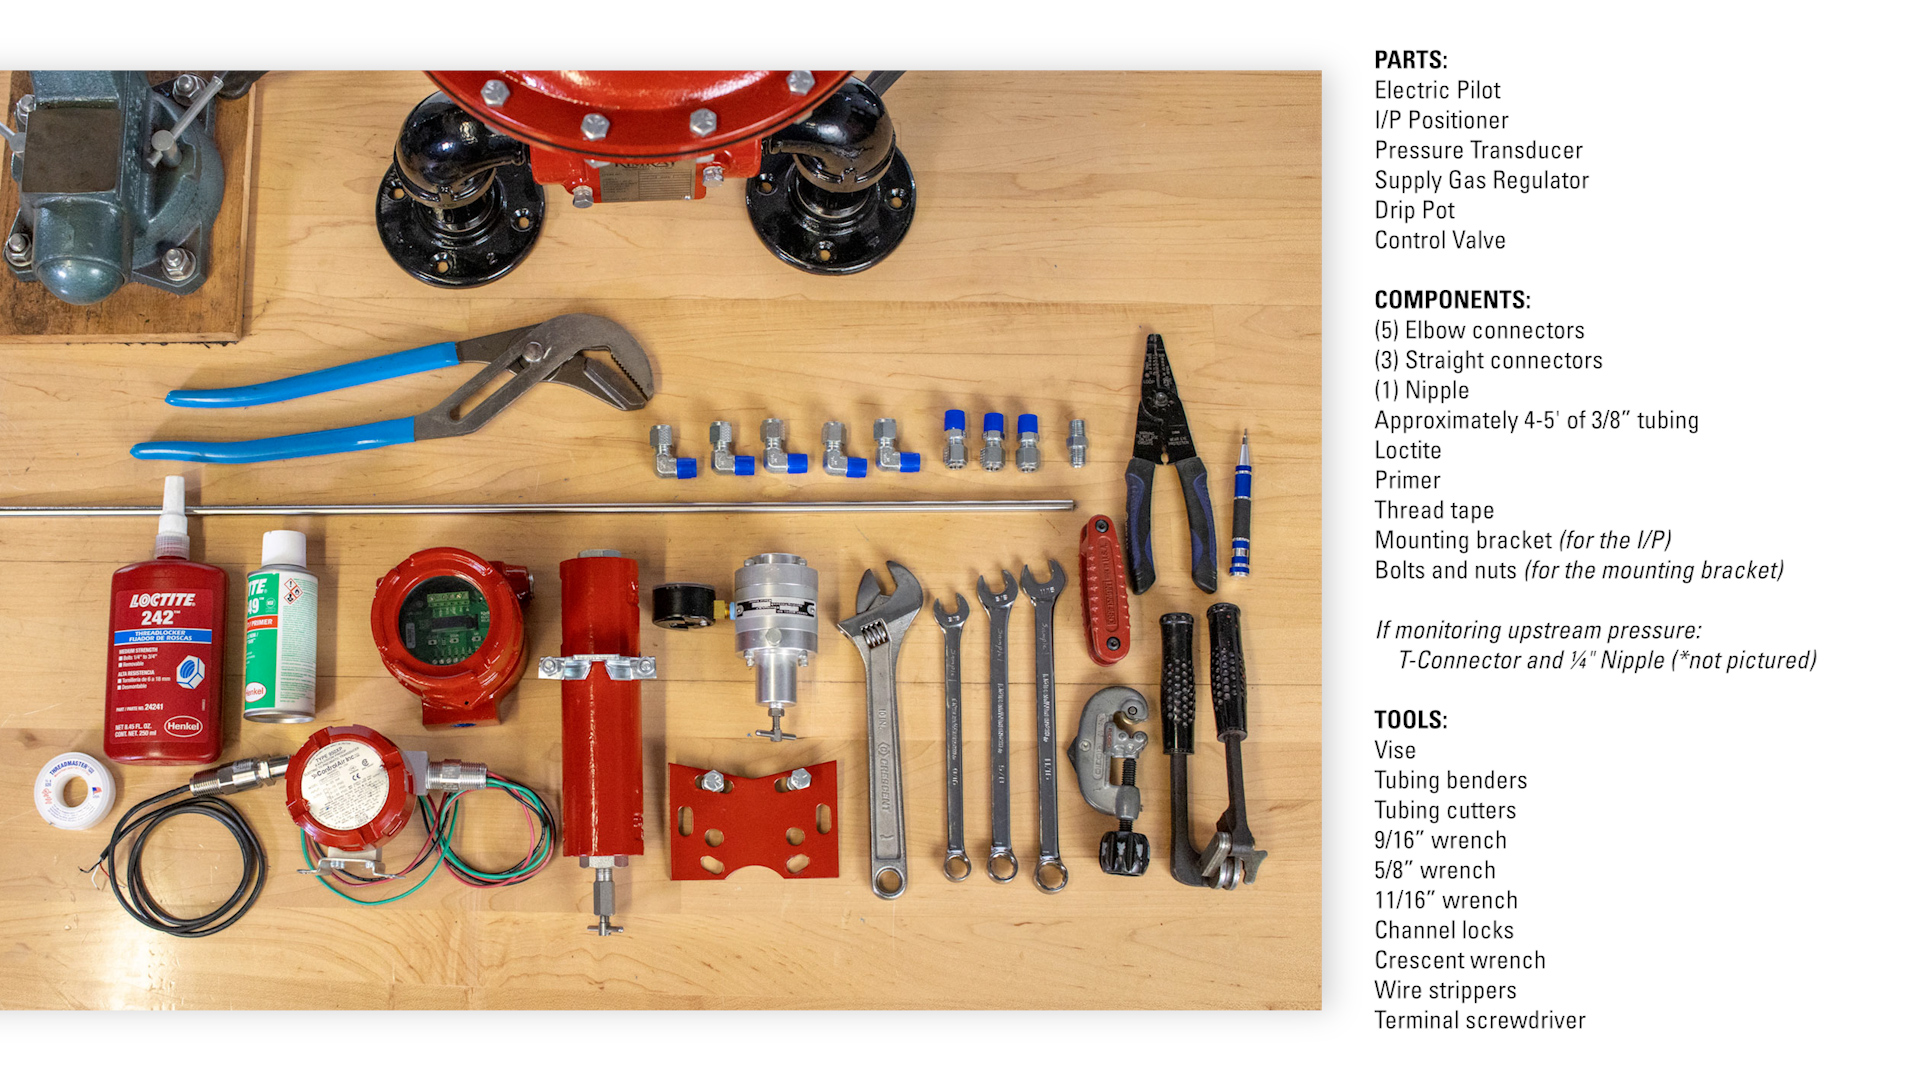
Parts, Components and Tools Needed
6.2 Parts, Components and Tools Needed
Parts
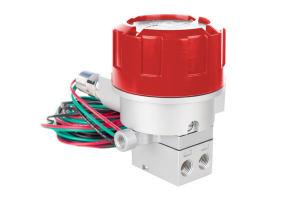
Electric Pilot
I/P Positioner
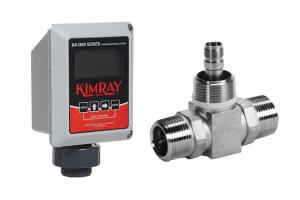
Pressure Transducer
Supply Gas Regulator
Drip Pot
Control Valve
Components
Connectors:
(5) Elbow Connectors
(3) Straight Connectors
(1) Nipple Connector
Approximately 4-5' of 3/8” Tubing
Loctite
Primer
Thread tape
Mounting Bracket (for the I/P)
Bolts and Nuts (for the Mounting Bracket)
If monitoring upstream pressure:
T-Connector
Additional ¼" Nipple
Tools
Vise
Tubing Benders
Tubing Cutters
9/16” Wrench
5/8” Wrench
11/16” Wrench
Channel Locks
Crescent Wrench
If doing electrical hookup:
Wire Strippers
Terminal Screwdriver
Installing Fittings
First, we’ll install the fittings into each component, then mount them to the valve body.
For all tubing connections, apply primer and Loctite. For all non-pressurized, threaded connections (nipple from I/P to YEP & YEP to transducer connections), use thread tape.
Put the I/P in a vise.
Using a crescent wrench, mount a straight connector in the inlet side of the I/P on the same side as the wires.
Mount another straight connector in the opposite side outlet.
Remove the two ¼" plugs from the valve body and use them to plug the remaining open inlet and outlet of the I/P.
Remove the I/P from the vise and insert the Supply gas regulator.
Put a nipple in the input of the SGR and a straight connector in the output of the SGR.
Now remove the SGR and put the drip pot in the vise.
Thread the nipple of the SGR into the drip pot.
Put an elbow in the inlet of the drip pot.
Put the pressure transducer in the vise.
Now, install an elbow in the inlet of the pressure transducer.
Secure the valve. If you use a vise, mount the body so that you can still access the ports, leave room so you can install the connectors and tubing later.
Install an elbow connector into the upstream and downstream of the valve body.
Install an elbow connector on the underside of the valve actuator.
Mounting the Components
With the fittings attached, now we’ll mount the components to the valve.
Using 9/16” and 11/16” wrenches, bolt the bracket for the I/P to the topworks. Do not fully tighten the bolts as it will help when installing the tubing later.
Bolt the I/P to the bracket.
Use a 7/64” Allen wrench to remove the board of the electric pilot so you can feed the wires through.
Now, mount the electric pilot to the I/P. Apply thread tape clockwise around the thread of the I/P nipple. (When the fitting is connected, the fitting is installed the same clockwise direction, sealing the fitting & not peeling back.)
Then attach the pressure transducer to the bottom of the pilot.
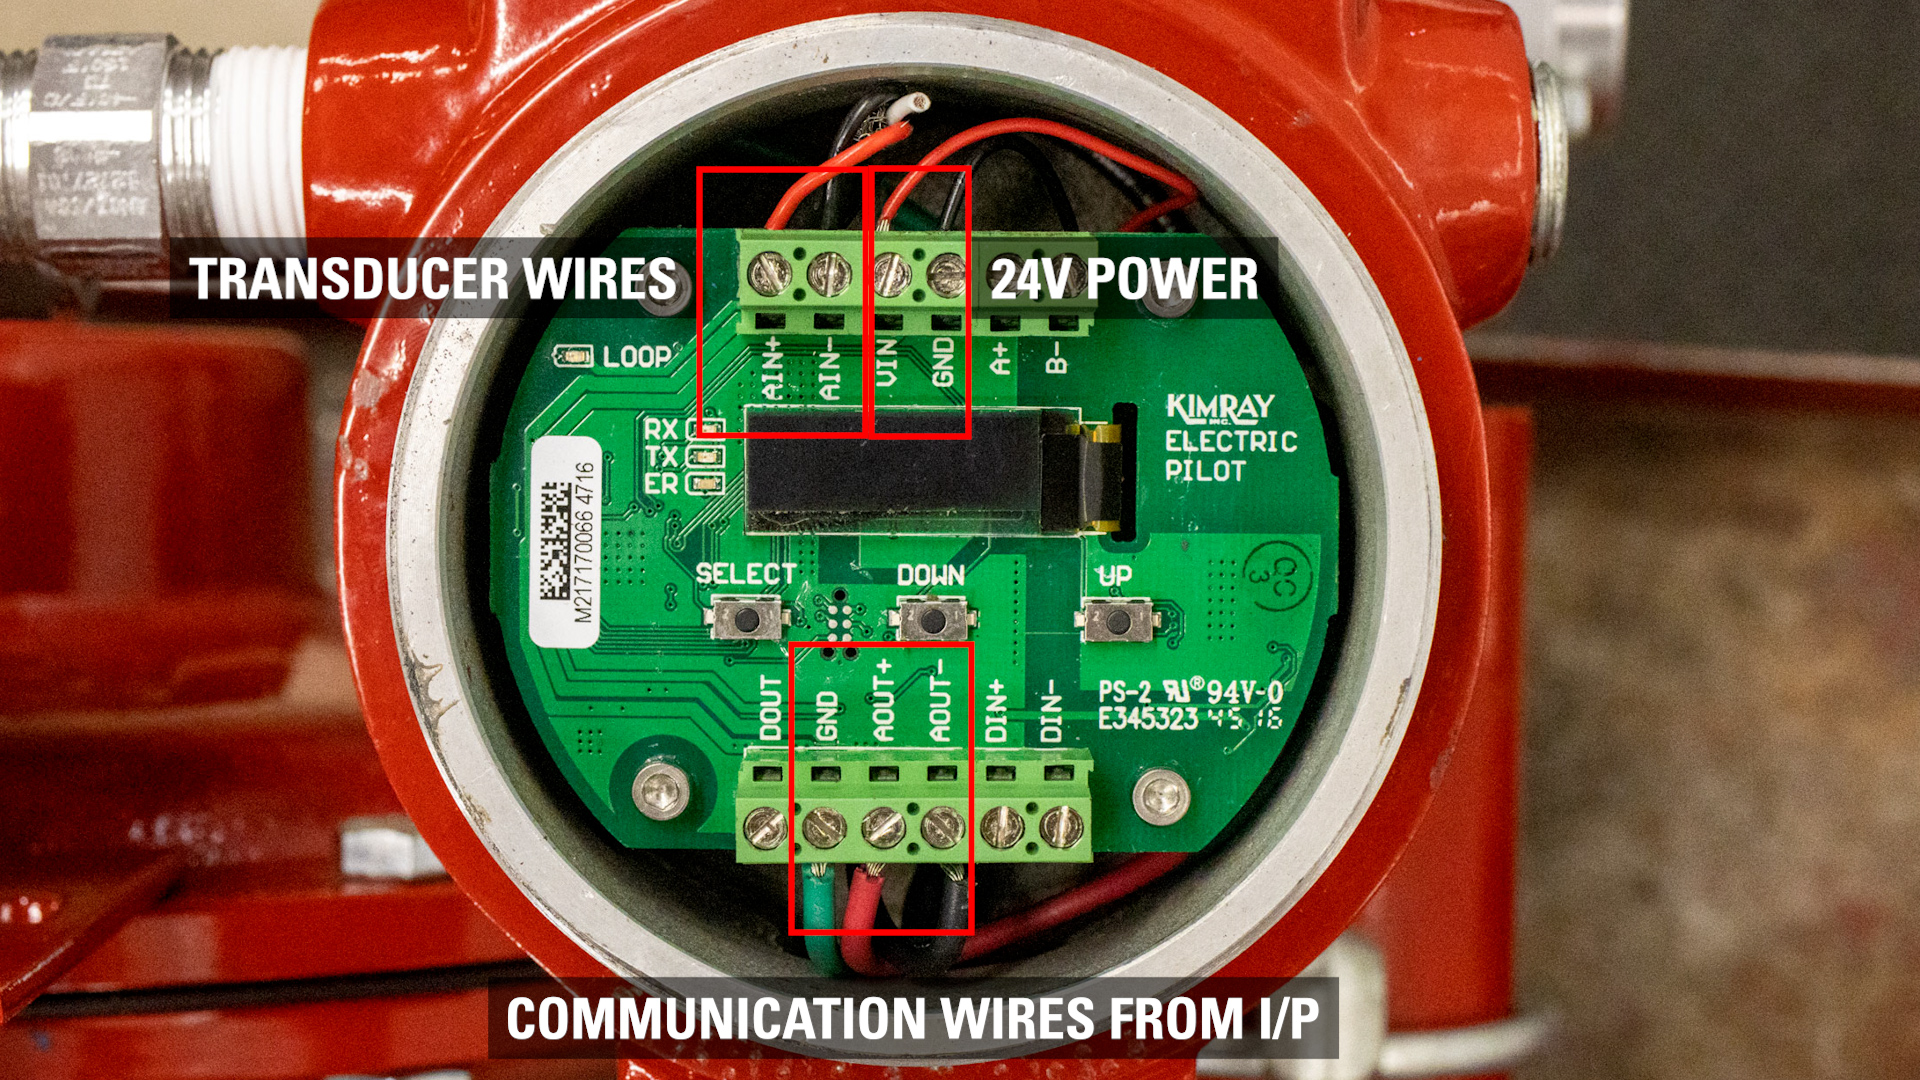
Wiring the Pilot
Next hook up the wires from the I/P to the pilot.
Use wire strippers to remove the insulation of the wires.
Connect the communication wires from the I/P to the analog output of the electric pilot. (AOUT+ & AOUT-)
The analog IN (AIN+ and AIN-) is where you connect the transducer to the pilot.
The VIN port and GRN is where you would connect 24V power to the pilot. If you’re building this package prior to installation, leave these open for now.
6.3 Wiring for Electric Pilot
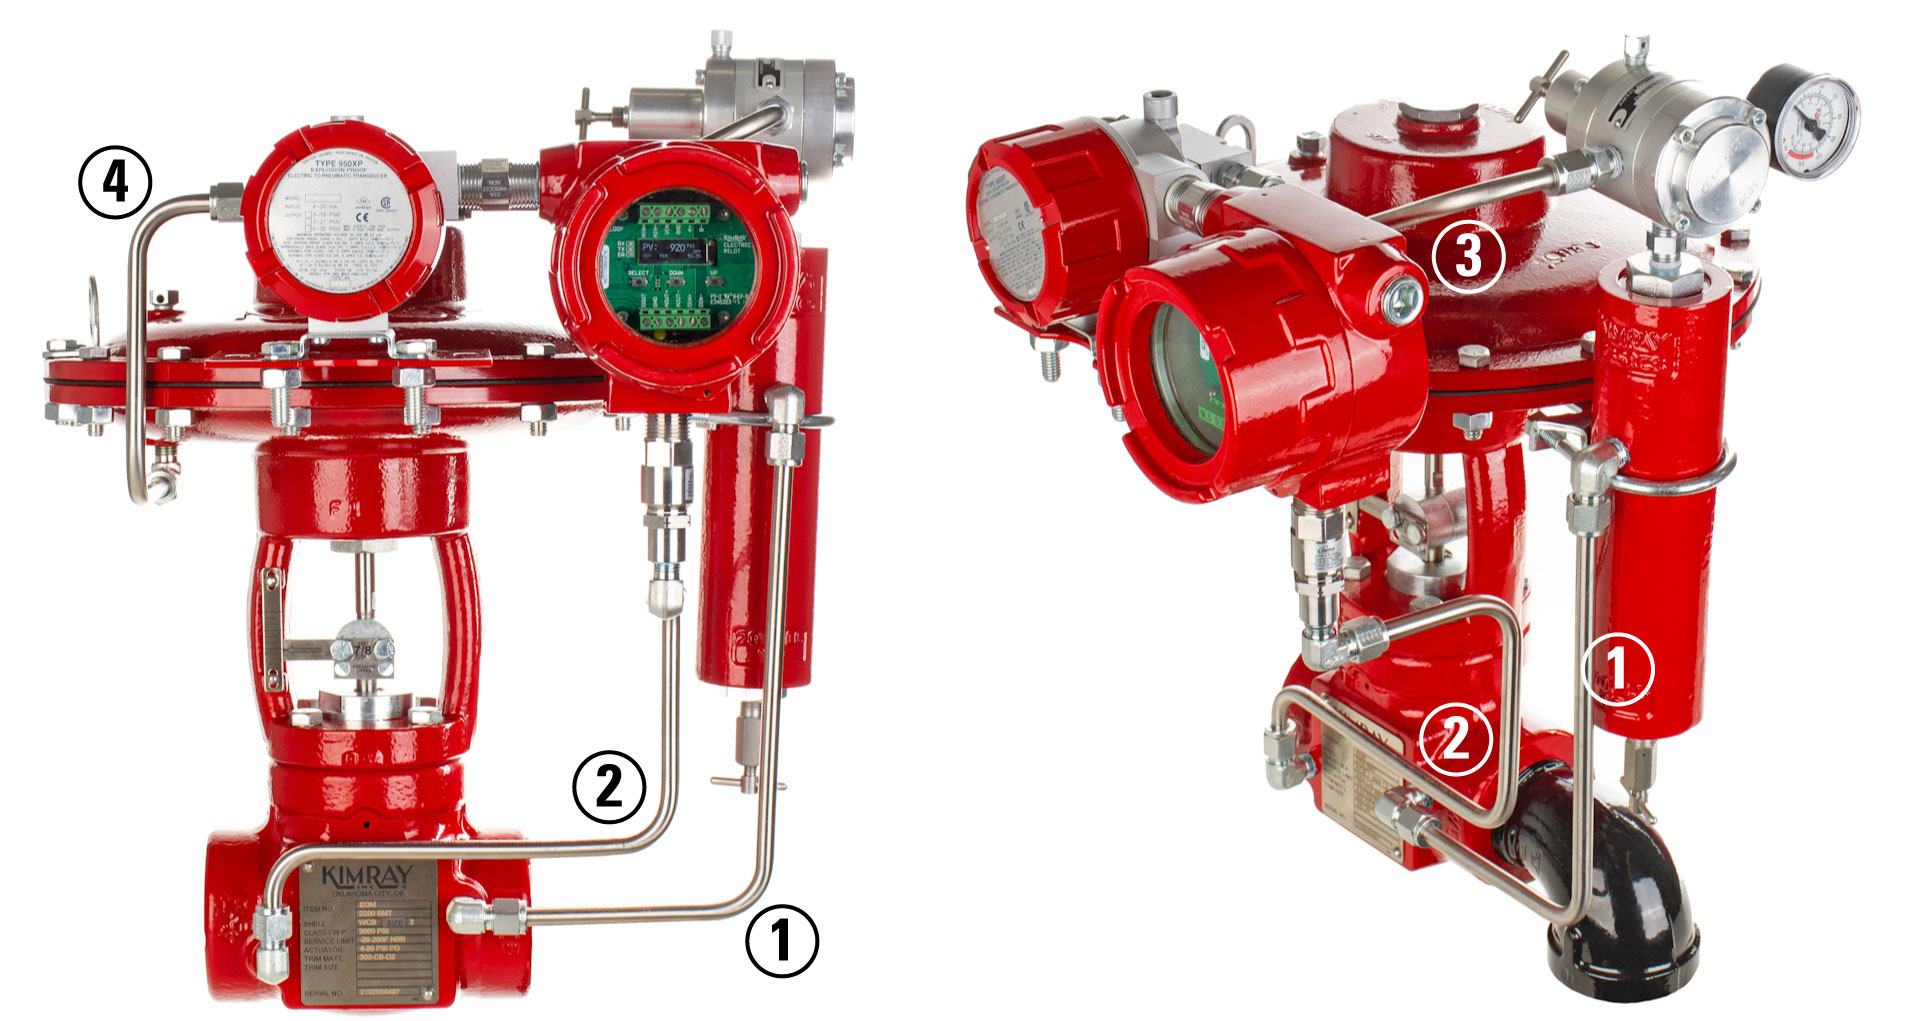
Tubing and Mounting
Mount the drip pot and SGR onto the valve. The output of the SGR should be pointing toward front of the valve.
First, connect tubing from the upstream port of the valve to the drip pot.
Then tube downstream pressure to the pressure transducer.
Connect tubing from the Supply Gas Regulator to the I/P.
Tube the I/P to the valve actuator.
Tighten the bolts on the mounting bracket now that the tubing is connected.
6.4 Tubing Locations for an Electric Valve Controller
To monitor upstream pressure (for back pressure), remove the tubing to the downstream (2). Instead connect the upstream tubing (1) to the transducer by adding a ¼" nipple and T-connector to the transducer. Then tube the T-connector to the drip pot.