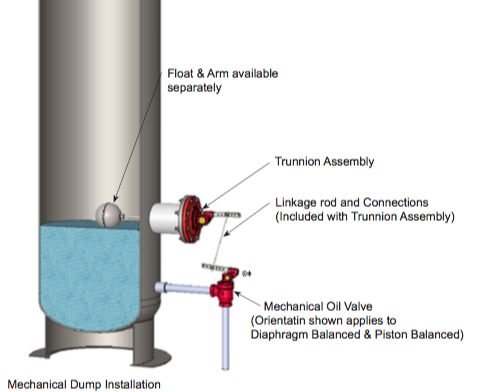
To control the production fluid level in process equipment, many producers use a mechanical setup consisting of four primary parts:
- A float and float rod, inserted into the vessel
- A trunnion assembly, on the exterior of the vessel
- A linkage rod, connecting the trunnion arm and dump valve arm
- A Lever Operated Dump Valve, which opens and closes to move the fluid
As the liquid level in the vessel rises, the float rises, which lowers the arm on the trunnion. Via the linkage rod, this opens the liquid dump valve and sends liquid out of the vessel.
As the liquid level in the vessel falls, the float lowers, which raises the arm on the trunnion. This closes off the liquid dump valve and stops the flow of liquid from the vessel.
The dump valve regularly cycles through this routine, adjusting its opening to ensure that the rate of liquid flowing into the vessel matches the rate out of the vessel.
Float Ball in 2-Phase Separators
On a 2-phase separator, the float ball remains empty. This floats on top of the production fluid and does not need to sink through one liquid to measure another liquid below.
Float Balls in 3-Phase Separators for Interface
On a 3-phase oil and gas separator, producers use two float-operated liquid level controllers to maintain oil and water levels in the vessel.
- The first float is for oil level (empty)
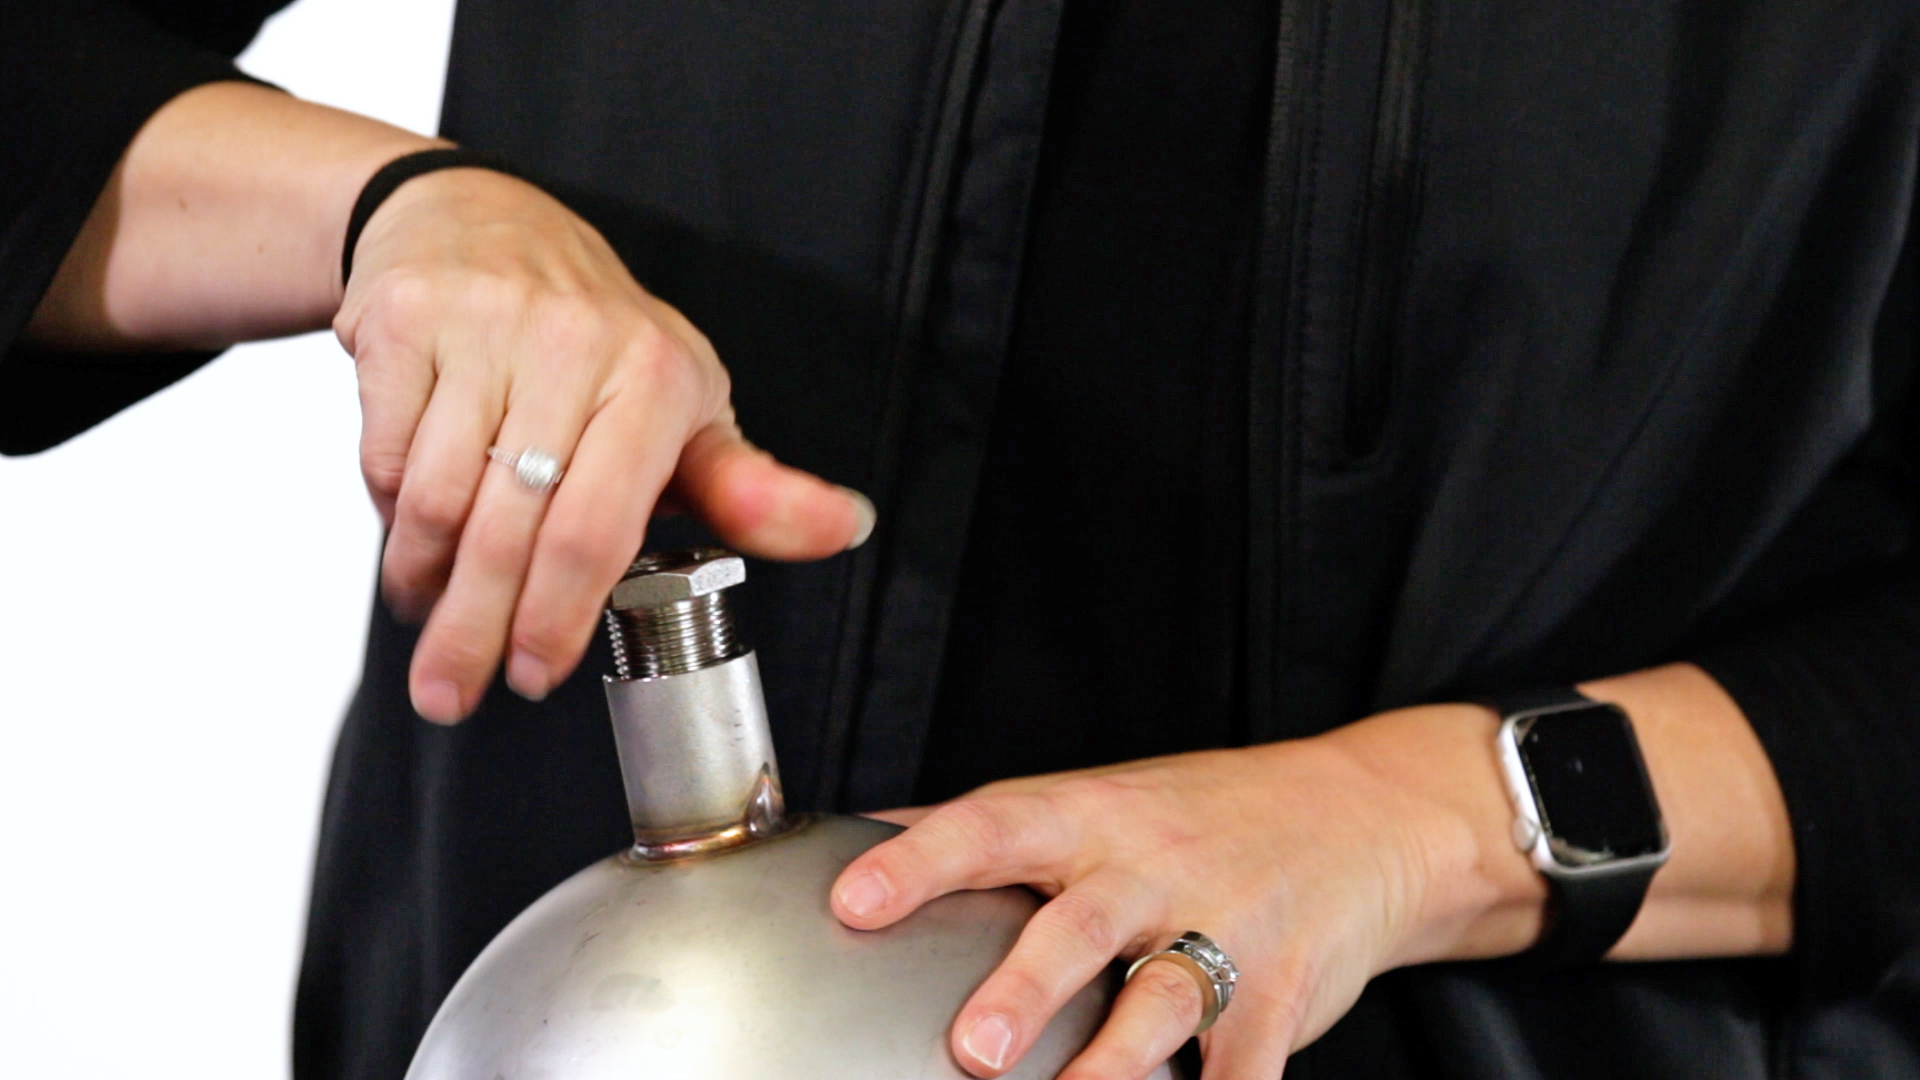
This float is empty and will sense the oil level by floating on top of it. This will work together with a dump valve to maintain the set oil level height. - The second float is for interface level (weighted)
This float must be weighted to sink through the oil and sense the level where the oil and water meet.
Oil & Water Interface: 2 Critical Adjustments
How to weight the float for the interface control
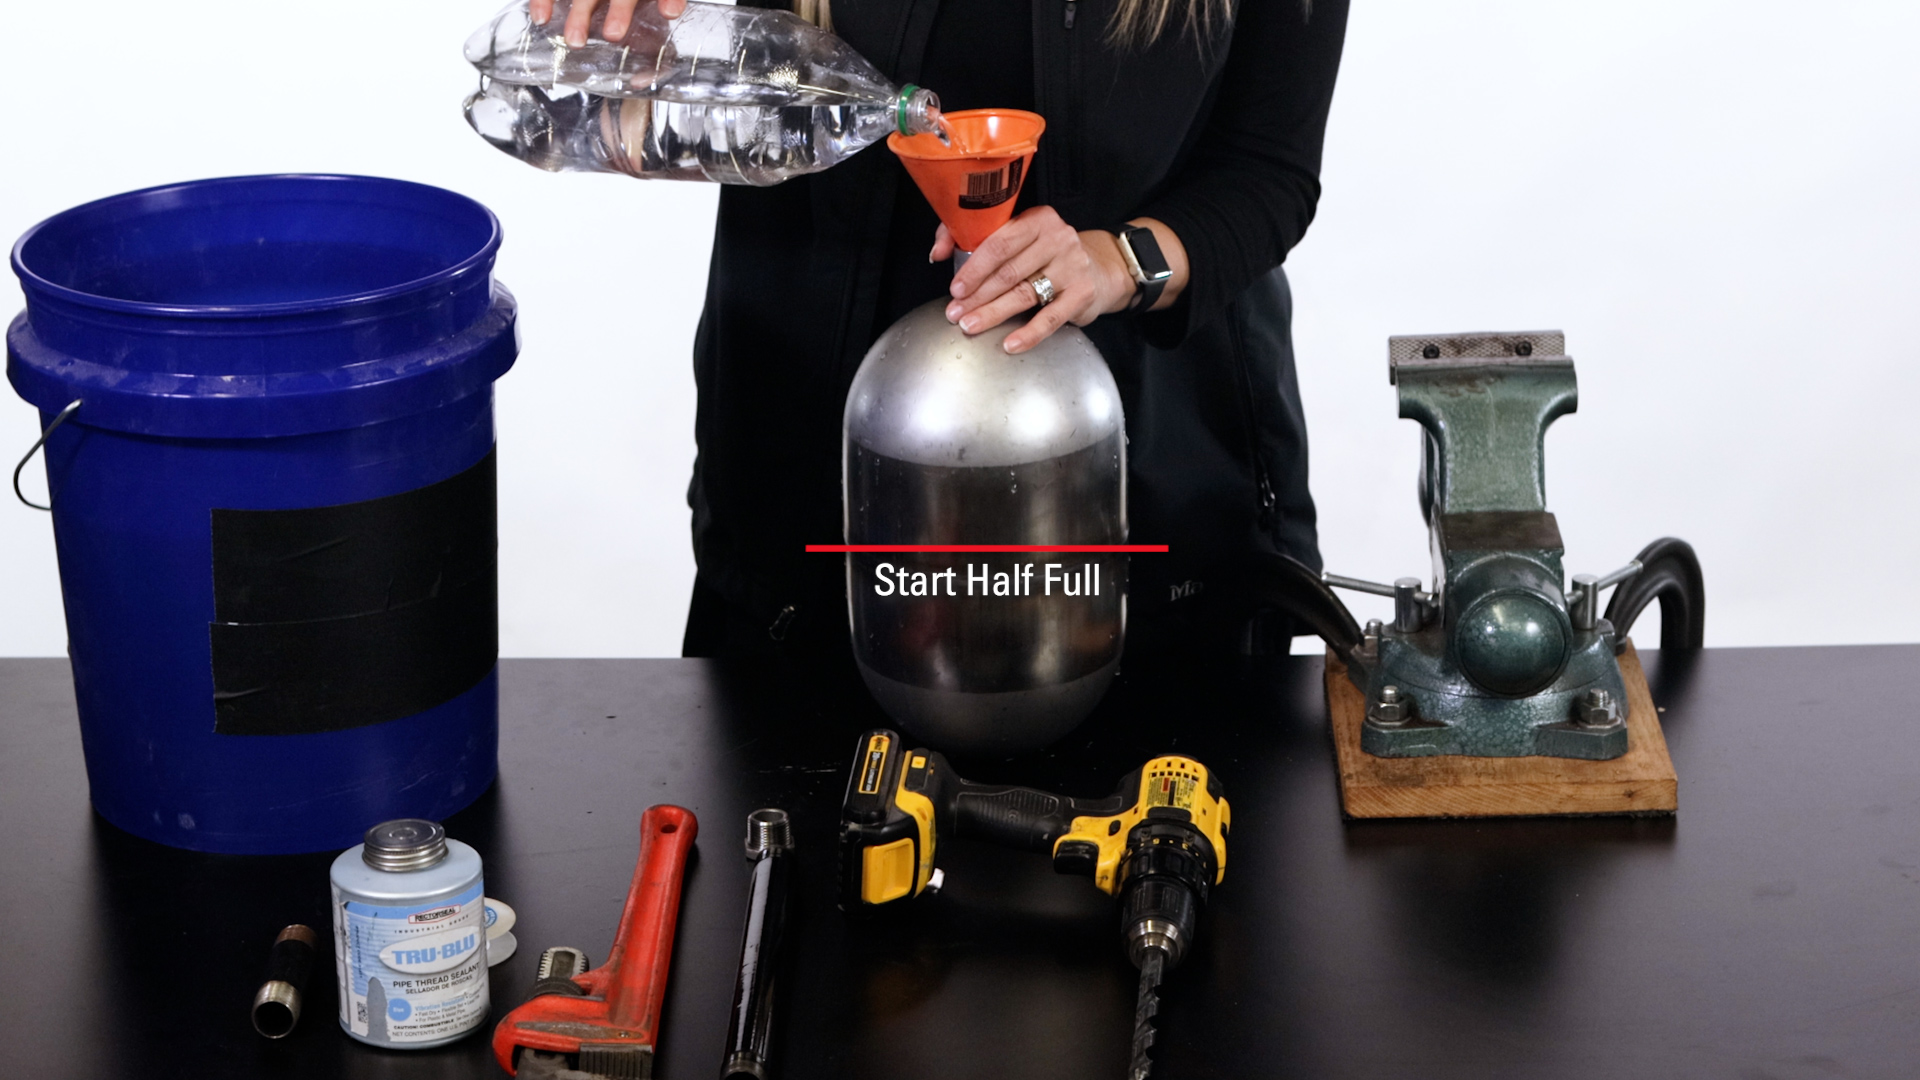
What you’ll need:
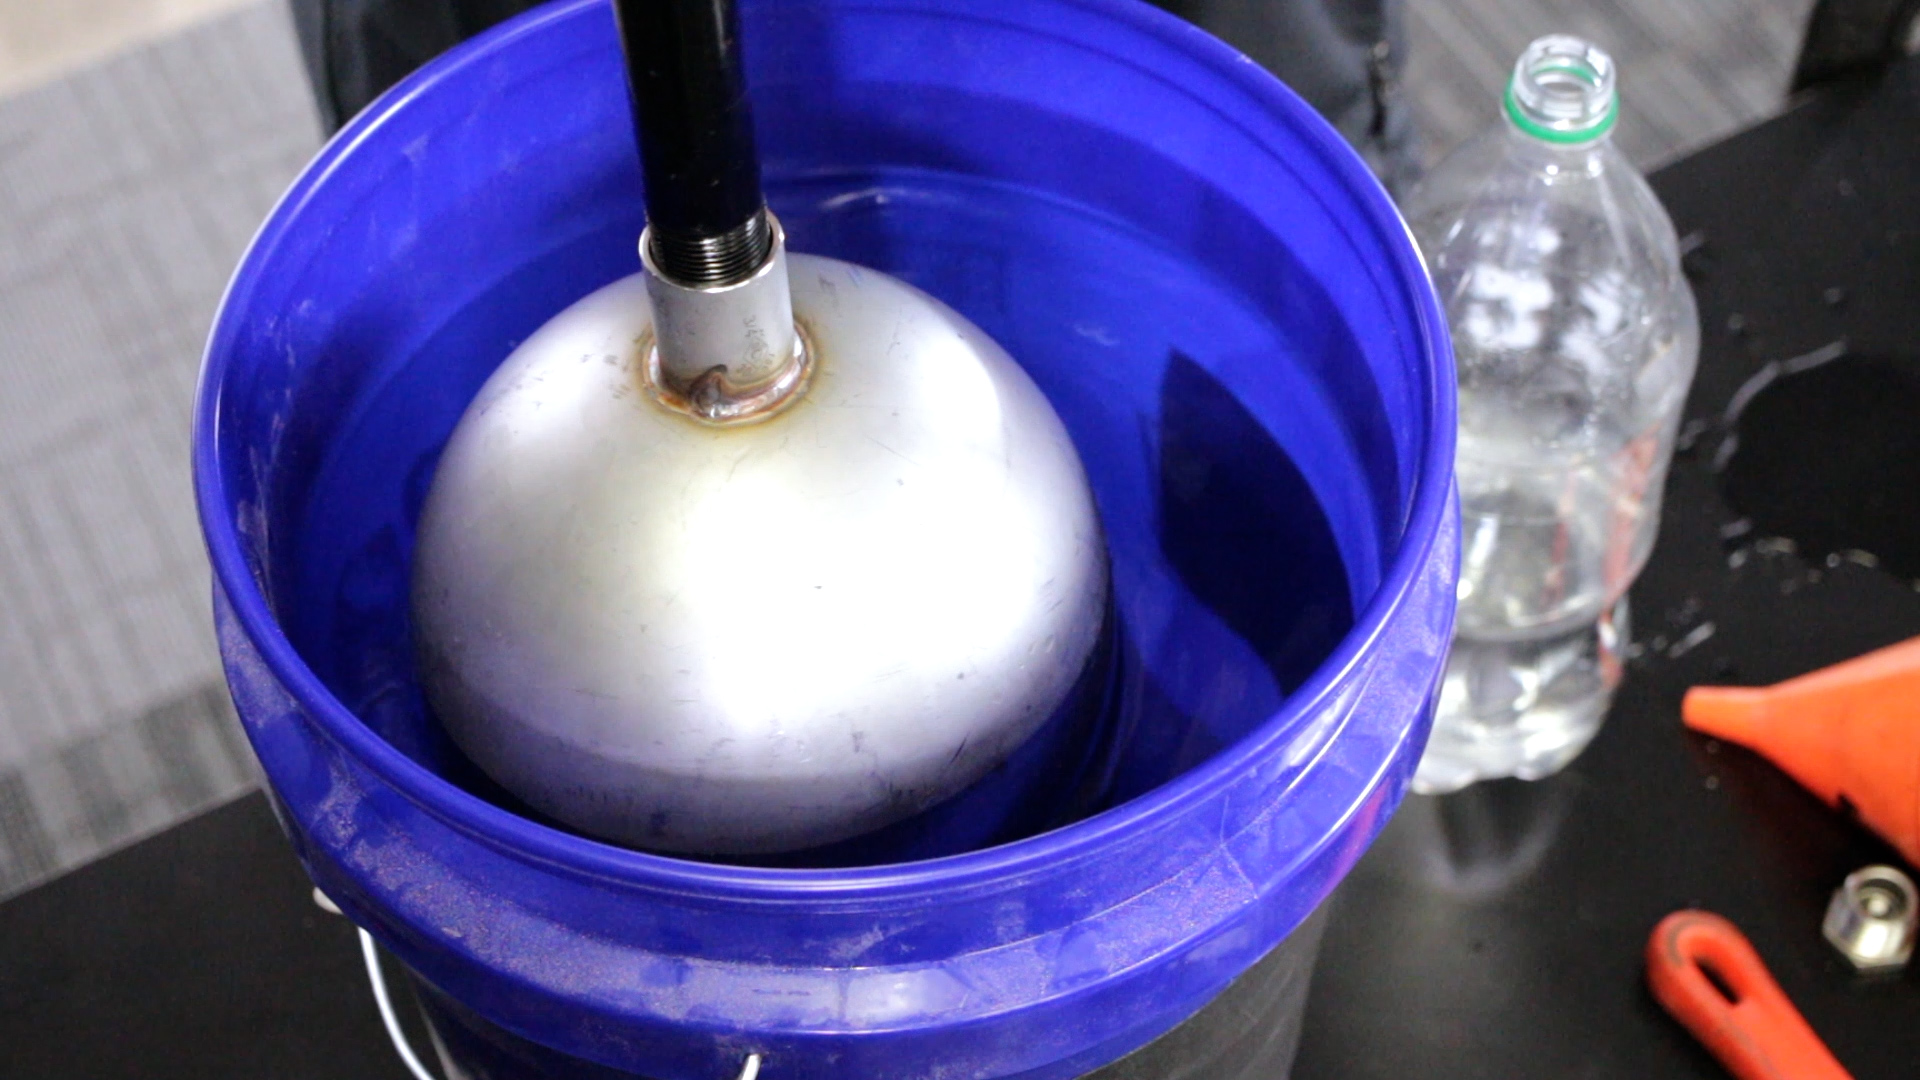
- 5-Gallon bucket (minimum) filled with water
- Dry sand, BBs, or production fluid (to fill the float)
- Drill
- 1/2" drill bit (maximum)
- Metal pipe nipple (to protect threads on float)
- Plastic funnel
- Teflon tape
1. Thread a short metal pipe nipple onto the float ball to protect the threads
This will prevent incidental damage and ensure a good seal.
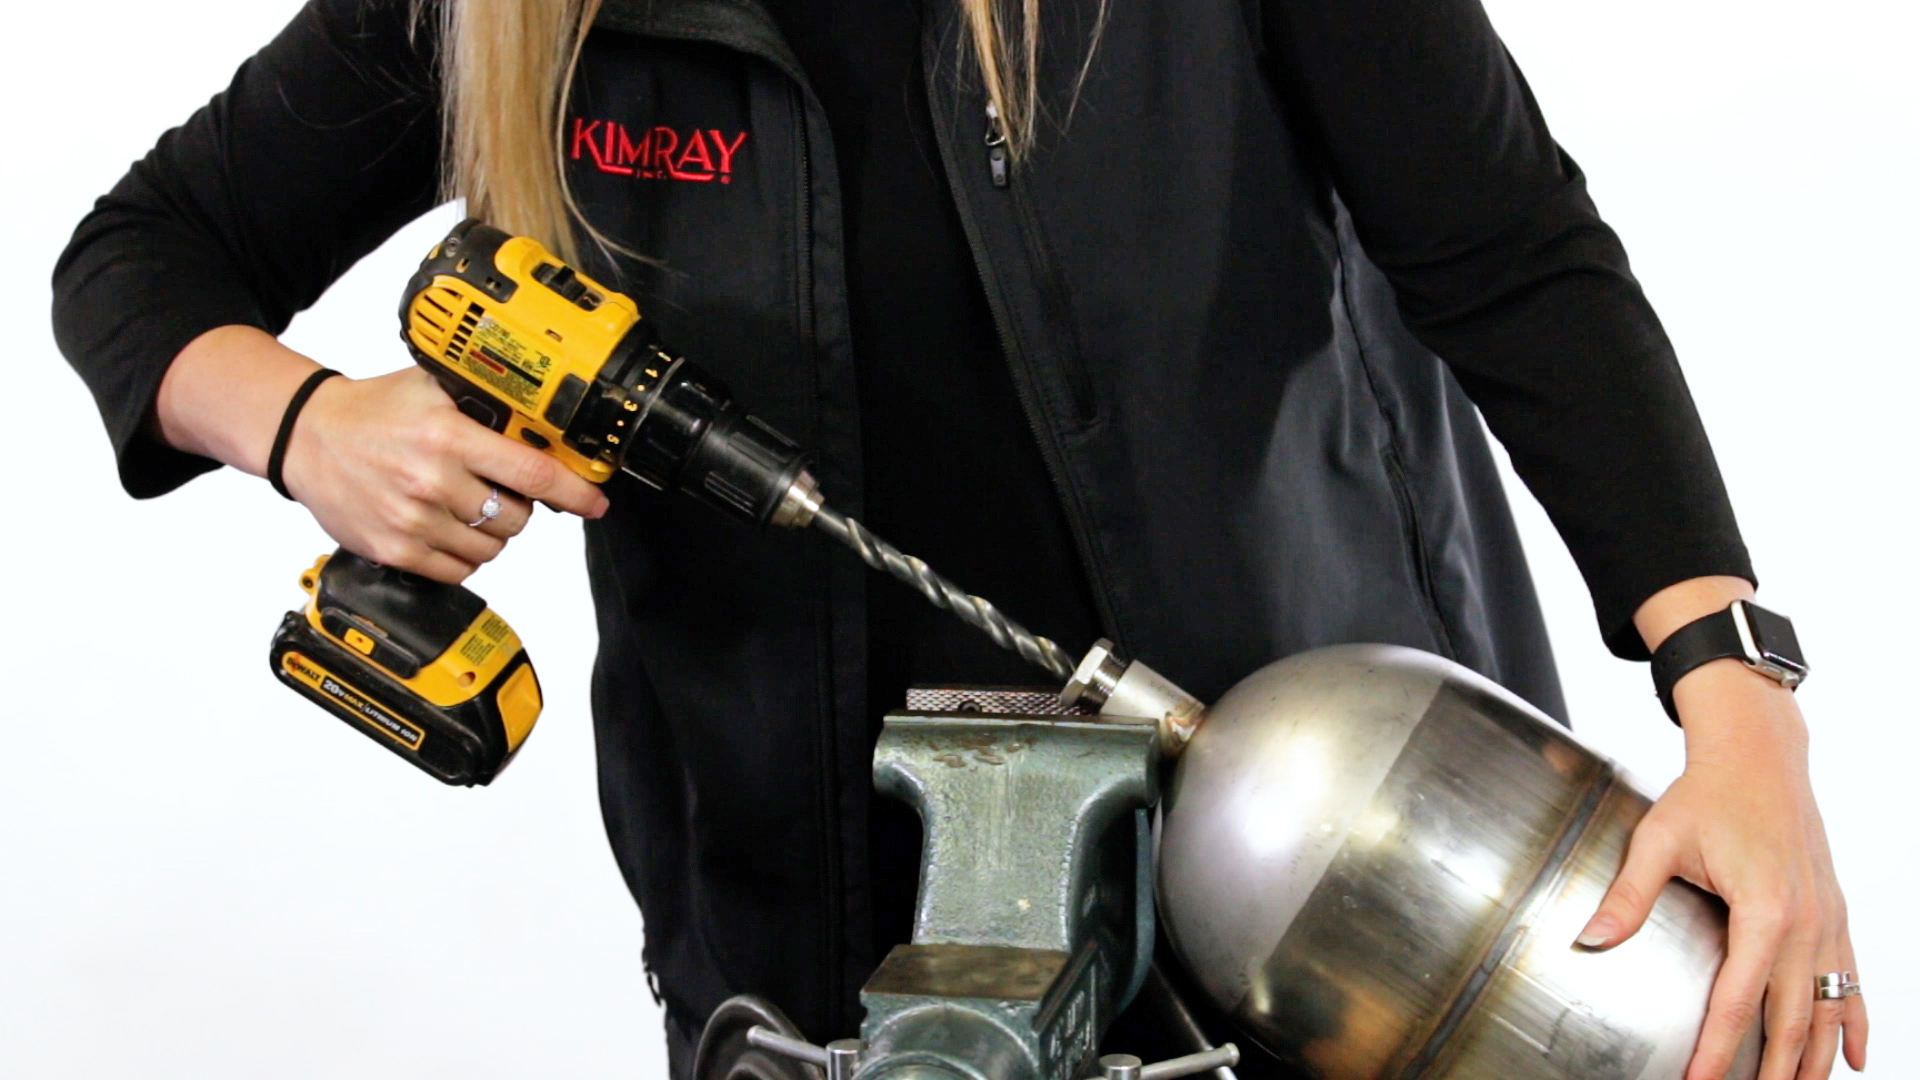
2. Drill a hole through the end of the float ball where the coupling is
Typically a 1/2" hole will work. This is where you will pour in the sand or water.
3. Pour water, sand or BBs into the float ball
Start by filling it halfway full. This is a trial-and-error process, and the weight needed will vary. If using sand, make sure it is dry. If you overfill, it’s much easier to remove dry sand from the float ball than wet.
4. Insert the float ball and float rod into a bucket of fresh water
- If the float has a surface area above the water, it’s not heavy enough.
- If the float is fully submerged to the coupling and still buoyant, you’re ready to seal the threads.
TIP: The weight of the rod arm here is slightly heavier than it will be inside the vessel, where roughly half of its weight is supported by the trunnion assembly. Make sure the float is submerged to the float collar to counter this weight once installed.
Overall, error on the side of overweighting the float slightly. It’s easier to add a weight onto the arm if and when necessary. If your float is too light initially, future adjustments mean removing the float from the vessel and adding more weight inside.
5. Tape the threads and attach the float rod
Next, tape the threads carefully. The hole drilled in the float collar creates a potential leak path and must be well sealed.
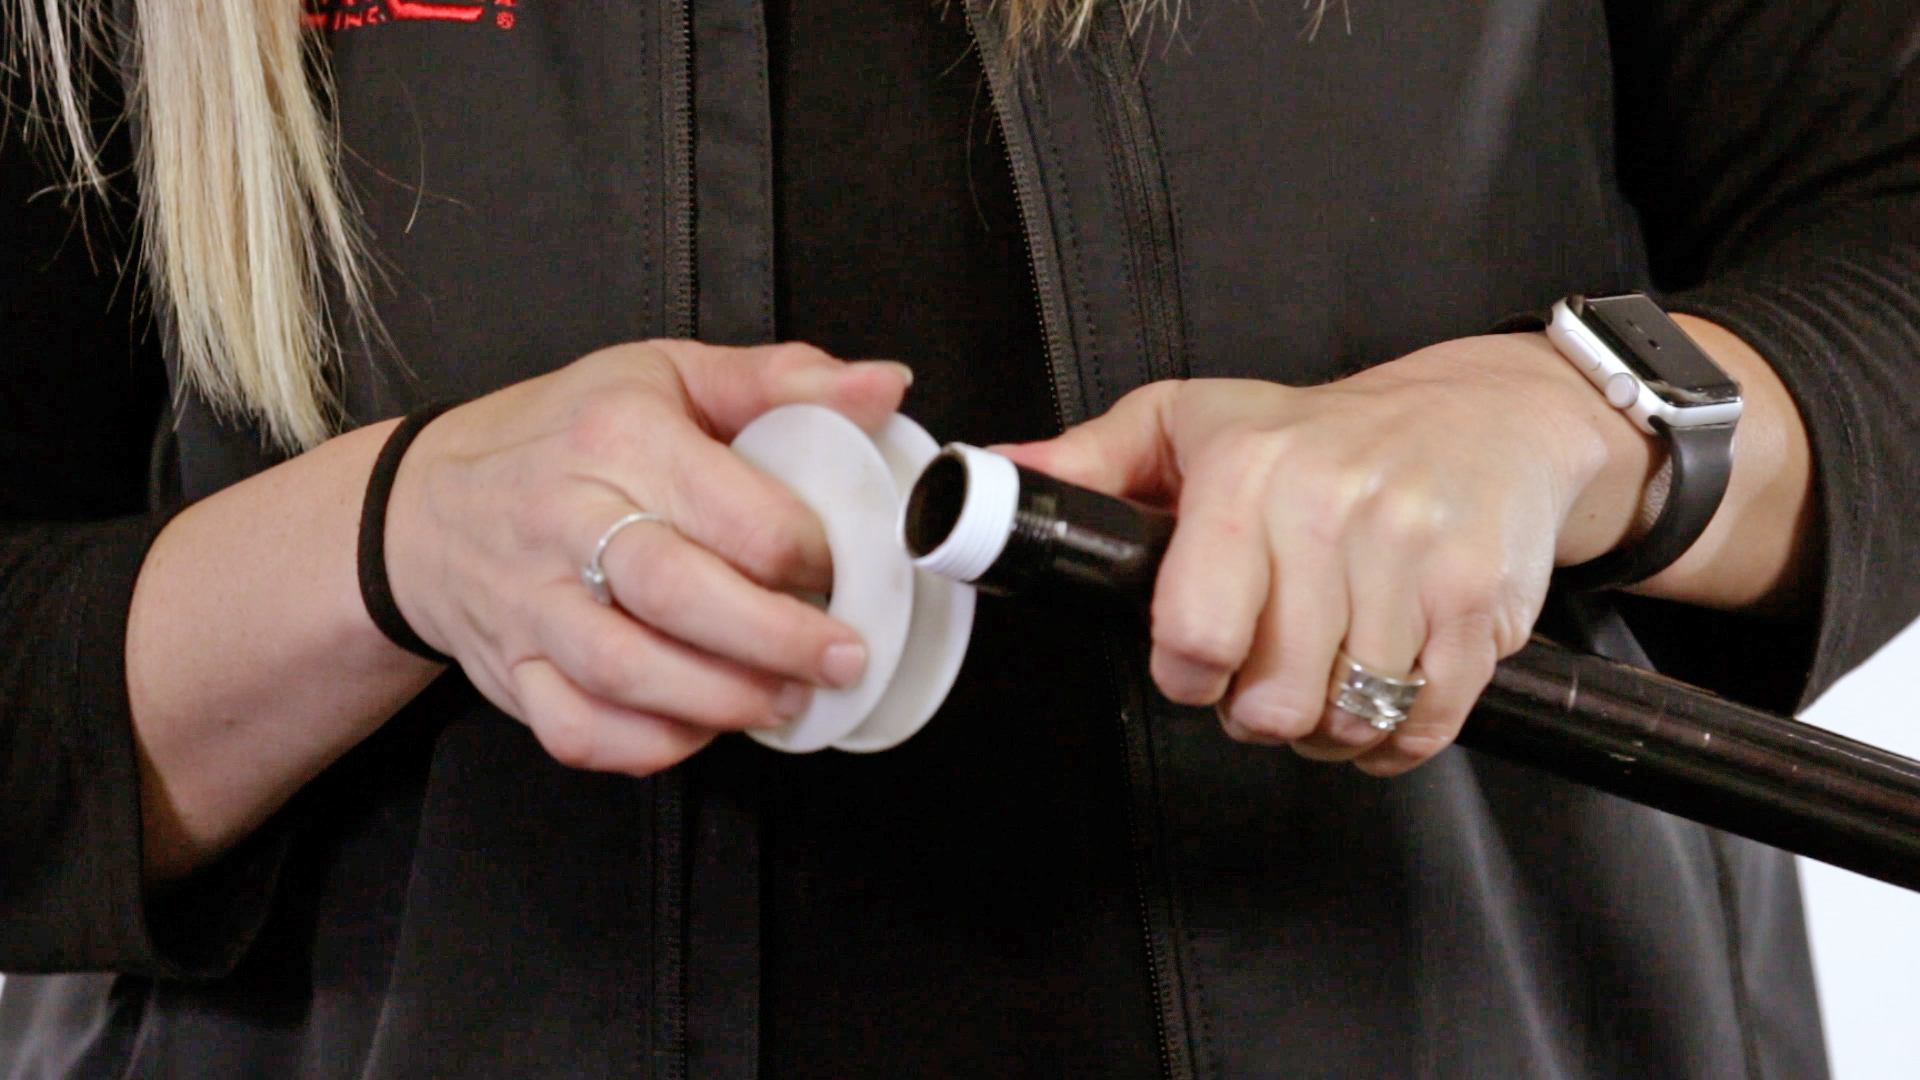
Installation note: Apply pipe sealant before installation. Water can be forced into the float when it is under pressure.
If you have further questions about weighting the float, reference our Liquid Dump Valve Quick Start Guide or reach out to your local Kimray representative.