A High Pressure Control Valve is a versatile solution that features field-reversible topworks for easy field conversions.
Why Reverse a High Pressure Control Valve actuator fail position?
Do you need to reverse the function of a high pressure control valve from fail close to fail open?
For example:
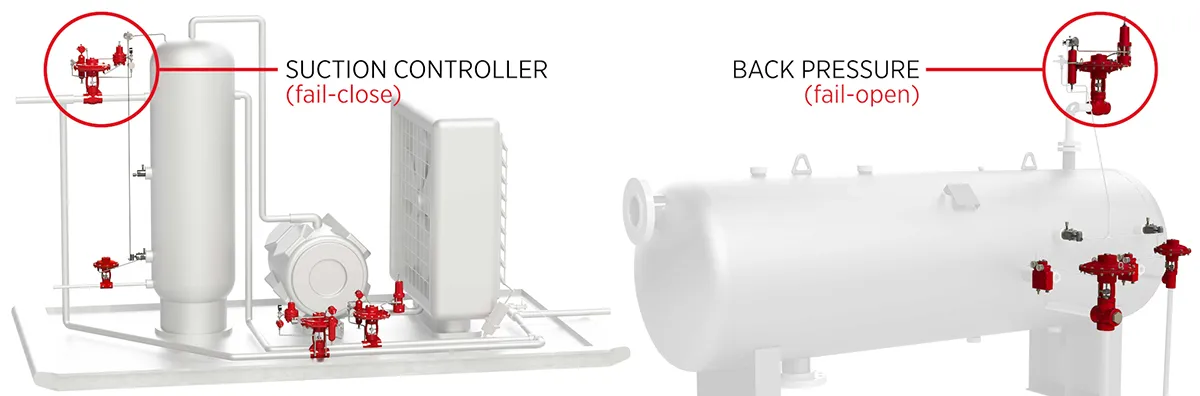
- You've been using a valve as a suction controller on the inlet of a compressor set to fail close operation.
- Now you want to use it for back pressure regulation on a separator, in which case you would want the valve setup to fail open.
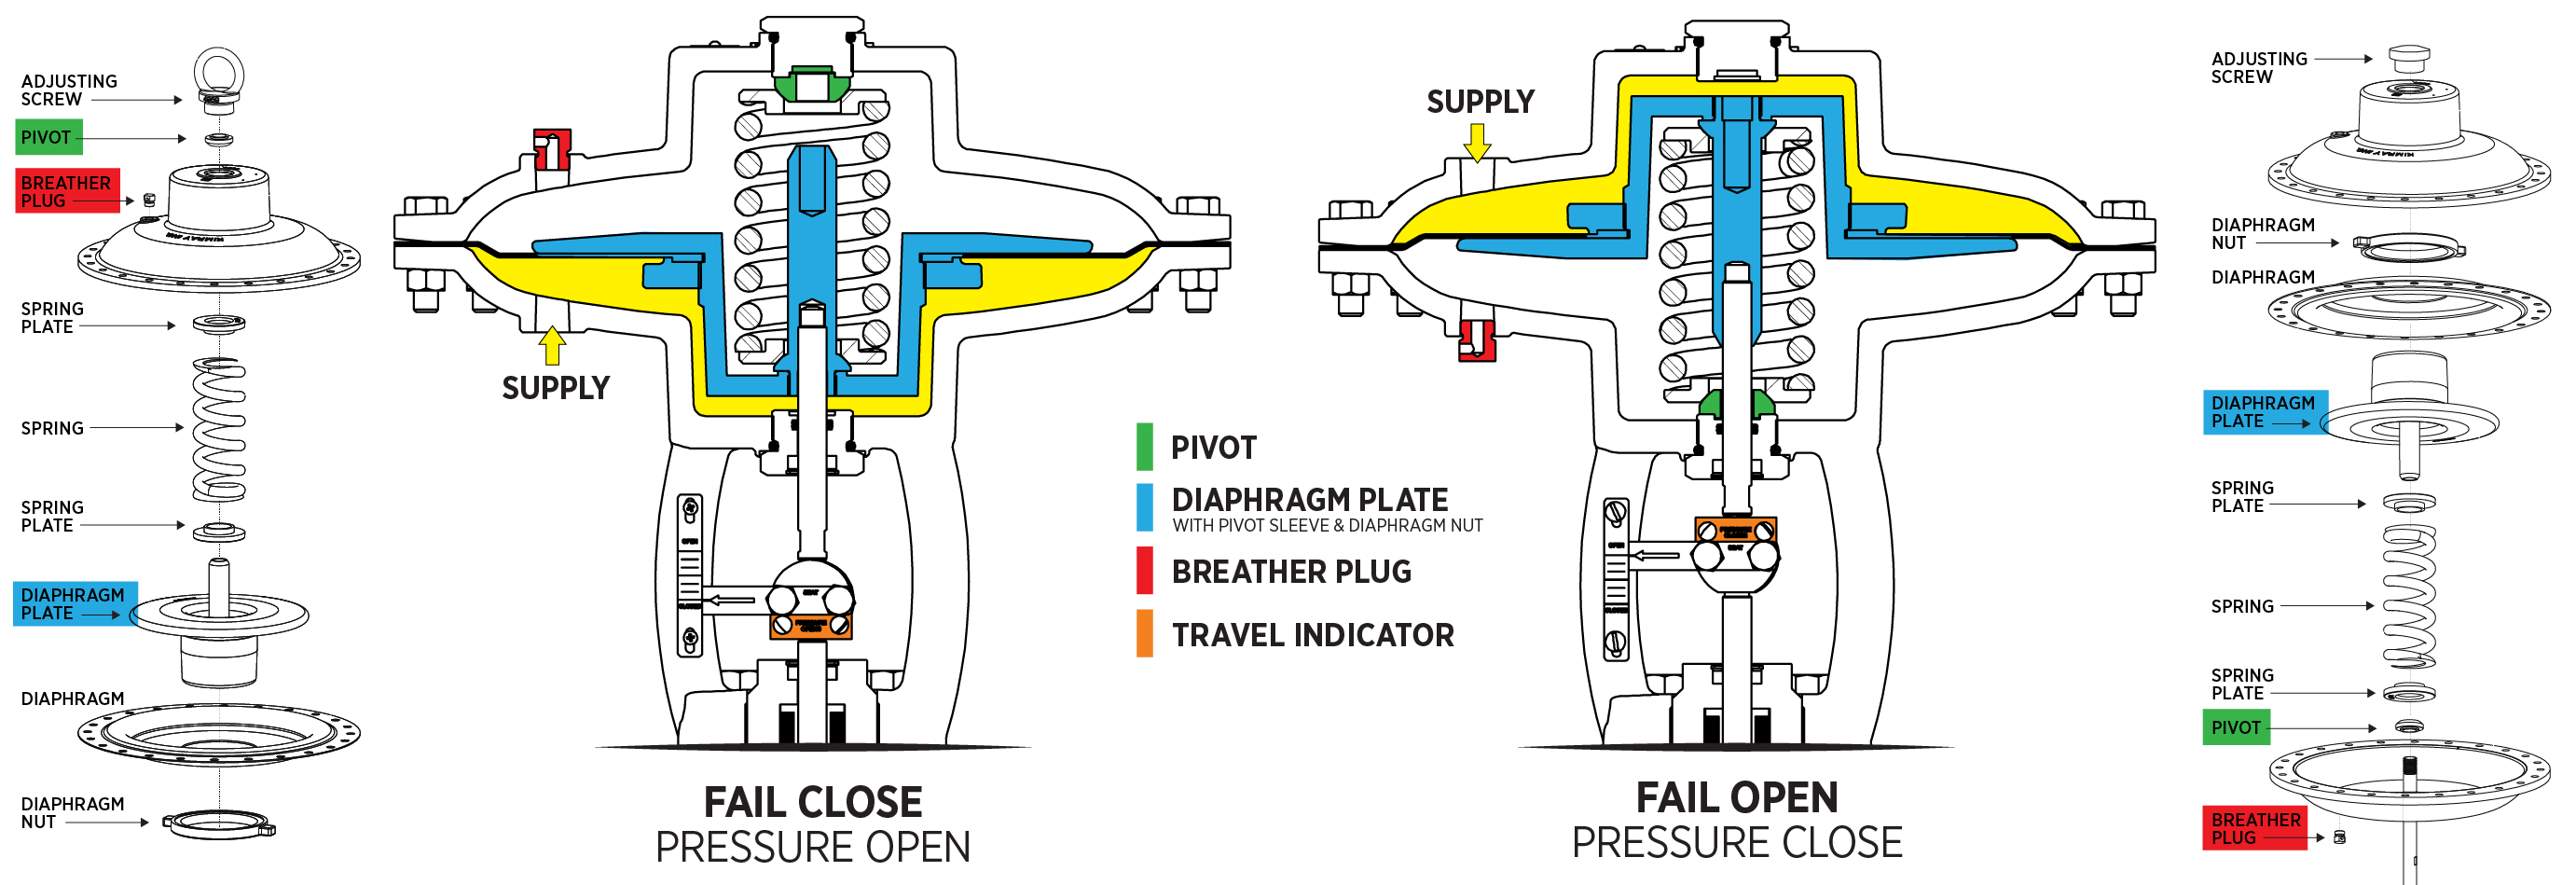
Should Your Valve Fail Open or Close?
In this video, we're going to show you how to easily change the actuator's failure position on a high pressure control valve. This process applies to both stem guided and cage guided models since we’ll only be working on the actuator components of the valve.
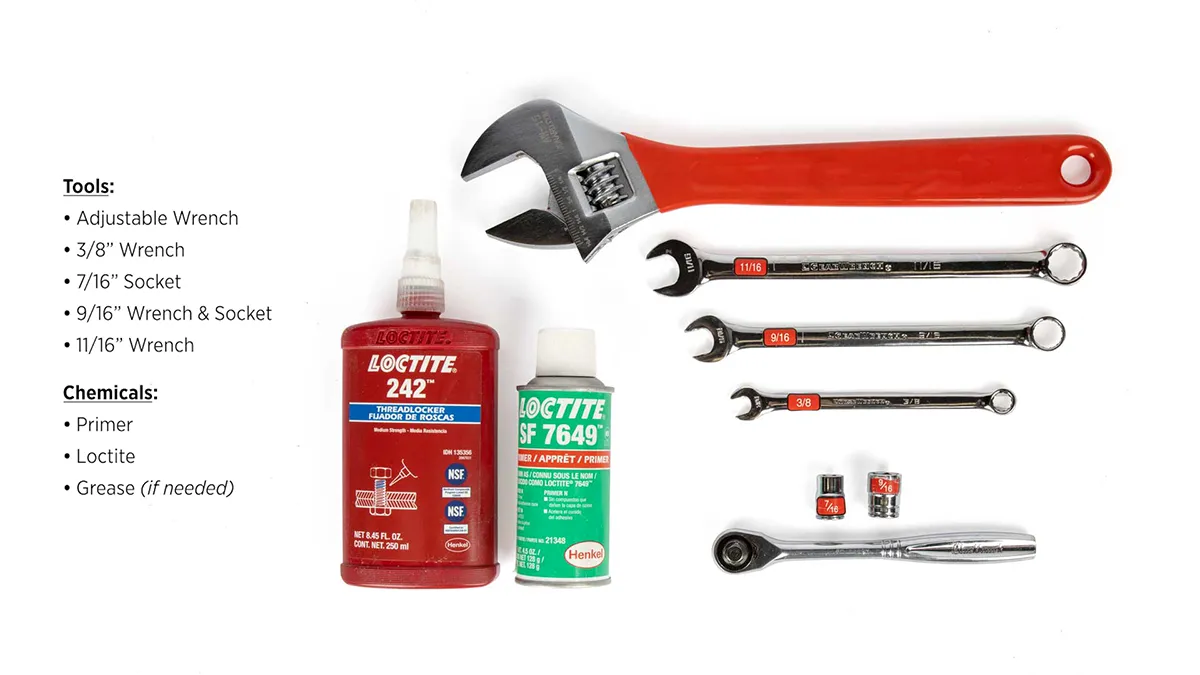
For this 2" conversion, you will need the following:
Tools:
- Large Adjustable Wrench (adjusting screw)
- 3/8” Wrench (upper stem)
- 7/16” Socket (coupling block)
- 9/16” Socket (bonnet bolts & breather plug)
- 11/16” Wrench (bonnet bolt nuts)
Chemicals:
- Primer
- Loctite
- Grease (if needed)
CAUTION: The procedures demonstrated in this video are intended for general informational purposes only. Always follow your company’s safety requirements, policies, and applicable regulations when performing any maintenance or repair.
Before starting any repair or maintenance activities:
- Review and follow all WARNING and CAUTION notes found in the Kimray Installation, Operation, and Maintenance (IOM) guide for your specific product.
- Wear all required personal protective equipment (PPE), including approved eye protection, steel toe safety shoes, and nitrile gloves to protect against exposure to chemicals and other hazardous materials.
-Failure to use appropriate PPE or follow proper procedures can result in serious injury or death.
WARNING: Before any service, be certain that the valve is fully isolated and that all pressure upstream and downstream has been relieved. Use bypass valves or fully shut off the process. Be sure that any operating or instrument gas lines have been disconnected. Never assume that a check valve is fully blocking the downstream line. Never tighten any fitting or the main connections to the regulator while there is pressure on the line.
How to convert from fail-close to fail-open
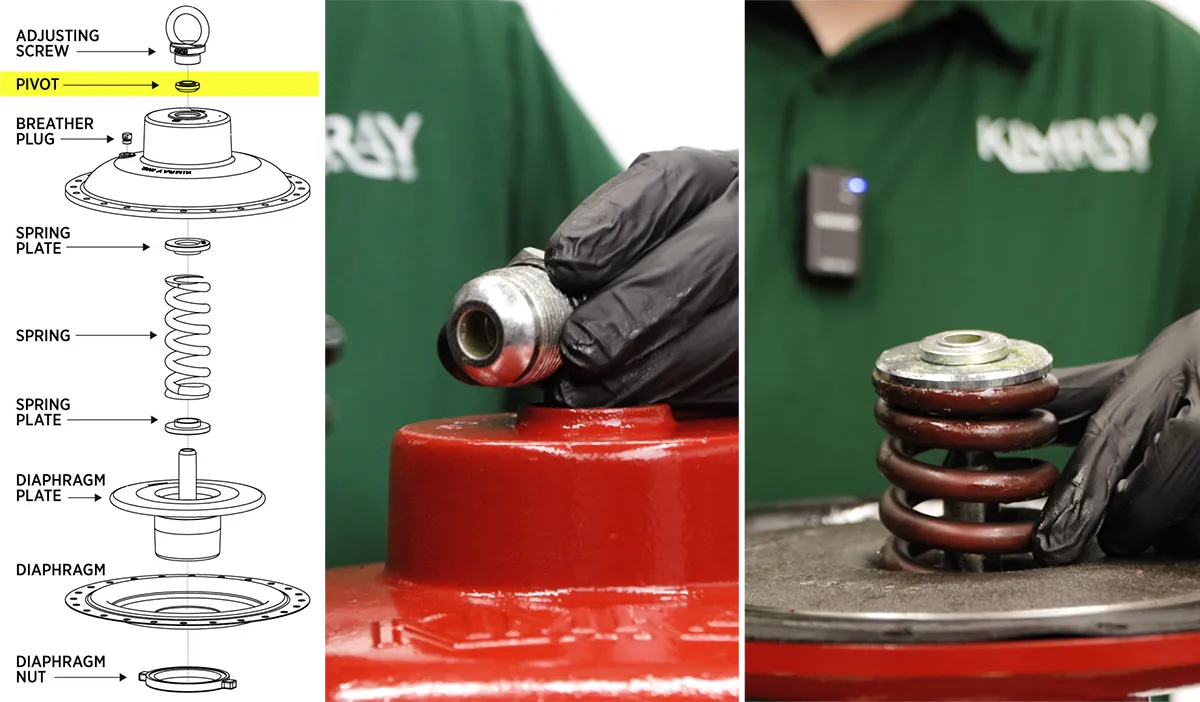
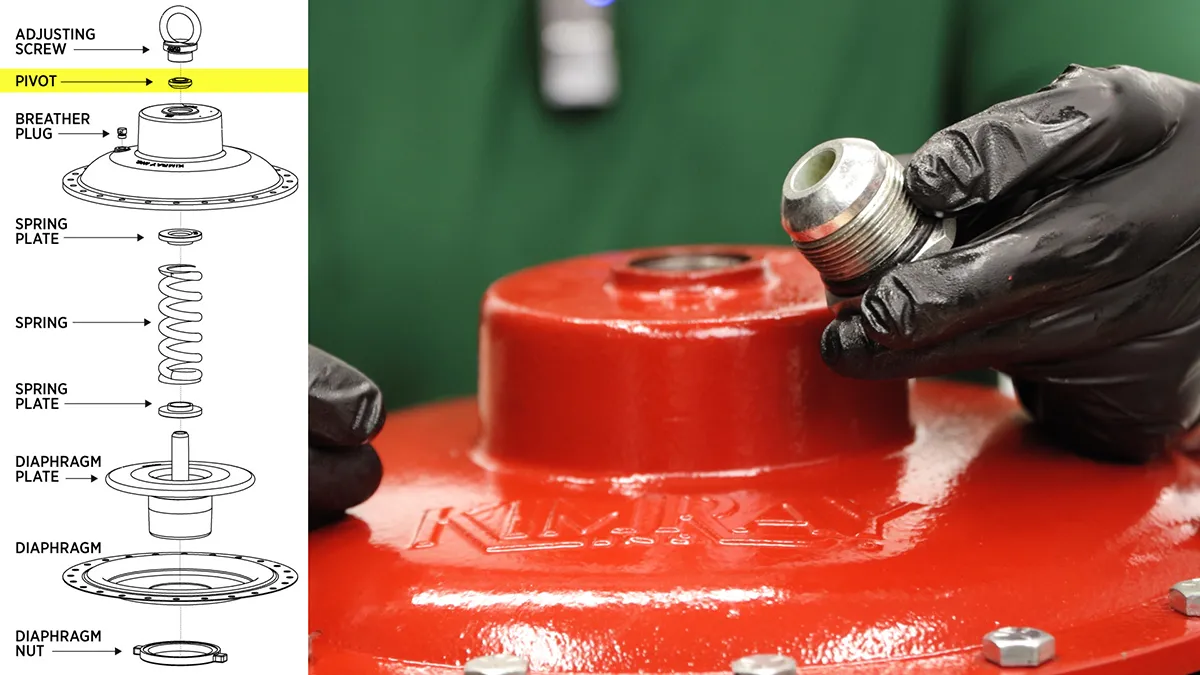
Adjusting Screw, Pivot, Breather Plug, Bonnet, Spring Plates & Spring
- Start by removing the adjusting screw with an adjustable wrench.
Remove the pivot from the adjusting screw. Sometimes the pivot will separate and sit on top of the spring plate. If so, we’ll remove it later.
- Next, use a 9/16” wrench to remove the breather plug.
- Use a 9/16” wrench or socket and 11/16” wrench to remove the bonnet bolts, then remove the bonnet.
- If the pivot separated from the adjusting screw, it can now be removed, followed by the upper spring plate, spring, and lower spring plate.
Coupling Block
- Remove the bolts from the coupling block with a 7/16” wrench.
- Then remove the block and indicator tag from the stem.
Diaphragm Plate Assembly & Stems
Next, use a 3/8” wrench on the flats of the upper stem to loosen the stem from the diaphragm assembly.
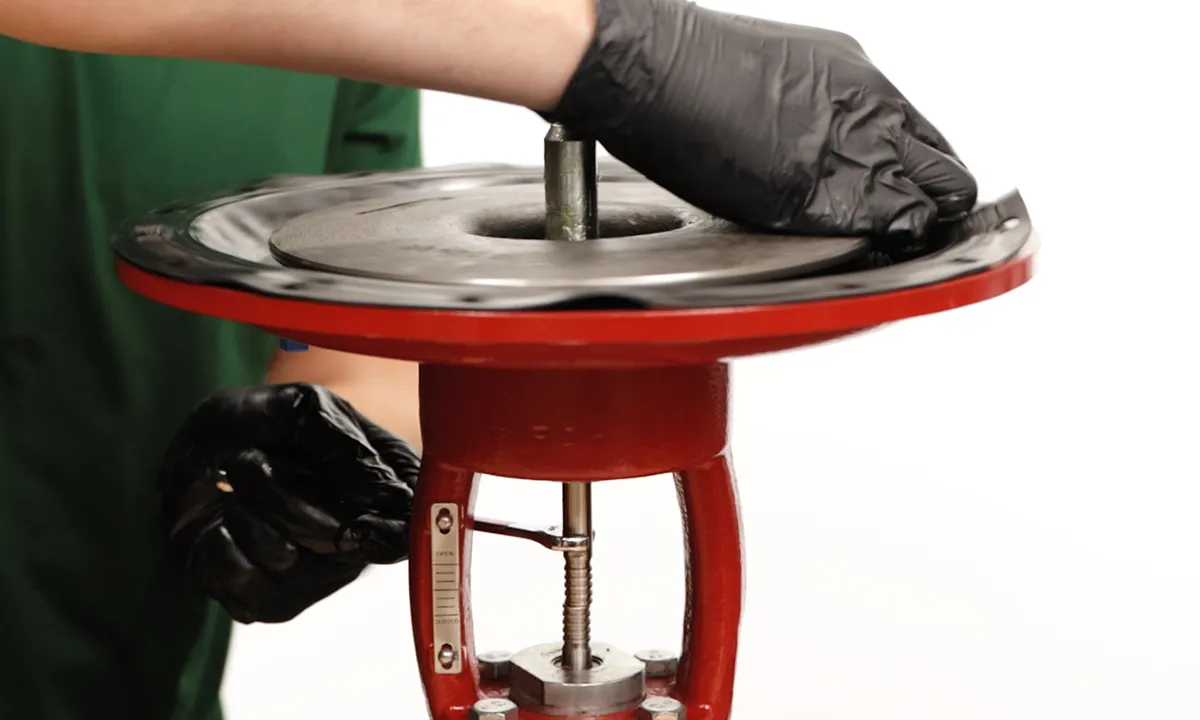
- Unthread the diaphragm plate, leaving the stem in the lower adjusting screw.
Raise the upper stem until only a small amount is exposed. This will prevent the oil in the topworks from spilling out.
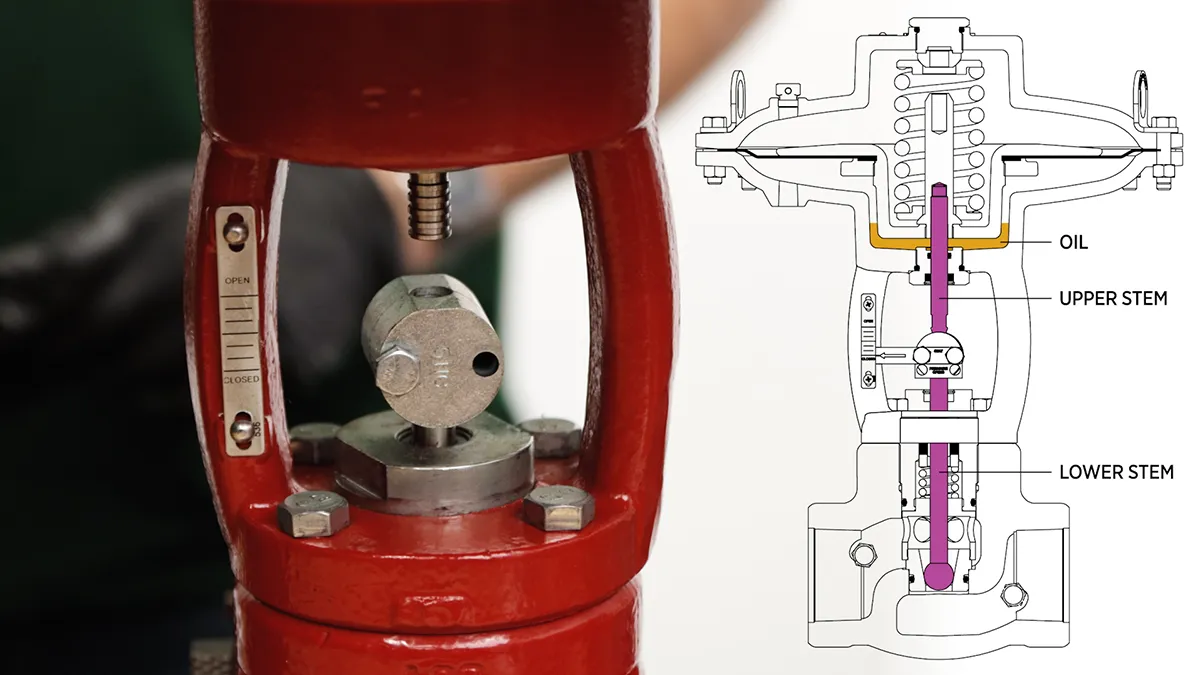
Next, we need to raise the lower stem so that we can attach the two stems later without needing a supply source to compress the spring. A helpful way to do this is to attach the coupling block to the lower stem – using only one screw will be enough. Then, using a screwdriver or similar tool, pry the lower stem into the highest position you can get. Remove the coupling block to continue assembly.

Assembly for Fail Open
To assemble for fail-open operation, first install the pivot over the upper stem with the bevel side facing up.

- Apply primer and Loctite to the threads of the upper stem.
- Install the lower spring plate, spring, and upper spring plate.
- Grease the upper spring plate if needed.
- Flip the diaphragm assembly over and install it so that the diaphragm nut is on top. Be careful not to push down on the assembly which will lower the stem that we previously raised.
- Using a 3/8” wrench on the stem flats, thread the assembly onto the upper stem.
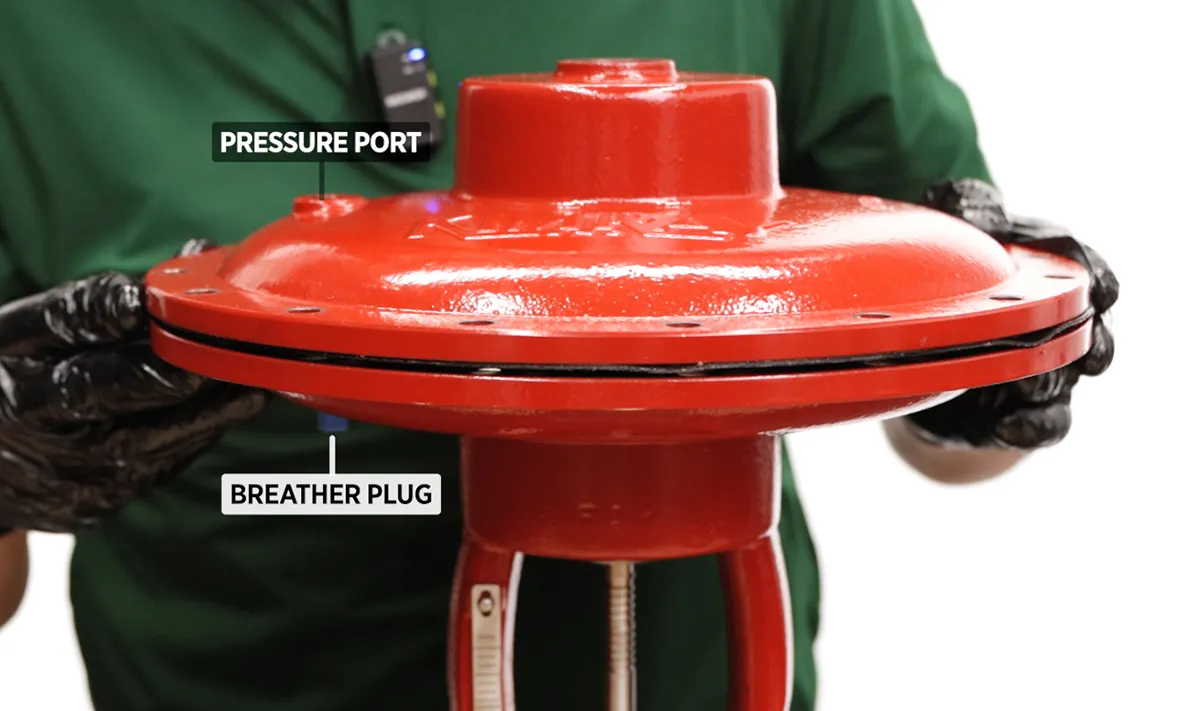
Replace the bonnet, aligning the pressure port and breather plug hole.
- Install the bolts and lifting rings using a 9/16” and 11/16” wrench. Kimray recommends tightening to 25-30 ft-lbs. Use a crisscross pattern and do not overtighten.
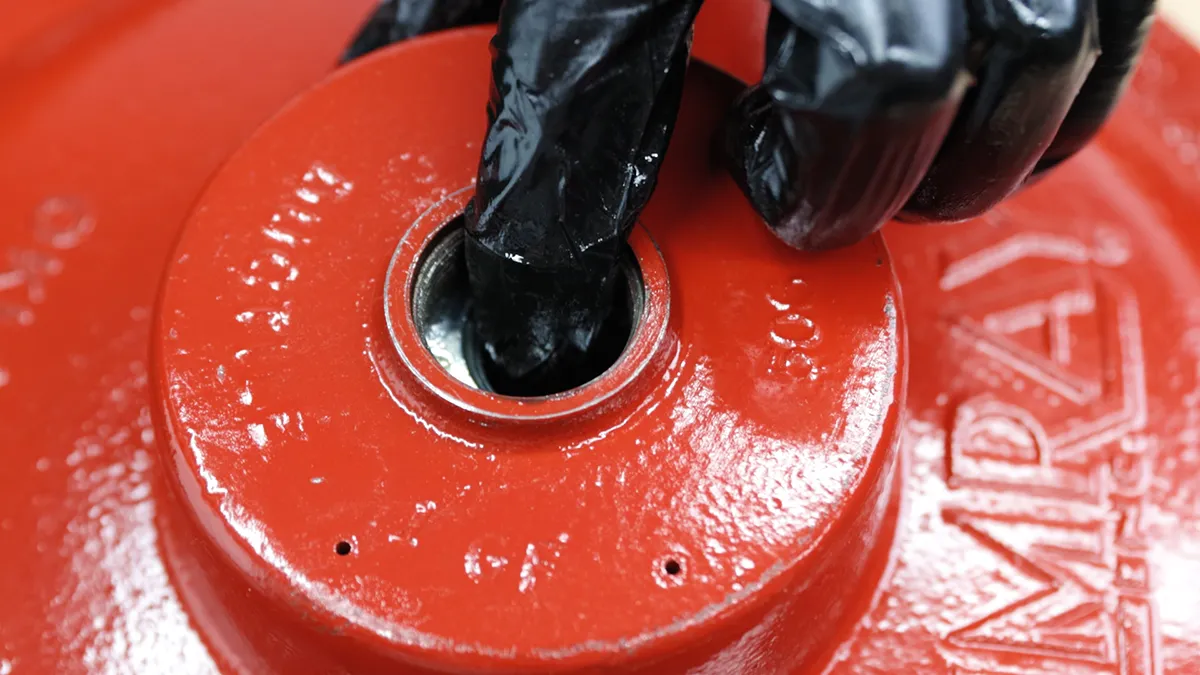
- Grease the O-ring of the upper adjusting screw if needed and thread it into the bonnet with an adjustable wrench.
- Install the breather plug into the bottom pressure port, so that the hole faces the bonnet.
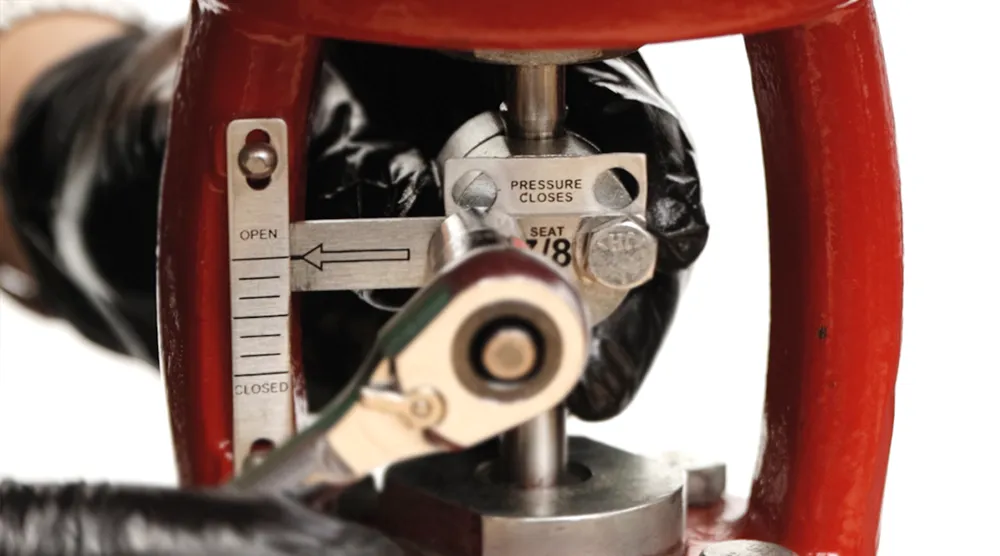
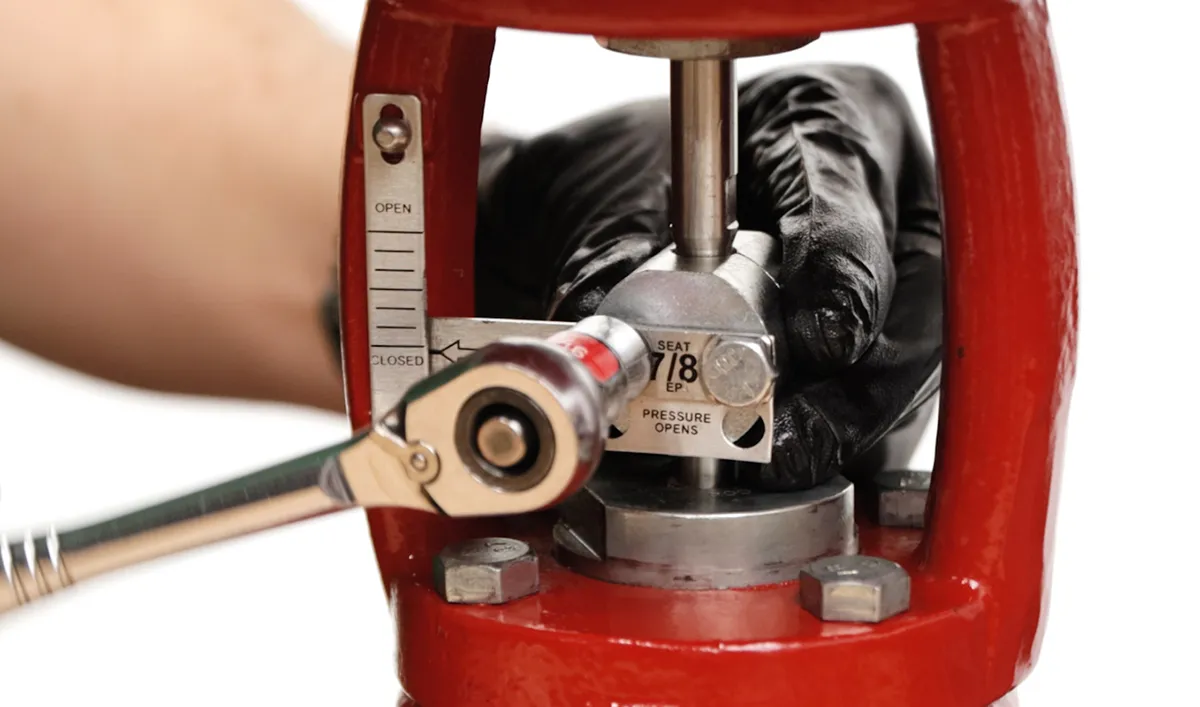
Use a 7/16” socket to attach the indicator tag and travel indicator onto the coupling block with the flats on top. Make sure that “pressure closes” is shown.
How to convert from Fail-open to fail-close operation
Adjusting Screw, Breather Plug, Bonnet
- Start by removing the adjusting screw with an adjustable wrench.
- Next, use a 9/16” wrench to remove the breather plug.
- Use a 9/16” wrench or socket and 11/16” wrench to remove the bonnet bolts, then remove the bonnet.
Coupling Block
- Remove the bolts from the coupling block with a 7/16” wrench.
- Then remove the block and indicator tag from the stem.
Diaphragm Assembly, Spring Plates, Spring & Pivot
- Next, use a 3/8” wrench on the flats of the upper stem while you unthread and remove the diaphragm assembly.
- Then remove the upper spring plate, spring, lower spring plate, and pivot. You may need a pick to get the pivot out.
Assembly for Fail Close
- To assemble for fail-close operation, first apply primer and Loctite to the threads of the upper stem.
- Thread the diaphragm assembly to the upper stem with the diaphragm nut facing down.
- Use a 3/8” wrench on the stem flats to fully tighten it to the diaphragm plate.
Push down on the diaphragm plate to fully seat the assembly.
- Then install the lower spring plate, spring, and upper spring plate. Add grease to the top of the upper spring plate if needed.
- Replace the bonnet, aligning the pressure port and breather plug hole.
Make sure the spring plate is aligned.
- Install the bolts and lifting rings using a 9/16” and 11/16” wrench. Kimray recommends tightening to 25-30 ft-lbs. Use a crisscross pattern and do not overtighten.
- Install the breather plug on the top of the bonnet, so the breather hole faces the bonnet.
Attach the indicator tag and travel indicator onto the coupling block with the flats on top. Use a 7/16” socket to tighten the bolts. Make sure that “pressure opens” is exposed.
Place the pivot onto the adjusting screw. Add grease if necessary to help them stay together.
- Thread it into the bonnet with an adjustable wrench.
-thumbnail.jpg)
To speak with an expert about converting your control valve's fail position, contact your local Kimray store or authorized distributor.