Looking for practical steps to take to achieve your ESG commitments? One source of natural gas emissions may be your pressure reducing regulator.
In this video, we'll show how a simple change can prevent your Pressure Reducing Regulators from venting natural gas.
Non-Vent Regulators vs Outside Supply Regulators
To eliminate emissions from your regulator, you can either choose a non-vent or an outside supply regulator operated with an outside supply like liquid nitrogen. Either option can be purchased new or easily converted with only a few extra parts.
If your pressure differential — or the pressure drop across the valve (𝚫P) — is 10 PSI or less, we recommend converting to the outside supply regulator.
Conversion & Repair Kits
- RYG (2" Repair Kit)
Parts Needed
If your regulator has been in service, we recommend also installing a repair kit.
- 9/16” Wrench / Socket
- Multi-Purpose Lubricant/Grease
- 1/4" Tubing Bending Equipment
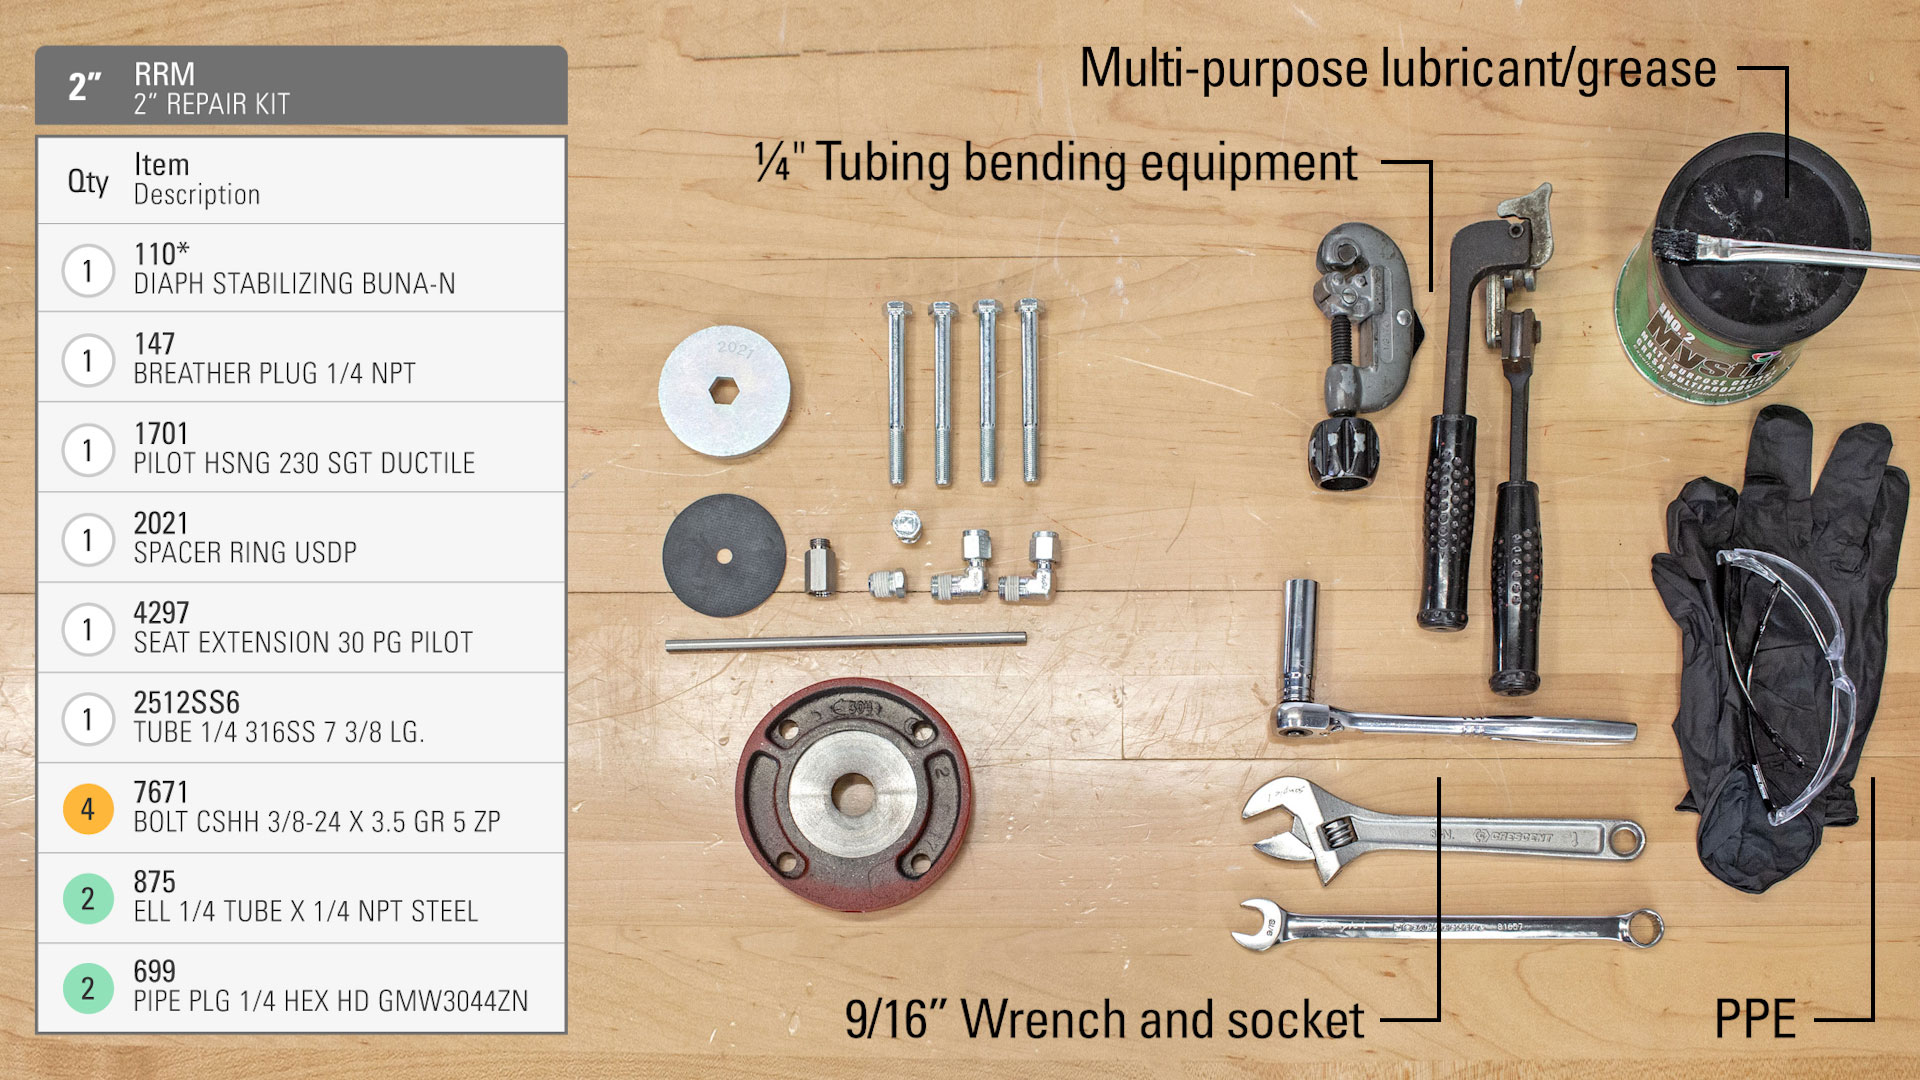
We’re in a controlled environment, but if you are doing this in-line, you will need to isolate and depressurize the valve first. Before beginning, consult your company’s safety guidelines and use the appropriate personal protective equipment (PPE).
How to Disassemble a Pressure Reducing Regulator for Outside Supply Conversion
- Position the valve on a vise so that you have access to the elbow on the upstream communication port.
- Using a 9/16” wrench, loosen the adjustment screw to relieve spring tension.
- Next, remove the pressure gauge.
- Then loosen the tubing connectors from both sense line ports.
- Remove and discard the bonnet bolts with a 9/16” wrench.
- Remove the bonnet, upper spring plate, spring, lower spring plate, and spacer ring.
- Rotate the pilot housing to remove the tubing coming from the gauge sense line. Leave the elbow on the T and downstream sense line port in place.
- Discard the tubing from the filter body and downstream port.
- Then remove the pilot housing from the upper housing.
- Turn the pilot housing over and use a 9/16” wrench to remove the pilot seat and diaphragm. Set aside for later use.
How to Reassemble a Pressure Reducing Regulator for Outside Supply Conversion
- Remove the valve body from the vise and replace with the diaphragm plate.
- Place the original diaphragm housing with the Tee connector over this assembly with the smooth surface facing up.
- Thread a (110) diaphragm on the seat extension. Thread the seat extension into the diaphragm plate by hand, then tighten until snug.
- Make sure the (110) diaphragm is centered in the pilot housing.
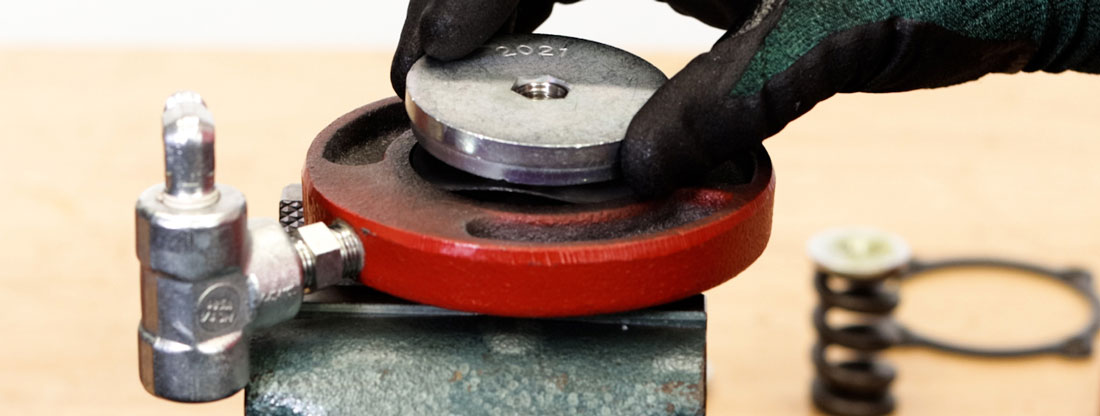
- Next, place the spacer over the seat extension with the part number facing up.
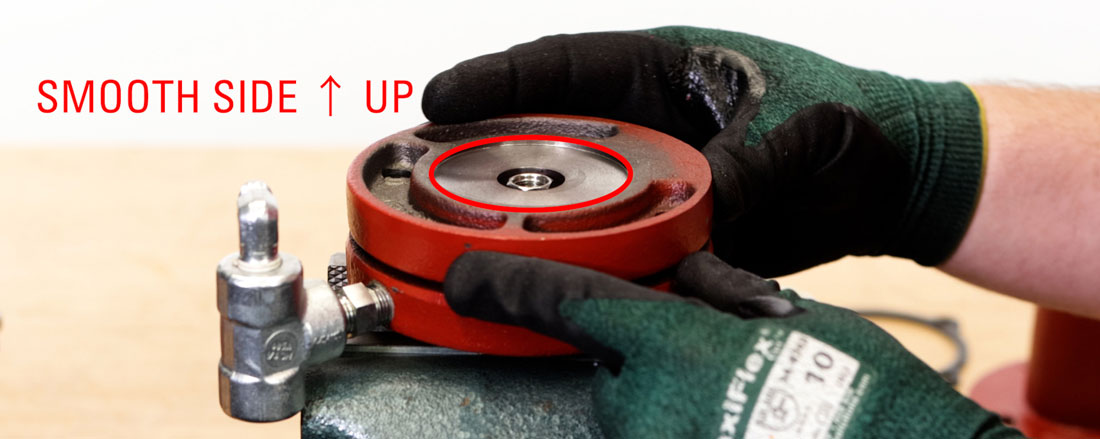
- Put a new (1701) diaphragm housing on top, smooth side up.
- Now thread the (110) diaphragm and (113) pilot seat assembly into the seat extension until snug.
- Remove the diaphragm housing assembly from the vise and place the body back in.
- Place the diaphragm housing assembly on top of the upper housing.
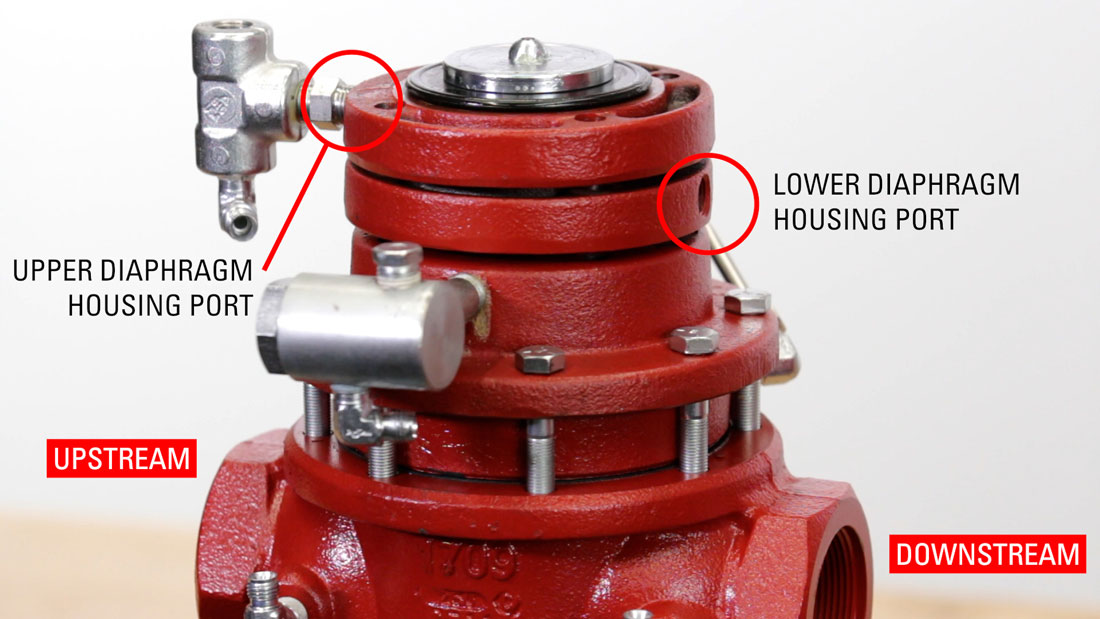
- The lower diaphragm housing port will face the upstream side of the valve body.
- The upper diaphragm housing port will face the downstream side.
- Place the spacer ring around the diaphragm.
- Add grease to the upper diaphragm plate.
- Replace the lower spring plate, spring and upper spring plate.
- Then grease the top of the upper spring plate if needed.
- Place the bonnet on the valve body with the breather plug facing the Kimray logo.
- Hand-start the new longer bolts but do not tighten them all the way.
- Now bend and fit your tubing to connect the two elbows.
- Then tighten the fittings. Since you’re only using the nuts and ferrules, you can discard the elbows.
- Now you can fully tighten the bonnet bolts.
- Use a 9/16” wrench to install the breather plug into the lower diaphragm housing port, face the opening down or angled.
- Apply Loctite to the gauge and install it on the top port of the Tee.
- Now remove the elbow from the upstream sensing port and replace it with a (699) plug.
- Remove the elbow from the filter body. This will become the connection port for your outside supply.
If you have any questions about any part of this repair process or the custom Kimray tools used, reach out to your local Kimray store or authorized distributor.
We have other solutions available to help you meet your company’s ESG goals, including electric actuators and pilots, non-vent control valves and more. For more information, check out our emissions solutions guide.