In this guide we’ll walk you through everything there is to know about liquid dump valves.
From the basics of how it works to step-by-step repairs and troubleshooting, you’ll gain a solid foundation of knowledge on how to operate and maintain Kimray’s liquid dump valves.
Use the table of contents to skip to different sections of the learning path.
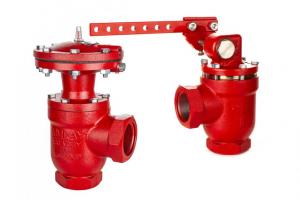
1. How to Repair a Lever Operated Liquid Dump Valve
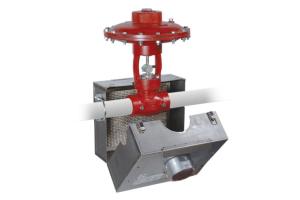
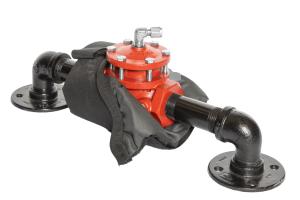
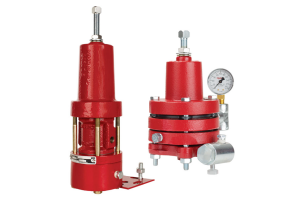
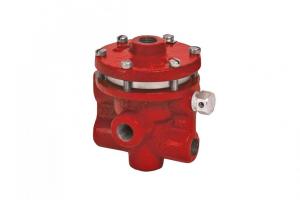
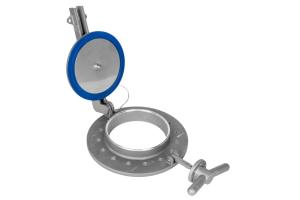
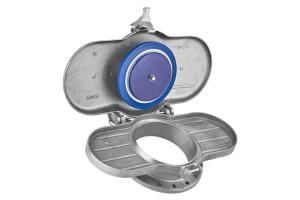
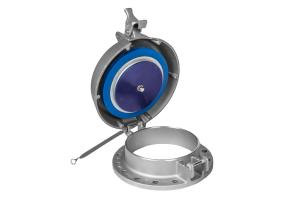
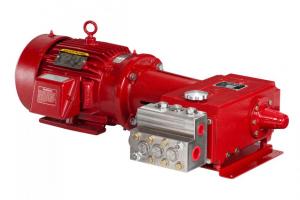
The Lever Operated Liquid Dump Valve is a reliable, zero-emission valve used to dump liquid from oil and gas production vessels such as treaters, separators, and free water knockouts.
In this video, Product Manager Mike Fick shows how to repair a 2” Lever Operated Dump Valve. You can find the step-by-step instructions below.
How to Disassemble a Lever Operated Liquid Dump Valve
These instructions apply to both the Diaphragm Balanced and the Piston Balanced versions of the liquid dump valve.
Start by securing the valve in a vise.
If you have an original hub design, you will need to remove the trunnion plug, loosen the stuffing box nut, loosen the set screw almost completely, and use a punch to remove the shaft.
Remove the stuffing box assembly from the bonnet.
Remove both square keys.
If you have other versions of this valve, you won’t need to remove the square keys, but you may need to remove the nut and washer from the end of the shaft.
Remove the follower, Teflon packing, and packing ring from the stuffing box assembly. In addition, keep the follower as it is not included in the repair kit.
If they didn’t come off already, remove the gaskets from both sides of the bonnet.
If the shaft is bent, it may be necessary to cut it off, then tap the trunnion shaft out through the stuffing box.
Remove the four bolts from the bonnet and remove the bonnet.
Re-secure the body in the vise at a 90-degree angle.
Use a large punch to tap out the cage assembly from the bottom through the top. Be careful to remove it in a controlled manner and not let it fall out, which could cause damage or injury.
Remove the gasket from inside the body.
Secure the cage assembly in the vise.
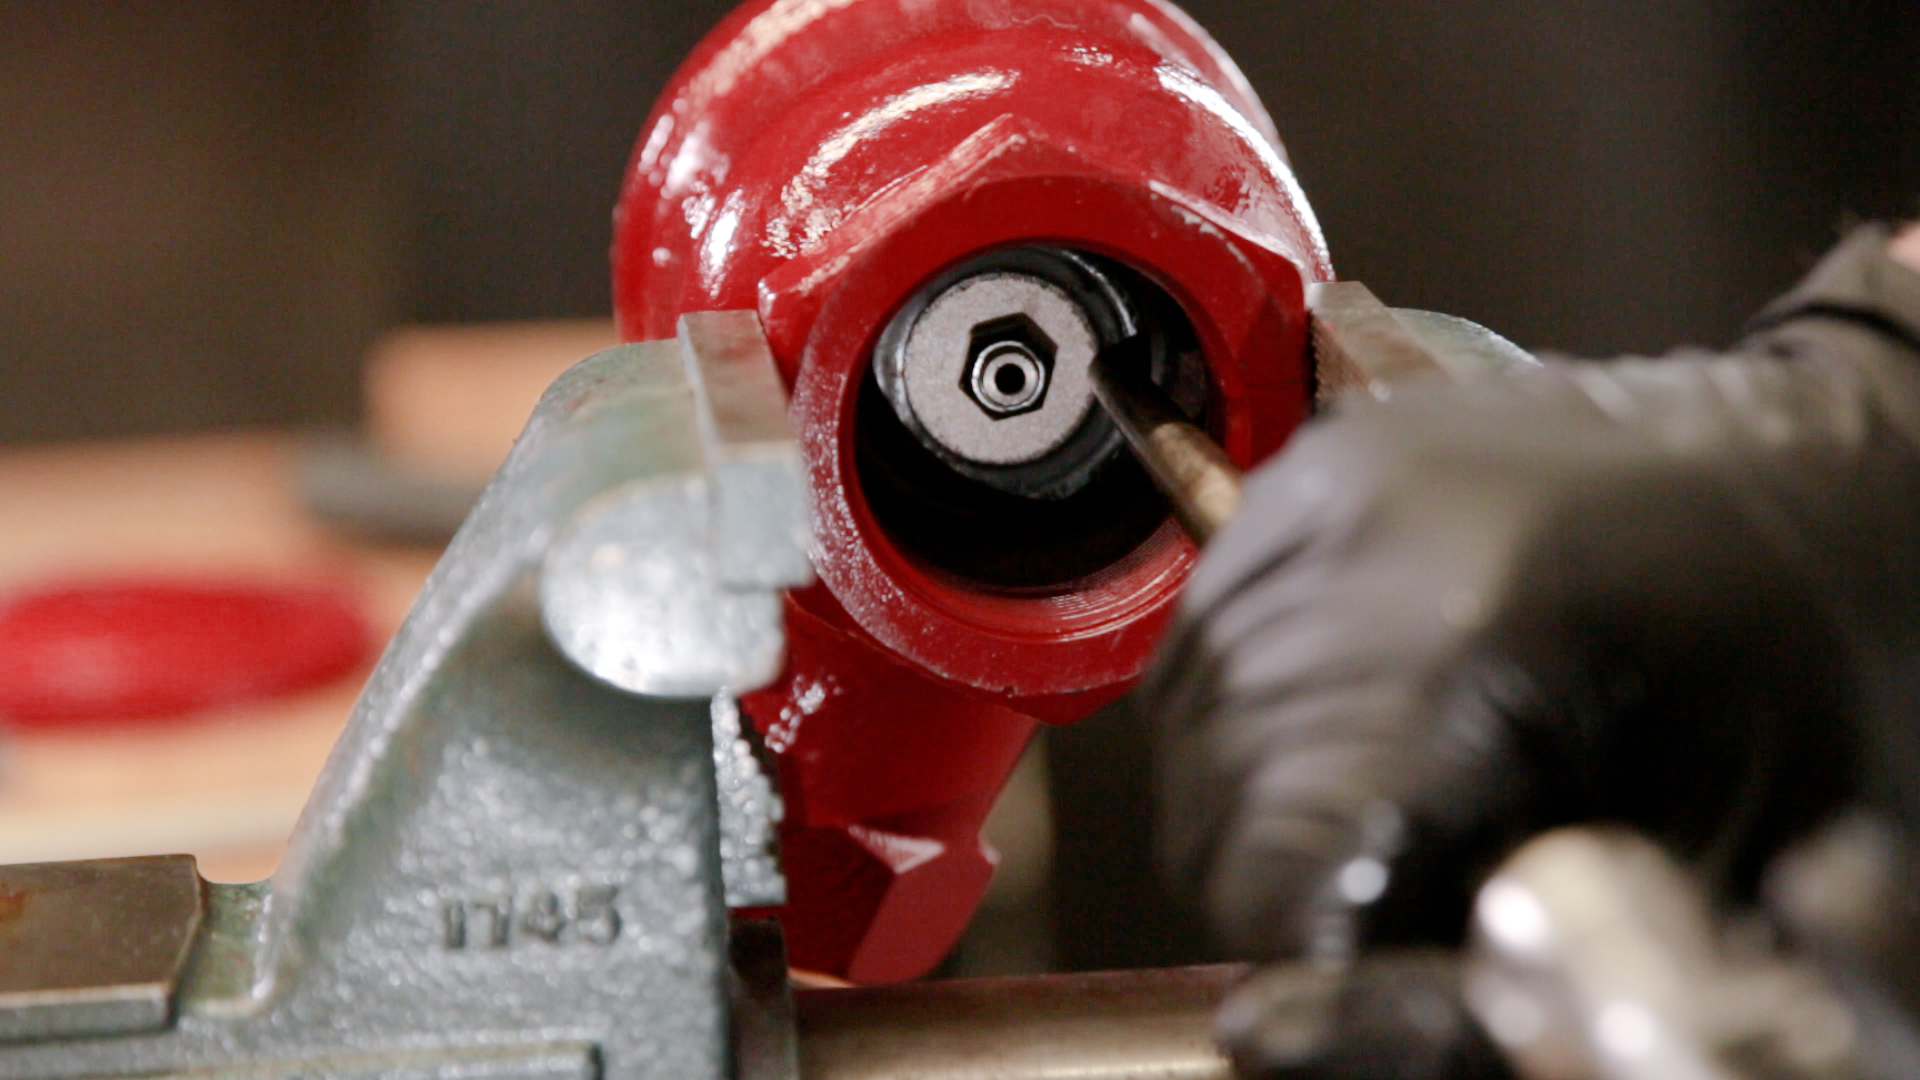
Using a wrench to hold the stem in place, insert a punch or screwdriver into the trunnion hub eyelet to unscrew it from the cage.
Remove the diaphragm and the plate.
To disassemble the trunnion hub, remove the snap rings.
Remove the links and pins from the stem nut and hub.
Remove the o-ring from the cage and remove the cage from the stem.
Place the stem in the vise and wrench loose the lock nut.
Remove the seat disc and soft seat.
Remove the ratio plug.
How to Inspect a Lever Operated Liquid Dump Valve for Damage
Start by inspecting the ratio plug. If you see an excessive amount of corrosion or erosion, it will need to be replaced.
Inspect the bottom surface of the cage. If you see an excessive amount of corrosion or erosion, or any damage that could create a leak path between the cage and seat, discard and replace. This one will need to be replaced.
Inspect the main trunnion shaft. If it is bent, it needs to be replaced.
Inspect the sealing surfaces on both sides of the bonnet for pits or other potential leak paths.
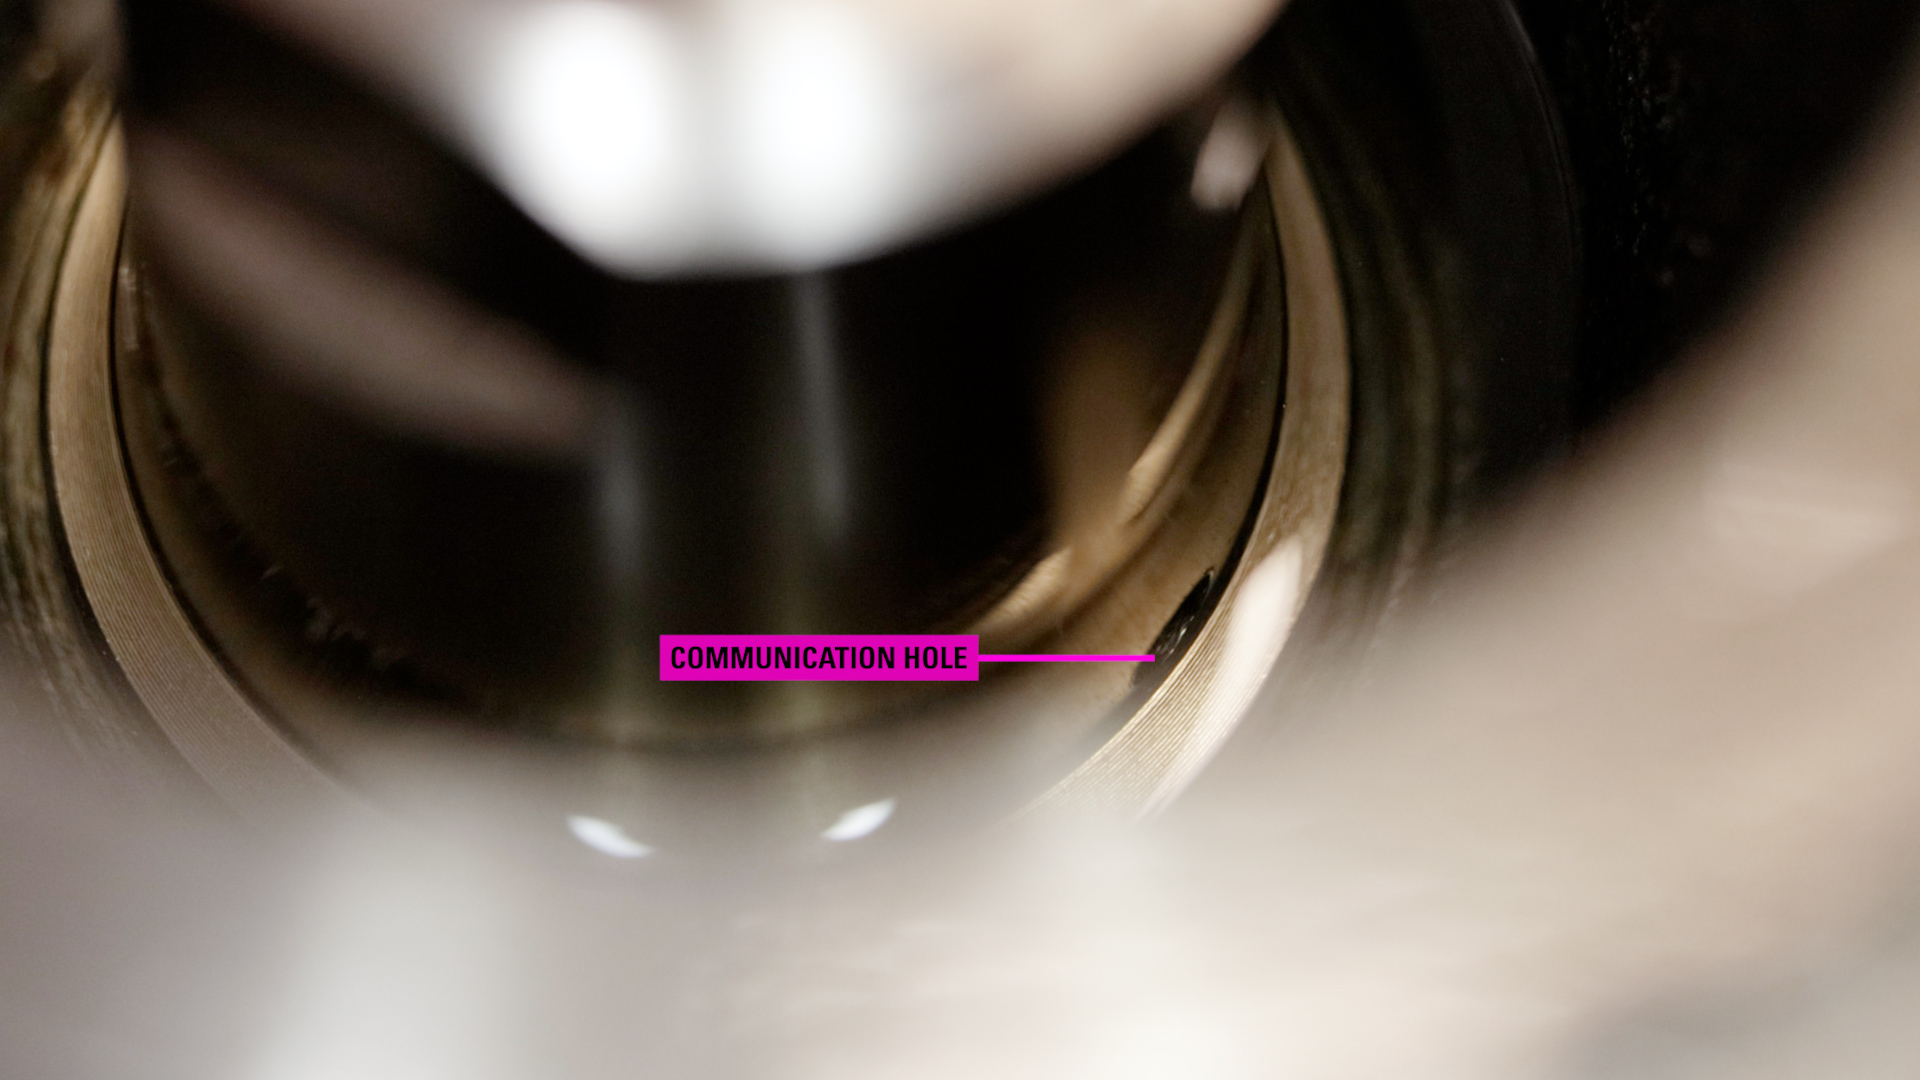
Inspect the stem. Make sure the threads are intact the stem is not bent, and the communication hole is clear of debris.
Inspect the stem nut, Make sure the threads are intact, there is no severe pitting, and the communication hole is clear of debris.
On the valve body, inspect the threads on the inlet and outlet to make sure they are intact.
Inspect the seat area where the gasket will sit. Check for severe washouts anywhere inside the valve.
Clean the interior and exterior to make sure it’s free of all solvents, debris and fluids that may damage elastomers and affect o-rings and gasket seals.
Run all the parts through a parts washer. If you don’t have one available, use a wire brush, degreaser, and the appropriate PPE to get them as clean as possible.
How to Reassemble a Diaphragm Balanced Lever Operated Liquid Dump Valve
There are two processes for reassembling a Diaphragm Balanced Lever Operated Liquid Dump Valve: one for valves after 2018, and one for valves prior to 2018. We’ll walk through the current version’s process first:
Place the new o-ring onto cage.
With the stem upside down in the vise, place the ratio plug onto the stem. In our newer models, the ratio plug comes standard in Delrin.
Grease and assemble the new style seat from the repair kit. This replaces both the old seat disc and seat. The new seat is reversible, effectively doubling its life span. If one side is worn, flip the seat to use the other side.
Thread on the lock nut, then flip the stem assembly and re-secure it into vise.
Place the cage on the stem assembly, followed by the stem plate with the serrations facing outward.
Attach the diaphragm.
To build the trunnion hub stem nut assembly, attach the 2 links and pins and 4 new snap rings.
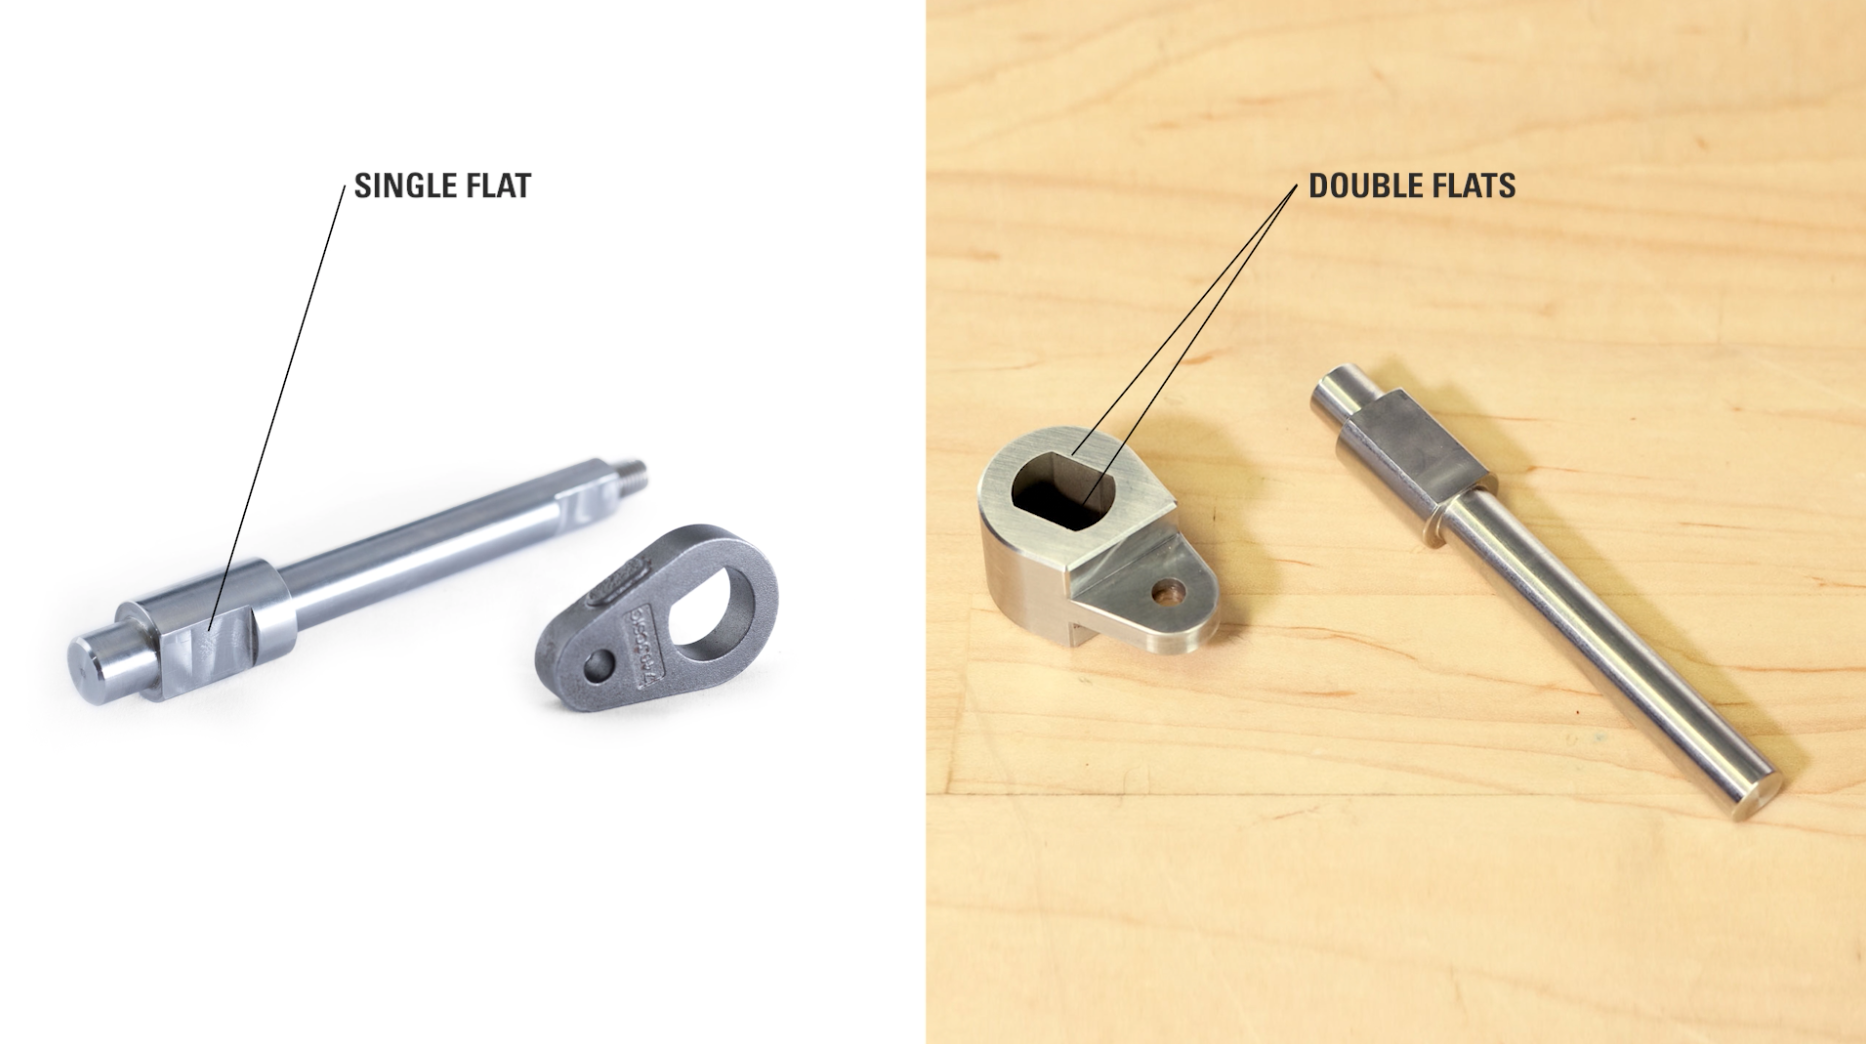
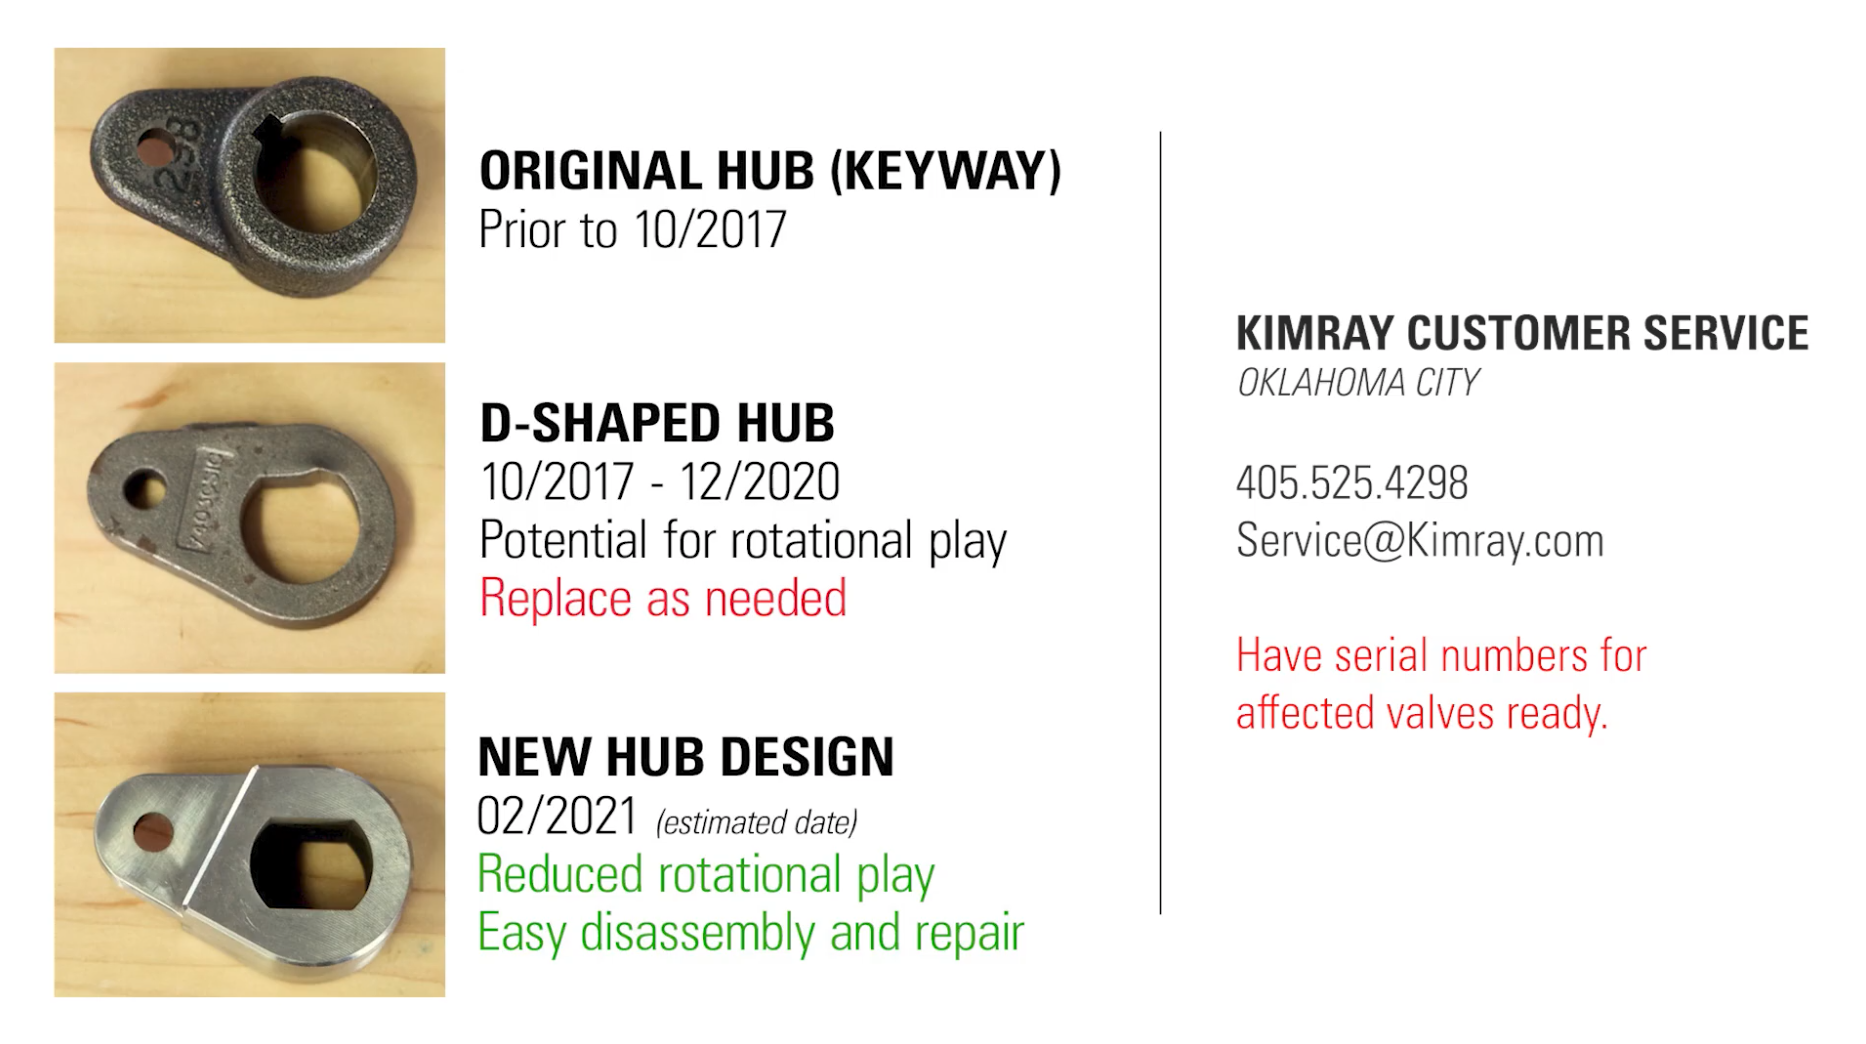
If you have the old version of the hub and shaft that has one flat, we recommend you replace it with the new style hub and shaft with double flats to reduce angular play in the hub and shaft connection.
Kimray can send you the new style hub and shaft free of charge. Contact Kimray Customer Service at 405-525-4258 or service@kimray.com and have your serial numbers ready. If you have the keyway style, you can keep that in your assembly. No replacement is needed unless they are damaged.
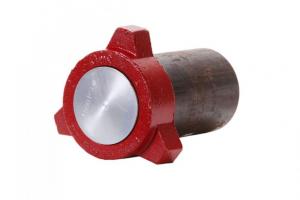
1.1 Hub Design Differences
1.2 Updated Hub Designs
Apply Loctite and thread the nut onto the stem.
Grease the o-ring, the shoulder where the gasket will seal, and the gasket.
Secure the body in the vise and insert the cage assembly with the hole facing the same direction as the valve connection. If needed, use a mallet until the cage seats. The diaphragm should be flush with the machined surface.
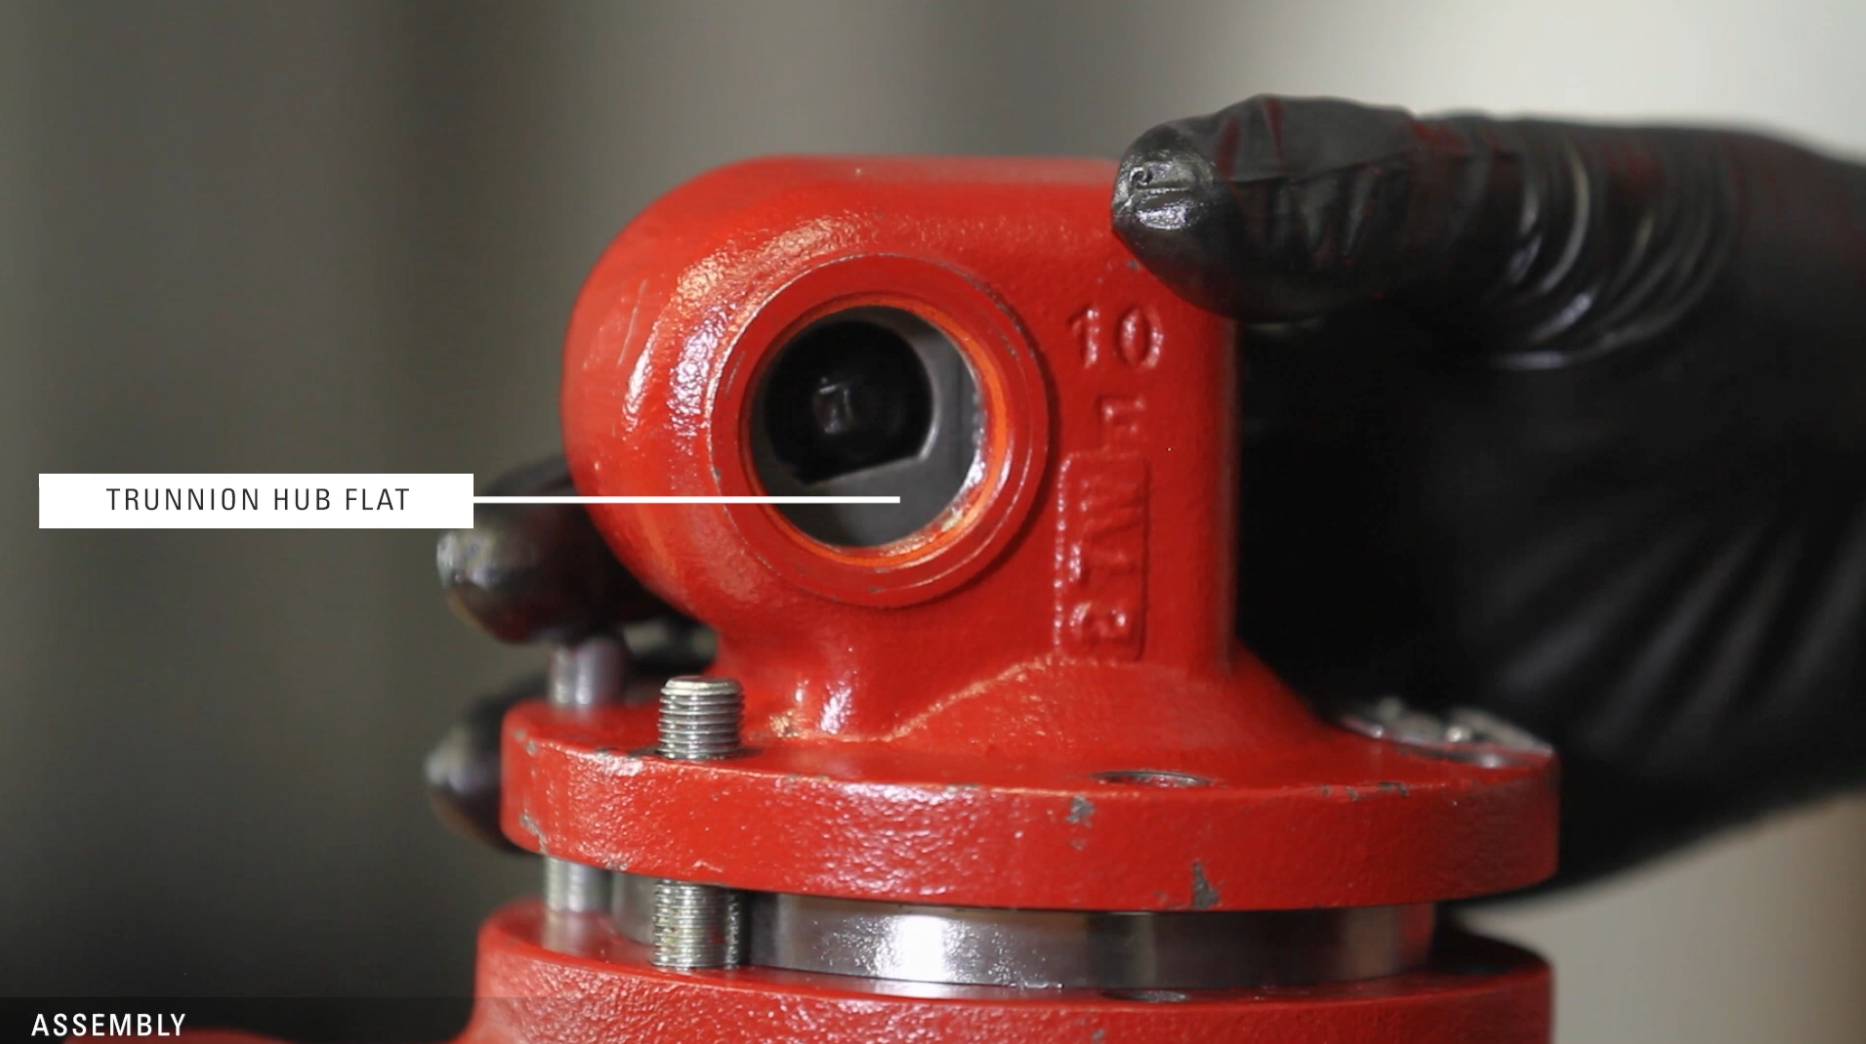
Make sure the hub is in the correct orientation by checking that the flat on the bottom side is in line with the pin hole when the hub is facing away from the inlet of the valve.
1.3 Hub Orientation
As mentioned earlier, we don’t recommend using the hub with one flat, but if you need to use it, then the correct orientation is with the flat side on the bottom when the hub is facing away from the inlet of the valve.
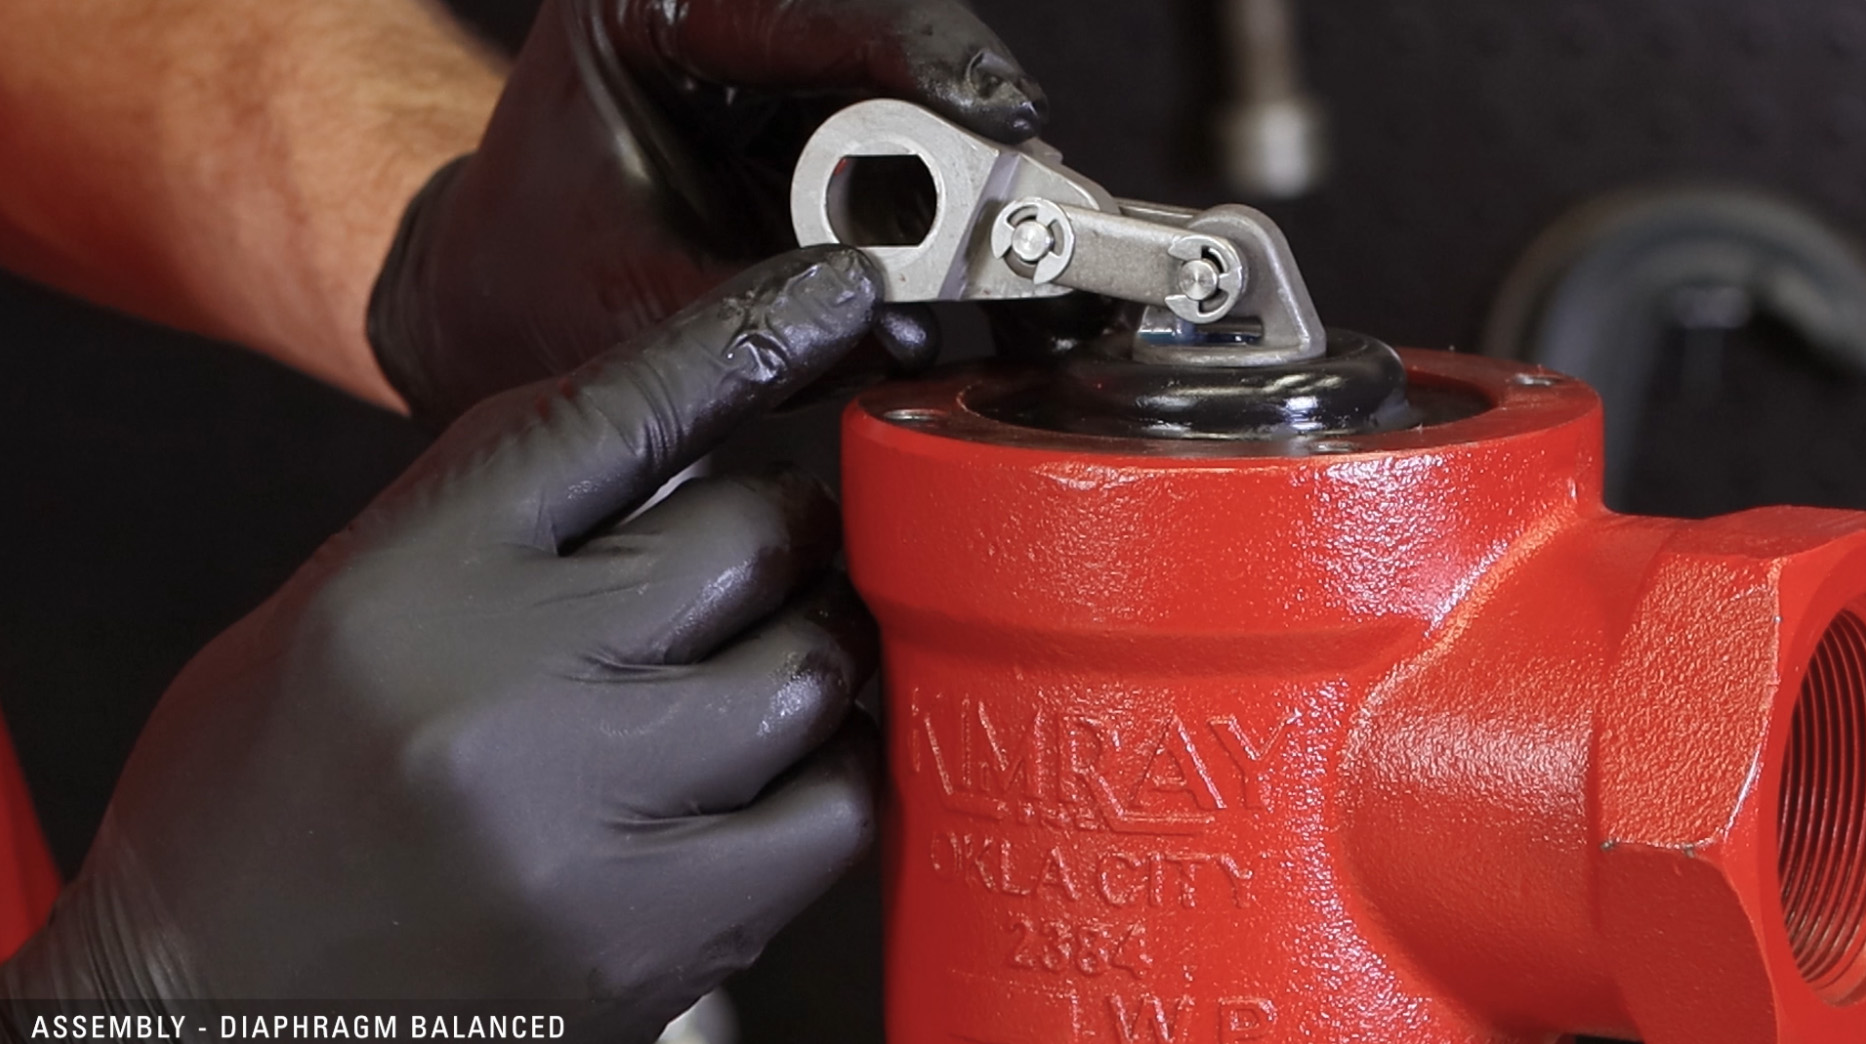
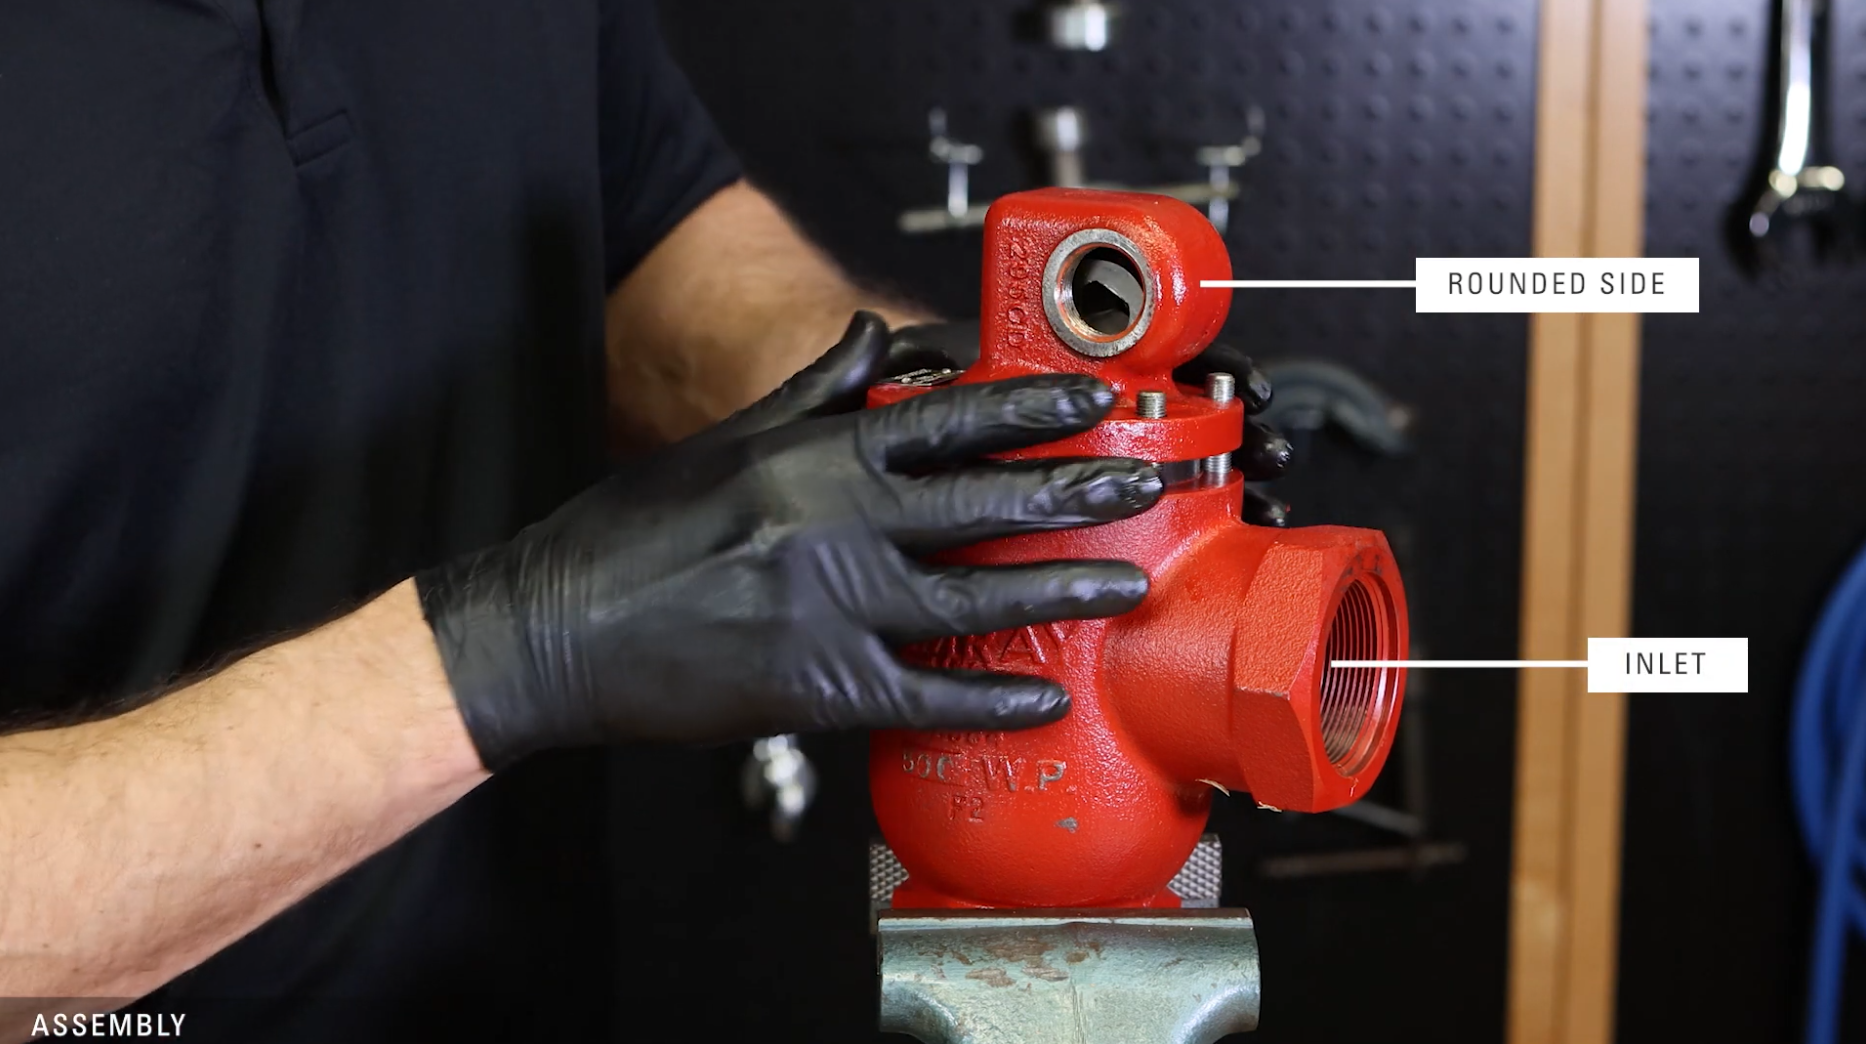
While holding up hub assembly, place the bonnet on the body. For the standard assembly, the rounded side should face away from the inlet. There can be variations, so make sure to reassemble the way it came.
Attach the four bonnet bolts in a criss-cross pattern to avoid misalignment.
Grease the shaft and insert the thicker end into the bonnet. Make sure the flat end is down.
Slide the bushing into the trunnion plug, add the o-ring, then grease them both.
Thread the trunnion plug into the bonnet and tighten with a wrench.
To assemble the stuffing box, start by placing the Teflon bushing on the shaft.
Grease the end of the stem and where the flat ends to reduce the risk of cutting the O-ring.
Then add the new O-ring, being careful to not cut the O-ring on the edge of the flat. Then apply grease.
Install the O-ring around the outside of the stuffing box, then apply grease.
Slide the stuffing box onto the shaft and tighten with a wrench.
Install the new lever hub with the arm attachment slot facing away from the bonnet.
Tighten the set screw at the bottom.
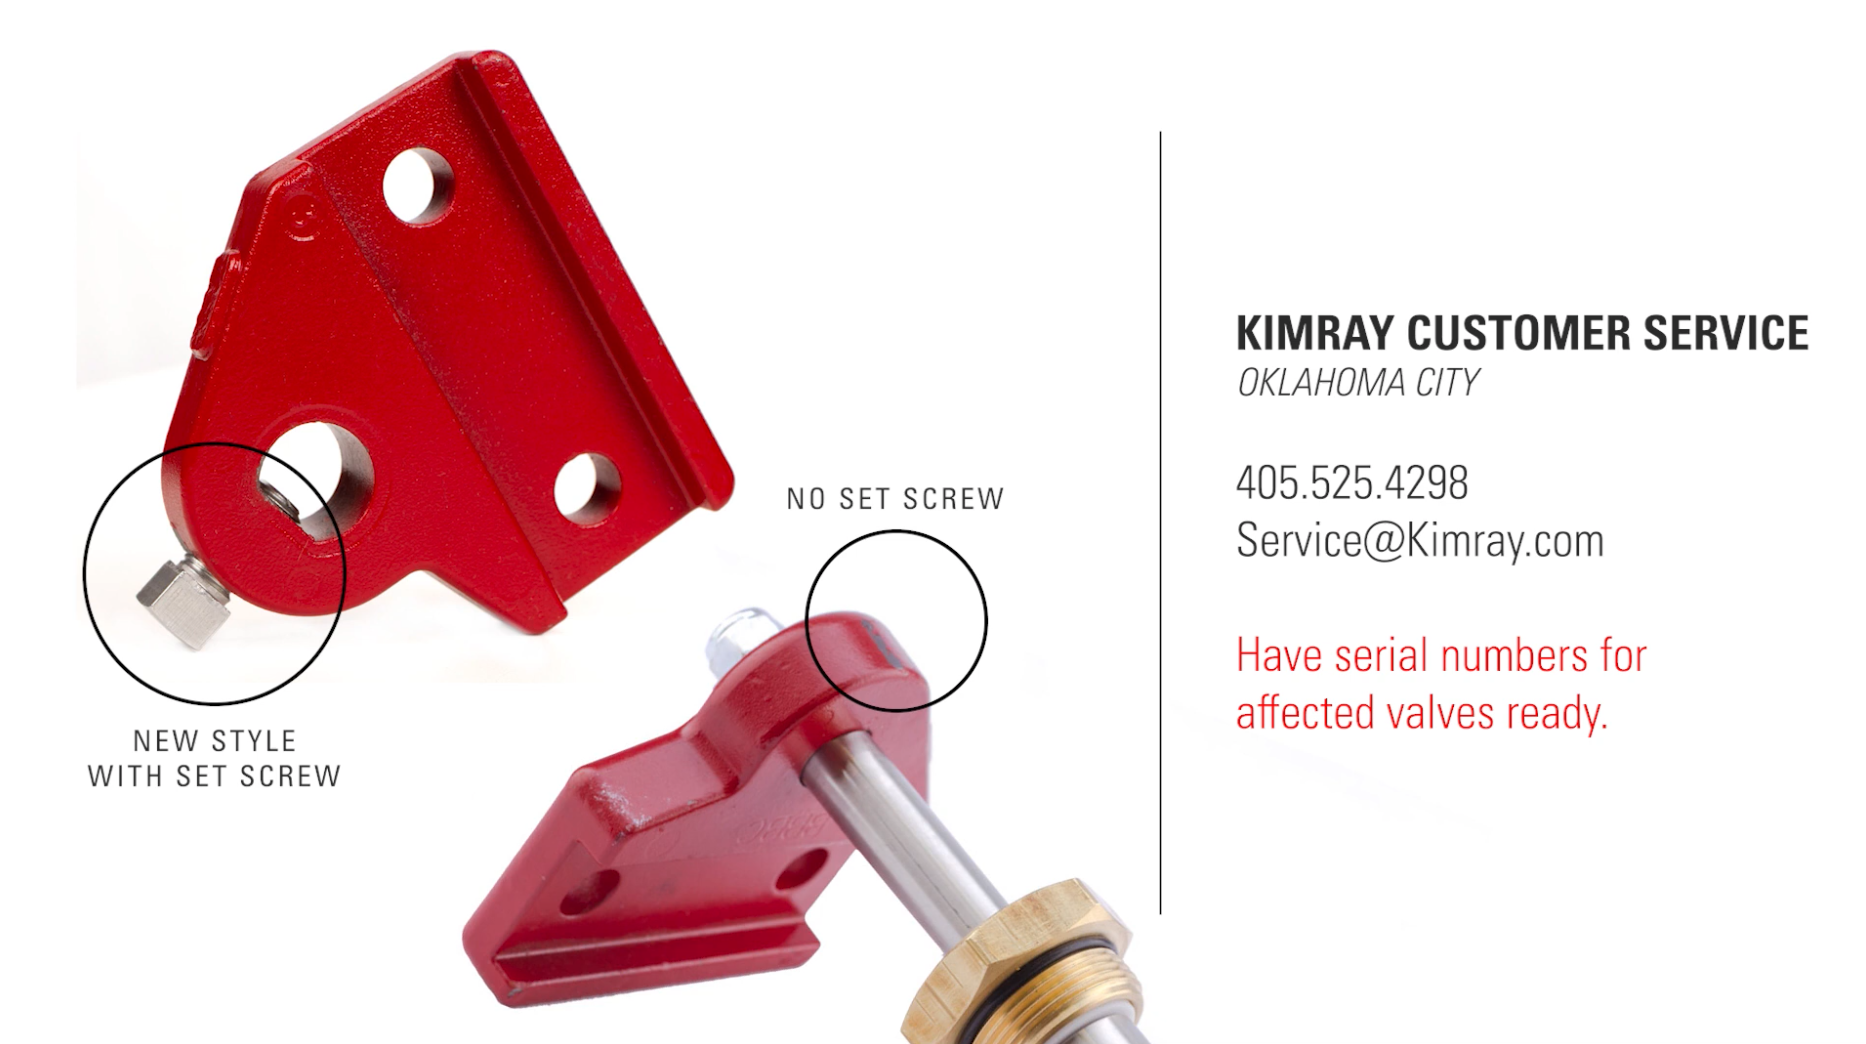
If your lever hub does not have a set screw on the bottom, we recommend replacing it with the newest style lever hub to reduce angular play in the hub and shaft connection as mentioned above. If you have a different style shaft that has threads at the end of it, slide on the washer and tighten the nut.
1.4 Set Screw Design
Complete the assembly by attaching the lever bar pointing the same direction as the inlet.
How to Reassemble a (Pre-2018) Diaphragm Balanced Lever Operated Liquid Dump Valve
If you’re reusing the old-style hub assembly, installation will look a little different starting from once you’ve bolted the bonnet to the body.
Insert the shaft into the hub.
Insert the shorter square key into the keyway in the shaft. Tap into place with a punch.
Install the new gasket on the trunnion plug, making sure it rests against the shoulder of the plug. Apply grease to the gasket and then tighten the plug with a wrench.
Install the washer onto the shaft.
Install the gasket onto the stuffing box and grease.
Thread the stuffing box onto the bonnet.
Install the packing ring with teflon packing, follower, and nut onto the shaft.
Install the hub and the longer square key.
Tighten the set screw until snug.
How to Reassemble a Piston Balanced Lever Operated Liquid Dump Valve
There are only a few parts that differentiate the Piston Balanced from the Diaphragm Balanced Dump Valve. We’ll look over those differences now:
Once you remove the piston assembly from the body, secure it in a vise.
Use a wrench to hold the stem in place.
Insert a punch or screwdriver into the trunnion hub eyelet to unscrew it from the cage.
Remove the piston with the o-ring and two back-ups and remove the cylinder from the cage.
Remove the two o-rings from the cylinder and remove the piston seal retainer and the o-ring.
Next, remove the o-ring from the cage.
Finally, remove the cage from the stem.
Flip the stem over and secure it in the vise to remove the nut, seat disc, and ratio plug.
Inspect all the parts for excessive corrosion or erosion or any damage that could create a leak path.
Inspect the stem. Make sure the threads are intact and the stem is not bent.
To reassemble, repeat this process in reverse, greasing all of the new gaskets, o-rings, and backups as they are applied.
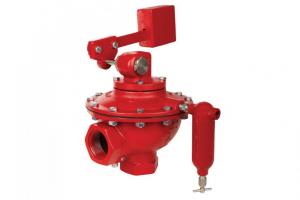
In this video, we’ll show you how to repair a Lever Operated PBT Dump Valve.
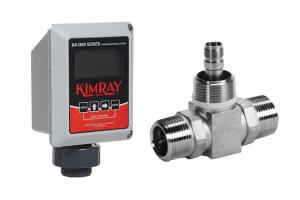
Tools Needed
7/16” Wrench
9/16” Wrench
11/16” Wrench
Crescent Wrench
Pick
Needle Nose Pliers
Repair Kit
Kimray Seat Removal Tool
How to Disassemble a Lever Operated PBT Liquid Dump Valve
Before we begin disassembly, it’s important to note that on the PBT valve, the bonnet is the opposite direction of other lever operated valves. The flat side is always away from the inlet. On other lever operated valves the flat side is on the same side as the inlet.
Using a 9/16” and 11/16” wrench, loosen the bolts to remove the lever arm.
Use a ½” wrench to remove the lever hub nut and washer.
Use a 9/16” wrench to loosen the lower bolt. Two to three full turns will allow the lever arm to slide off without removing the bolt.
Use a crescent wrench to loosen the plug and the stuffing box. If it doesn’t come off easily, tap the wrench with a mallet.
Remove the plug, stuffing box, and shaft.
Remove and discard all the O-rings (3x) and bushings (2x) from the plug and stuffing box.
Examine the shaft. If it’s bent or heavily scored, it will need to be replaced.
Use a 9/16” wrench to remove the bonnet bolts. A socket wrench can be used for most of the bolts but you’ll need a wrench for the two remaining nuts above the inlet.
Remove the bonnet. The two remaining studs stay in place.
Discard the gasket. It may be stuck to the bonnet.
Pull up on the trunnion hub to remove the piston assembly. You may need to use a screwdriver for leverage.
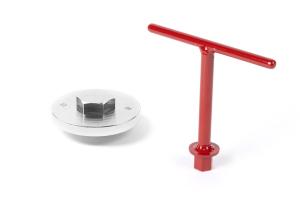
Use the Kimray Seat Removal Tool to remove the seat.
Your Seat Removal Tool will vary depending on your valve model.
Discard the gasket and inspect the removable seat and threads for any damage.
Remove the valve body and put the piston assembly in the vise by the lock nut.
Use needle nose pliers to remove a snap ring to slide the link pin out and disconnect the trunnion hub from the nut. Snap rings don’t normally need to be replaced, but if one is damaged or missing, there are replacements in the repair kit.
Use a crescent wrench to loosen the nut and a 7/16” wrench on the flats to keep the stem from spinning.
With the nut off, pull the cylinder out.
Rotate the stem using the 7/16 wrench so that the piston assembly can be completely disassemble.
Lift the piston, seat, and ratio plug off the vise.
Remove the nut from the vise and discard.
How to Inspect a Lever Operated PBT Liquid Dump Valve for Damage
Use compressed air to clear any debris that may be in the communication hole on the stem.
Remove and discard the packing and O-rings from the piston.
Examine the seat. The seat is reversible, so if one side is damaged, you can flip it over to use it again. A new seat is included in your repair kit, so if you’re doing a full repair, you can replace the seat or save it for a future repair.
Inspect the ratio plug for any damage. If it’s damaged, it will need to be replaced.
Discard the O-ring and examine the cylinder for scoring on the inside. If it’s damaged it may need to be replaced.
Clean the communication holes of any debris.
How to Reassemble a Lever Operated PBT Liquid Dump Valve
Put the flats of the stem in the vise.
Attach the new backup, O-ring, and second backup on the piston and apply grease.
Slide the piston onto the stem with the O-rings on the bottom, followed by the seat with the good side facing up if you’ve flipped it, and then the ratio plug on top.
Lightly grease the threads of the stem.
Using a 9/16” wrench or socket wrench, tighten the new lock nut from the repair kit onto the stem.
Remove the piston assembly and flip it over and put the nut in the vise.
Replace the O-ring on the cylinder and slide it onto the stem.
Apply Loctite to the threads and tighten the nut with a crescent wrench. Use a 7/16” wrench on the flats to keep the stem from turning.
Slide the link pin through the two links and the nut and secure with a snap ring. Replace any other snap rings as needed.
Grease the top of the cylinder and place the gasket on top.
Then apply more grease on top of the gasket.
Remove the piston assembly and mount the valve body onto the vise.
Carefully attach the gasket to the removeable seat and add grease.
Thread the seat into the body by hand and tighten with the Kimray Removable Seat Tool.
Grease the O-ring on the piston assembly and push it down into the valve body. If it doesn’t slide in easily, it may be crooked.
Place the bonnet on top of the body, verifying that the trunnion hub is in the correct position with the flat side at the bottom.
2.1 Flat Side Down
If you have the version of the hub and shaft that only has one flat, we recommend you replace it with the new style hub and shaft with double flats to reduce angular play in the hub and shaft connection.
If you have the version with one flat, Kimray can send you the new style hub and shaft free of charge. Contact Kimray Customer Service (405-525-4298 or service@kimray.com) and have your serial numbers ready. If you have the original keyway style, you can keep that in your assembly. Replacements are not needed unless they are damaged.
2.2 Updated Hub Designs
Make sure this new style hub is in the correct orientation with the flat on the bottom side in line with the pin hole when the hub is facing towards the inlet of the valve.
While lifting up on the hub assembly, place the bonnet on the body with the rounded side facing the inlet of the valve and confirm the trunnion hub is in the correct position.
2.3 Rounded Side Facing Inlet
Tighten the bonnet bolts and nuts.
With the inlet facing away from you, insert the shaft into the right side of the bonnet
If you installed the hub with double flats, you will be installing the shaft with double flats. Make sure the single flat on end of the shaft is facing down.
Grease the inside and outside of the plug and stuffing box and install the O-rings over the threads.
Then install the new O-ring and bushing inside the stuffing box.
Install the bushing in the plug.
Add the plug and stuffing box to the shaft and tighten them with a crescent wrench. Use a few taps with a mallet to secure them in place.
Slide the lever hub onto the shaft, with the slot for the lever arm facing the valve.
Tighten the washer and nut on the end of the shaft with a 1/2" wrench. In the latest version of the hub design, there are not threads on the end of the shaft, so you can skip this step.
Next, tighten the set screw on the bottom of the lever hub with a 9/16” wrench.
If your lever hub does not have a set screw on the bottom, we recommend replacing it with the newest style lever hub as mentioned earlier. Contact Kimray customer service (405-525-4298 or service@kimray.com) and have your serial numbers ready.
2.4 Set Screw Design
Finish by attaching the lever arm to the lever hub. Notice the slot for the lever should be facing towards the valve. The nuts should be facing the valve.
Currently there are four additional parts in the repair kit that are used in older hub designs.
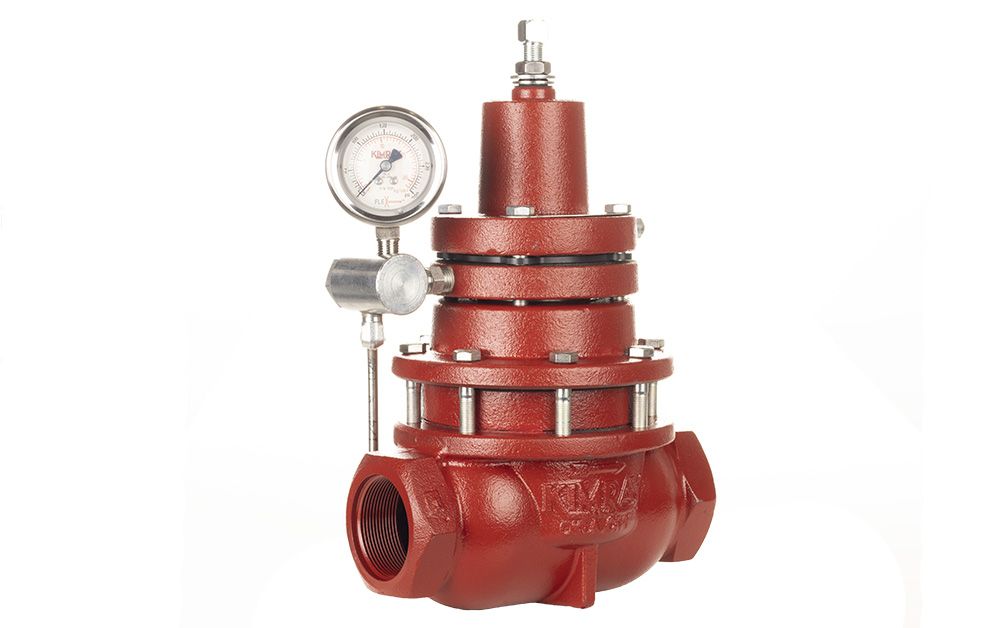
It provides long-lasting, robust control of low-pressure applications that allows you to keep your well running longer.
Kimray Liquid Dump Valve bodies can last decades, but the internal components can require maintenance in harsh environments to achieve peak performance.
In this video, we show you how to do a complete repair.
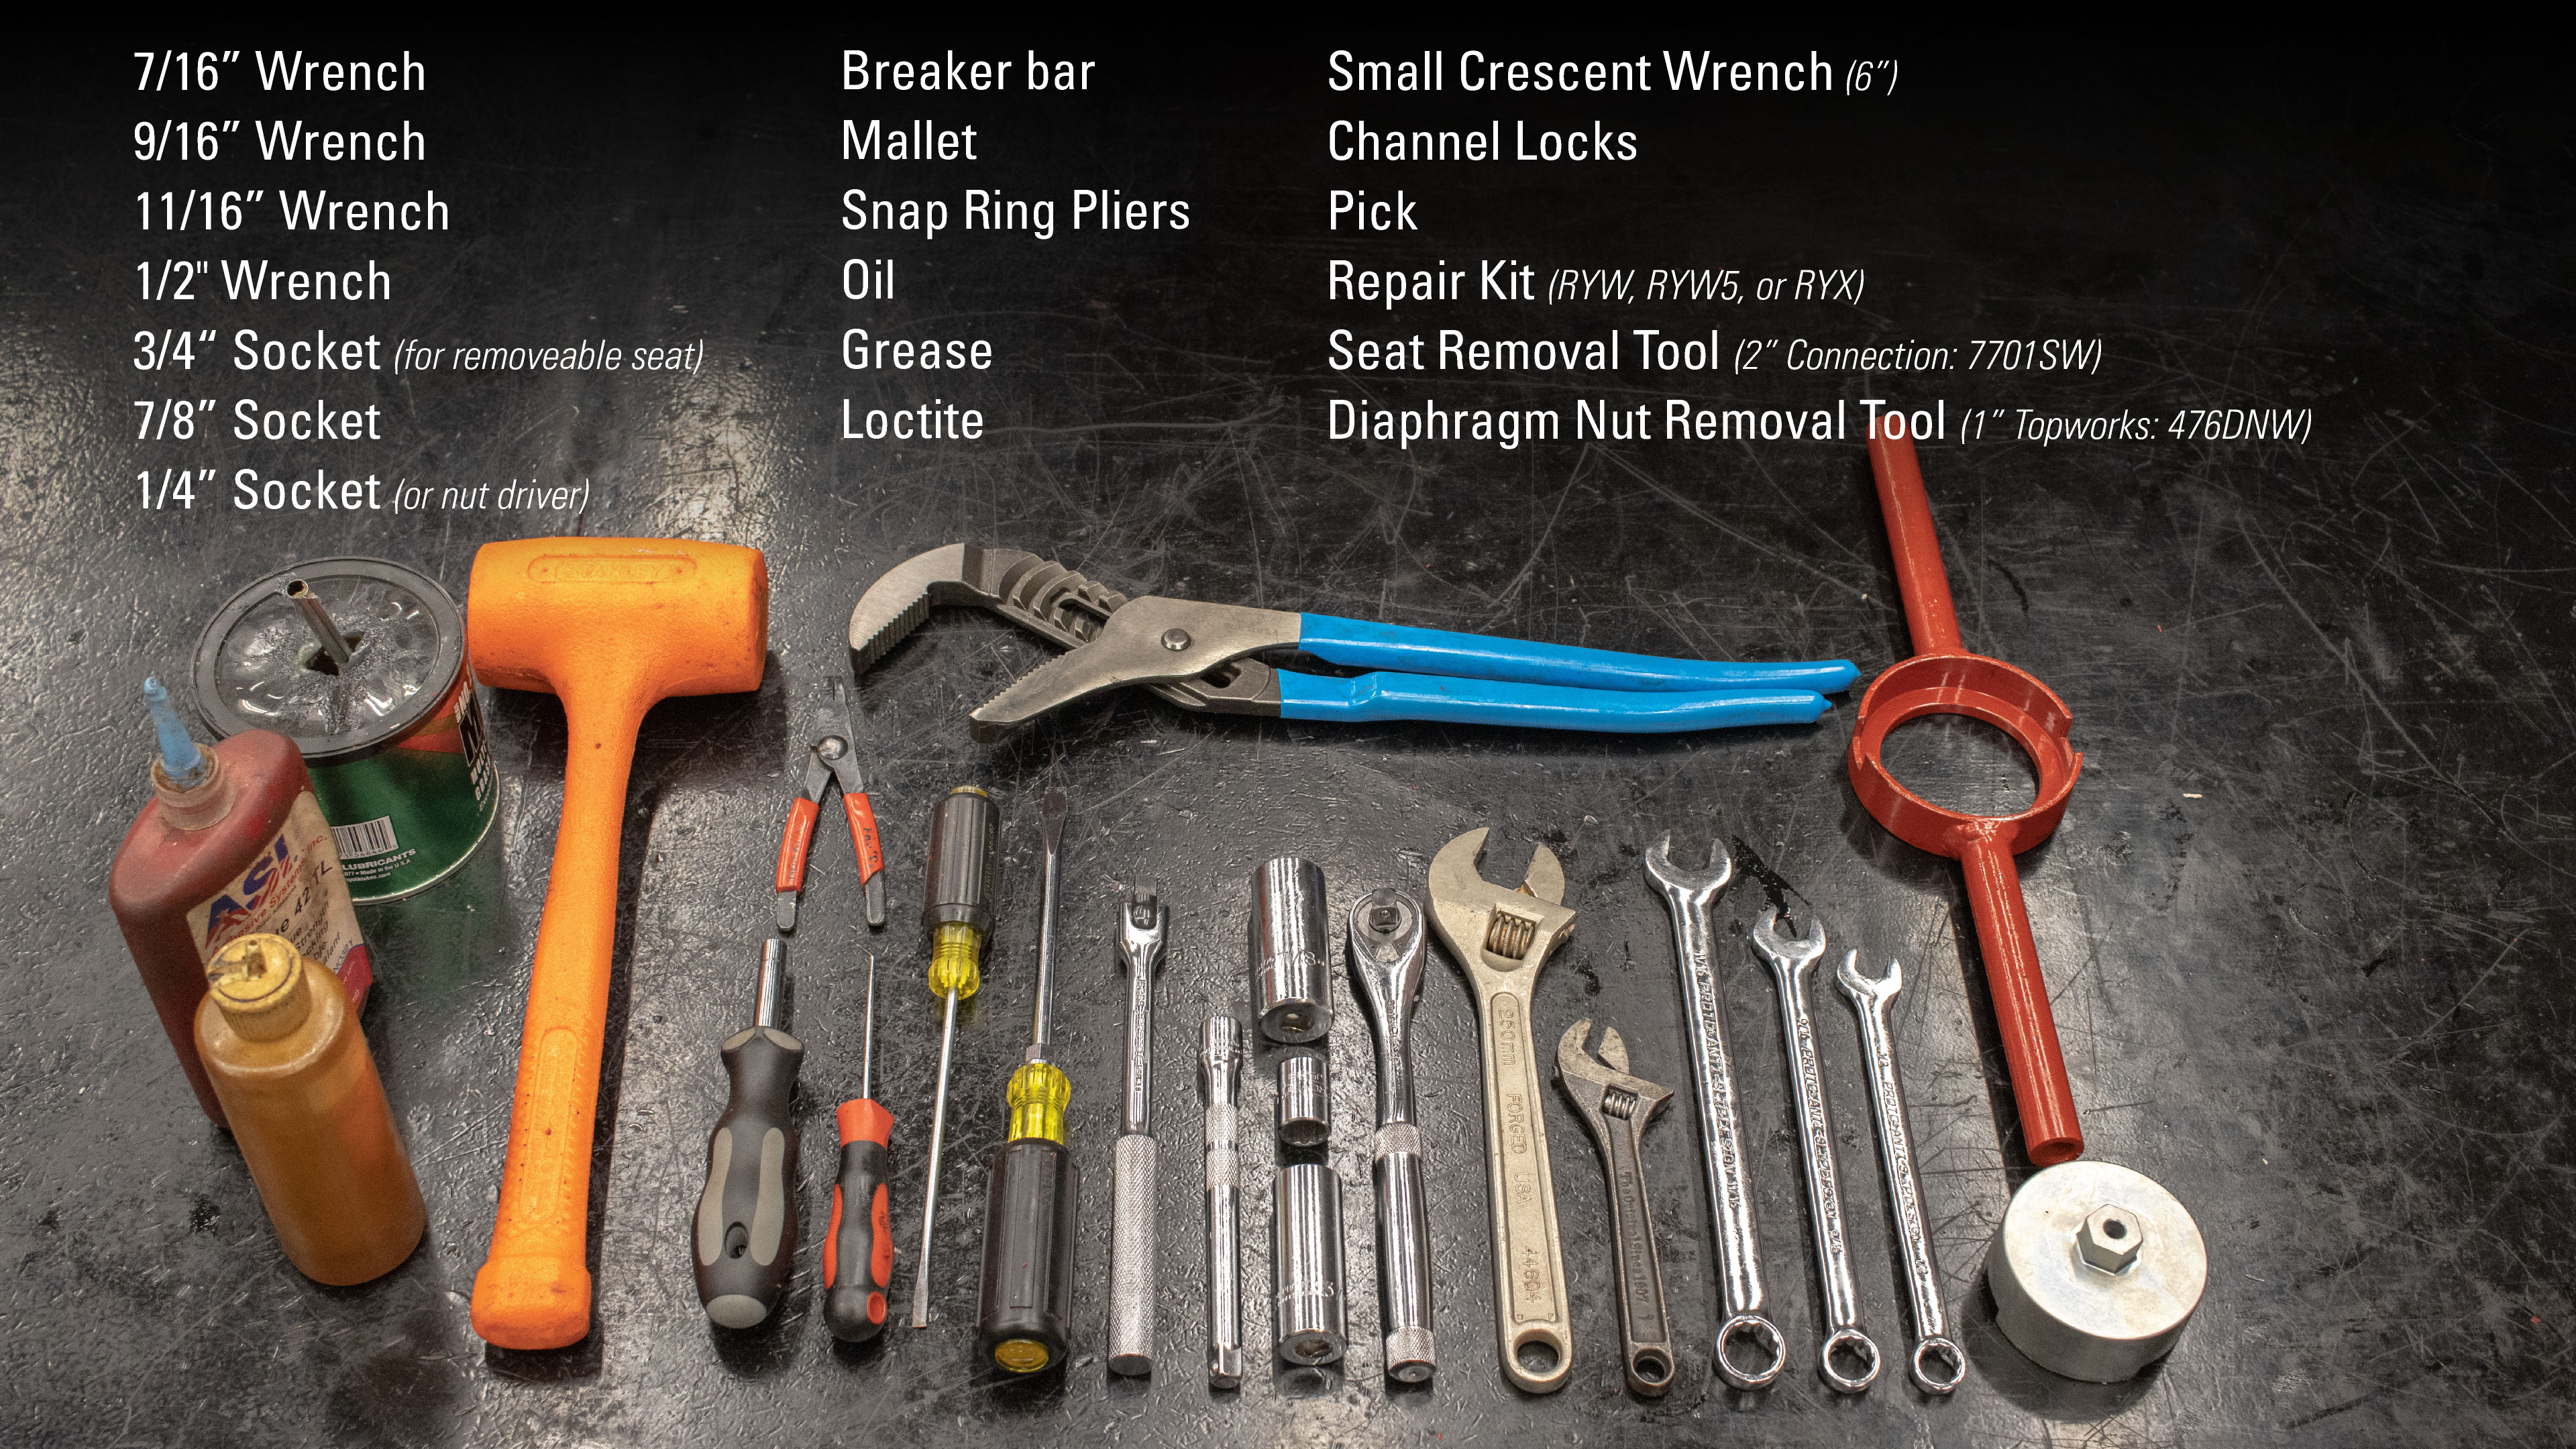
Tools Needed
7/16” Wrench
9/16” Wrench
11/16” Wrench
1/2" Wrench
3/4" Socket (for removeable seat)
7/8” Socket
1/4” Socket (or nut driver)
Breaker bar
Mallet
Snap Ring Pliers
Oil
Grease
Loctite
Small Crescent Wrench (6”)
Channel Locks
Pick
Repair Kit
Kimray Seat Removal Tool (2" Connection: 7701SW)
Diaphragm Nut Removal Tool (1" Topworks: 476DNW)
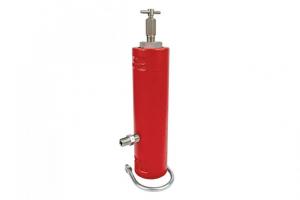
3.1 Tools Needed
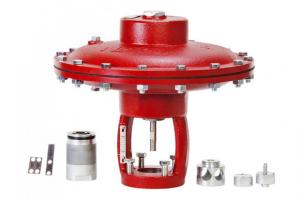
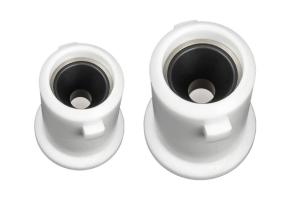
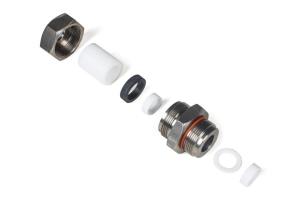
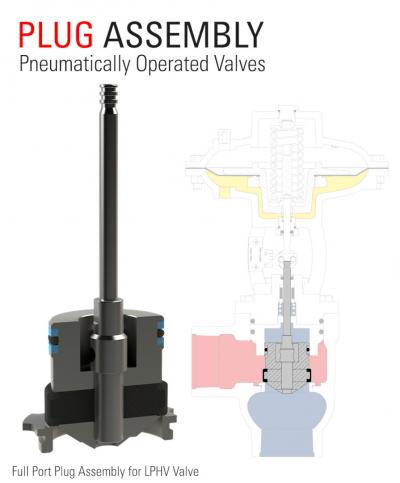
As an alternative to a complete repair with a repair kit, you can use a replacement plug assembly. This assembly includes the ratio plug, removable seat, stem, 2 backups, piston seal, piston, seat disc and gasket all in one pre-assembled unit.
This makes for a faster, simpler alternative to a full repair and could save you time in the long run if during your repair you find you need to replace something like a worn ratio plug or bent stem.
3.2 Plug Assembly
Before performing any service, verify all system pressures are bled-off or properly isolated. Consult your company’s safety guidelines and requirements. Follow all regulations and wear all necessary PPE.
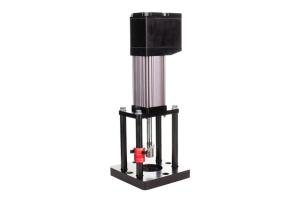
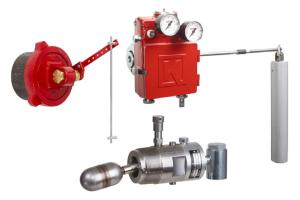
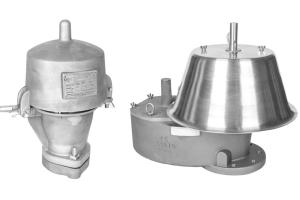
How to Disassemble a Low Pressure High Volume (LPHV) Liquid Dump Valve
Clamp the valve body in a vise.
Using a crescent wrench, remove the upper adjusting screw. The pivot may also come off at this point. If it doesn’t, you can remove it after taking off the bonnet.
Use a pick to remove and discard the O-ring from the screw.
Use a 9/16” wrench or socket to remove the breather plug.
Remove the bonnet bolts and take off the bonnet
Using a pick if needed, remove the pivot (if it did not come out previously), upper spring plate, spring, and lower spring plate.
Next, unthread the diaphragm plate from the upper stem. There are two flats on the upper stem where you can put a wrench to stabilize it.
The diaphragm needs to be inspected for any abnormal wear like punctures or swelling. If it is damaged, you will need to order a replacement because it is not included in the repair kit.
It’s also good to inspect under the diaphragm nut. However, to remove this or to replace the diaphragm, you will need the Kimray diaphragm nut removal tool. Put the tool on the diaphragm nut and put the diaphragm plate into the vise. Unthread the nut.
Now you can inspect the diaphragm fully. If the diaphragm is undamaged, replace the diaphragm nut. If it is damaged, remove and discard the diaphragm.
Remove the coupling block with a ¼" socket or nut driver.
Use a ½" wrench to remove the four bolts from the yoke base.
With the yoke off the body, empty the oil from the yoke into an appropriate container.
Remove the upper stem then flip the yoke over.
Use a 7/8” socket to remove the lower adjustment screw. If it doesn’t come easily, use a breaker bar.
Remove and discard the snap ring, retainer, felt wiper, outside O-ring, and inside O-ring from the lower adjusting screw.
Use a 9/16” wrench to remove the stuffing bonnet bolts.
Remove the stuffing bonnet assembly and piston assembly from the valve body. You may need to use one or two flathead screwdrivers and a mallet to pry it off.
Remove the valve body and place the stuffing bonnet upside down in the vise.
Use large channel locks to unthread the cylinder from the stuffing bonnet.
Remove and discard the O-ring from the bonnet.
Use a pick to remove the spring and spring follower. (The spring follower may be attached to the spring itself.)
Remove the stuffing bonnet assembly from the vise.
Remove the snap ring, retainer and felt wiper from the stuffing bonnet assembly.
Use a screwdriver or pick to push the Teflon packing out.
Remove the O-ring the from the cylinder.
Use a mallet to tap down on the piston assembly and remove it from the cylinder.
Next, remove and discard the O-ring and two backups from the piston.
Now put the stem in the vise using the two flats.
Using the shaft of a large screwdriver or the side of a wrench, carefully remove the ratio plug.
Remove the seat disc. This is reversible and can be flipped to use the other side or replaced with a new disc from the repair kit.
With the valve fully disassembled, we’re ready for inspection and assembly.
How to Inspect a Low Pressure High Volume (LPHV) Liquid Dump Valve for Damage
Inspect each component for damaged threads, scoring or scratching that could result in a leak path. Pay careful attention to the stem, cylinder, and ratio plug. If there is damage, you will need to replace those components.
If the removable seat is damaged, you will need to order a replacement and identify the required torque specs for that repair. You’ll also need a specific Kimray tool to remove the seat, called the Seat Removal Tool (7701SW for 2”; 7699SW for 3”).
Use a pick to clear the breather plug of any debris.
How to Reassemble a Low Pressure High Volume (LPHV) Liquid Dump Valve
Begin by putting the O-ring and two Teflon backups on the piston.
Put the piston stem in the vise and install the cylinder and removeable seat.
Apply Loctite to the threads on the stem, and then thread on the ratio plug. (Use primer if available to clean surface and help seal faster.)
Tighten the ratio plug until the seat no longer spins. Then remove the piston assembly from the vise.
Put the new felt wiper, retainer, and snap ring into the top of the stuffing bonnet.
Flip it over and the put it in the vise.
Slide the four packing rings on the Teflon packing sleeve.
Apply grease in the stuffing bonnet and slide in the packing sleeve, flanged end first.
Insert the packing follower and spring.
Use an appropriately sized tool to push the spring down so you can engage the threads of the cylinder.
Put the new O-rings on the stuffing bonnet and cylinder.
Pushing down with your hand to engage the threads, thread the cylinder on about three rotations.
Add grease to the teflon backups and O-ring of the piston assembly.
Use a mallet to slowly tap the piston assembly into the cylinder.
Use large channel locks to firmly tighten.
Remove the stuffing bonnet from the vise and replace it with the valve body.
Grease both O-rings on the stuffing bonnet assembly.
Line up the bolt holes, also making sure that the topworks holes face the correct direction.
Use a mallet to tap the stuffing bonnet into the valve body.
Hand start the bolts and then tighten in a star pattern.
Install the felt wiper, retainer and snap ring into the lower adjusting screw.
Install the inner O-ring and outer O-ring and apply grease to both.
Turn the yoke upside down and install the adjusting screw into the yoke with a 7/8” socket.
Then grease and install the stem. Be careful not to damage the inner O-ring.
To assemble the diaphragm assembly, first put the diaphragm plate into the vise.
Grease the diaphragm and thread it onto the plate.
Grease and install the diaphragm nut making sure to not overtighten it and deform the diaphragm.
Attach the yoke by tightening the four bolts into the stuffing bonnet.
Add oil to the bowl (enough to at a minimum cover the lower adjusting screw.)
Next, apply Loctite to the stem threads.
Thread the diaphragm assembly onto the stem. (If the upper stem is too high, tap with a mallet until it meets the lower stem.)
Use an adjustable wrench to hold the flats on the stem while you thread the diaphragm assembly until it comes to a stop.
Grease the inside of the diaphragm plate.
Add the lower spring plate, spring, and upper spring plate and grease the top.
Install the bonnet, aligning the communication holes on top and bottom.
Thread the bolts onto the bonnet and tighten using a star pattern.
Install the O-ring on the upper adjusting screw.
Then add grease to the O-ring and the top of the adjusting screw.
Place the pivot on top of the adjusting screw, using the grease to hold it in place.
Make sure the spring plate is aligned and install the adjusting screw into the top of the bonnet with a crescent or 7/8" socket.
Now install the breather plug.
Lastly, attach the coupling block with a 1/4" socket or nut driver.
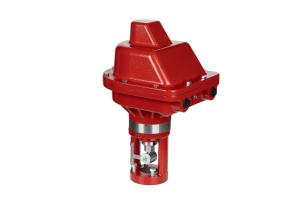
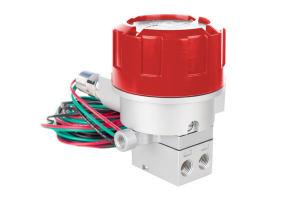
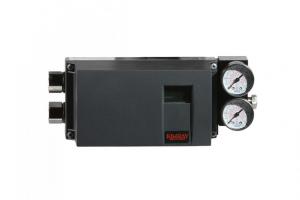
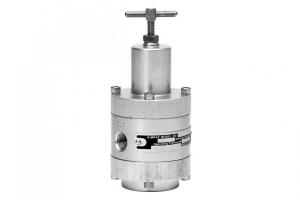
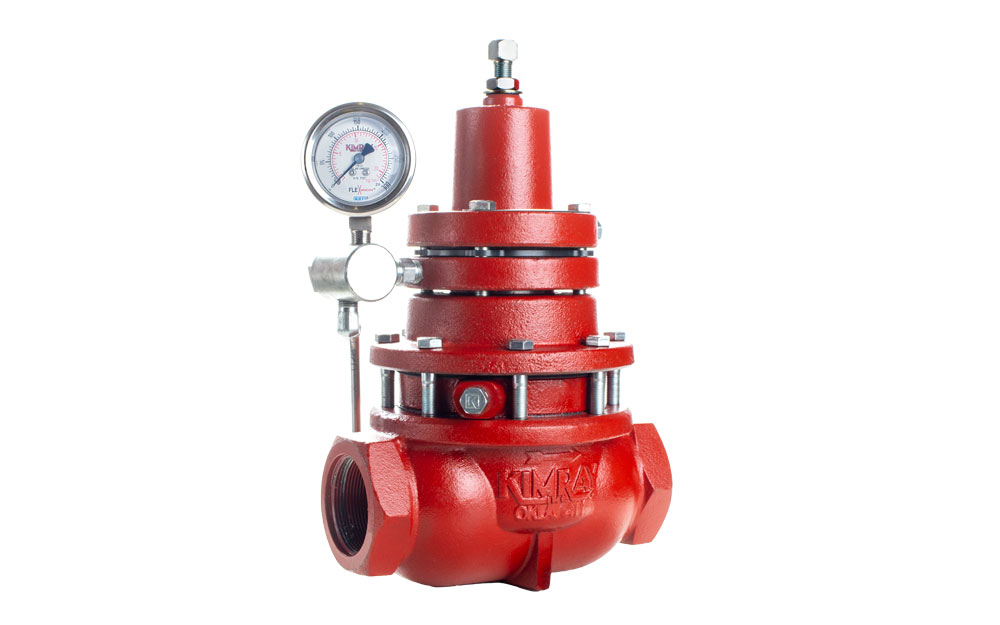
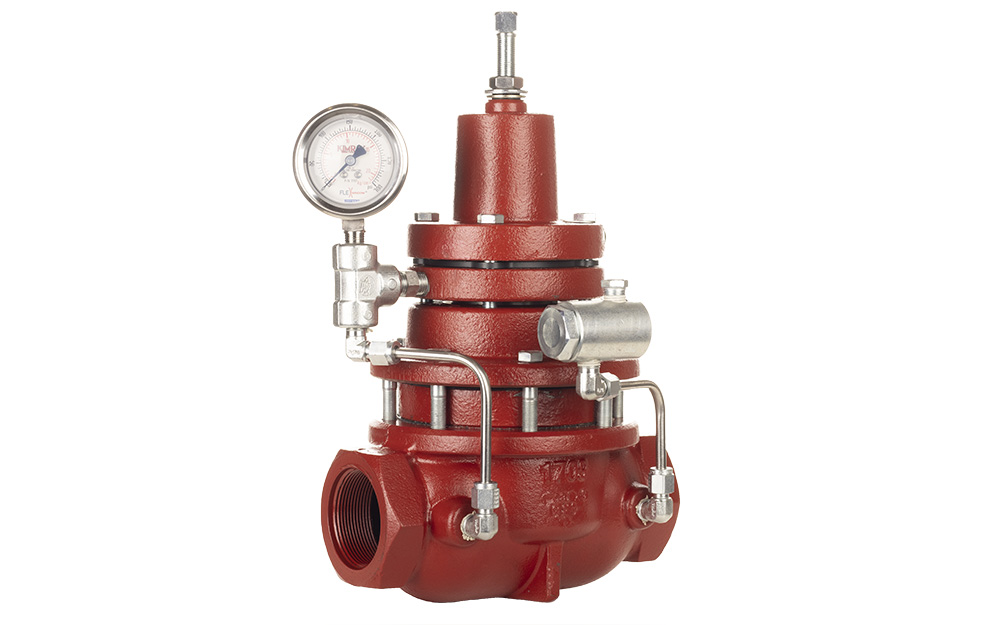
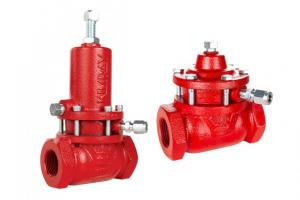
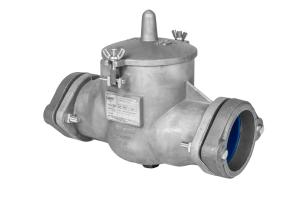
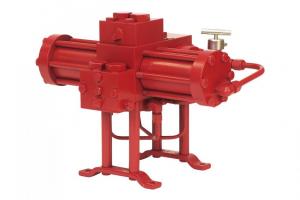
4. How to Repair a Pneumatically Operated Diaphragm Balanced Liquid Dump Valve
This is a walkthrough of how to repair a Pneumatically Operated Diaphragm Balanced Liquid Dump Valve.
Pneumatic liquid dump valves are available in either pressure-opening or pressure-closing configurations. We will be using the pressure-opening model for this repair.
How Often Should I Perform Maintenance on a Liquid Dump Valve?
Though the body of a liquid dump valve will last for many years, the seals should be replaced at least once a year.
We also recommend inspecting the valve seat every 6 months under normal service and conditions. Under severe service applications, inspection should be done regularly until a predictable pattern can be established for maintenance.
Parts Needed
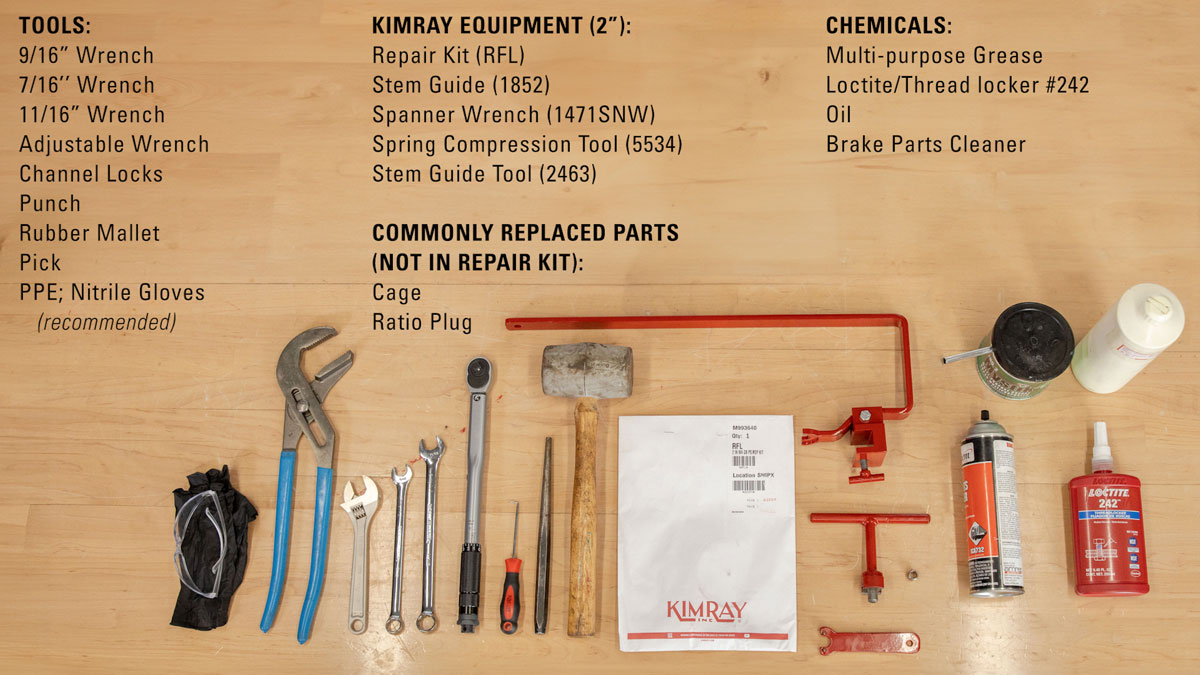
For this job, you will need the following tools, equipment, and chemicals:
Tools
9/16” Wrench
7/16’’ Wrench
11/16” Wrench
Adjustable Wrench
Channel locks
Punch
Rubber mallet
Pick
PPE; Nitrile Gloves (recommended)
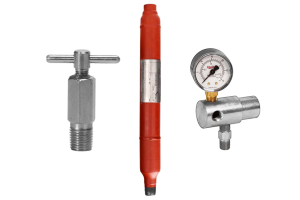
Kimray Equipment (2”)
Repair Kit (RFL)
Stem Guide (1852)
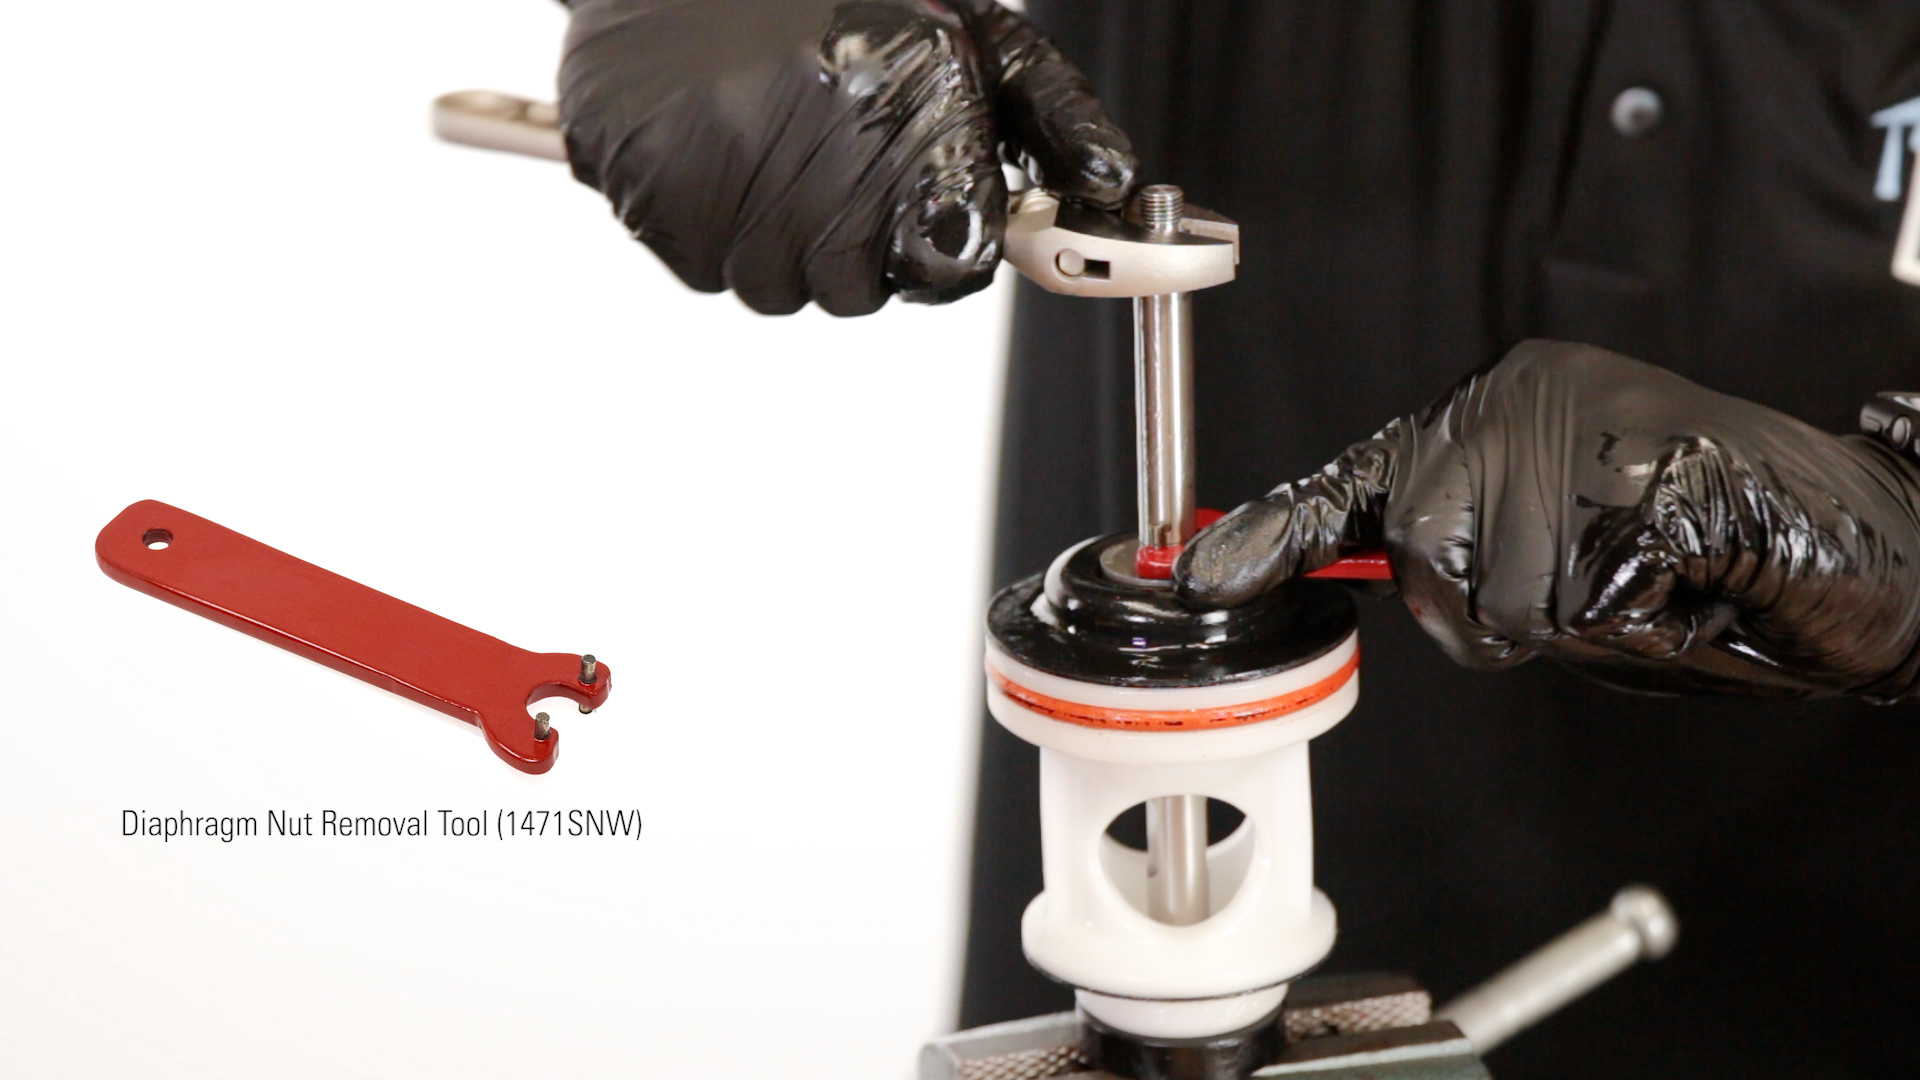
Spanner Wrench (1471SNW)
Spring Compression Tool (5534)
Stem Guide Tool (2463)
Commonly Replaced Parts (not in repair kit):
Cage
Ratio Plug
Chemicals
Multi-purpose Grease
Loctite/Thread locker #242
Oil
Brake Parts Cleaner
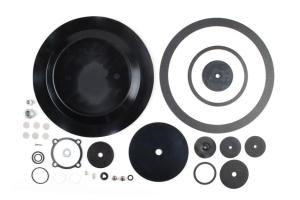
4.1 Tools and Equipment Needed4.2 Repair Kit Parts
Before any service, be certain that the valve is fully isolated and that all pressure upstream and downstream has been relieved. Use bypass valves or fully shut off the process. Be sure that any operating or instrument gas lines have been disconnected.
How to Disassemble a Pneumatically Operated Diaphragm Balanced Liquid Dump Valve
Remove the breather plug from the housing with a 9/16” wrench.
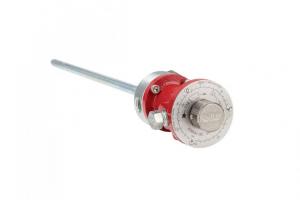
Remove the travel indicator housing with an adjustable wrench. Be careful because it will pop out.
Remove the spring and the travel indicator stem and set them aside.
The gasket will come off with the housing or may be stuck to the bonnet. Remove and discard.
Use a 9/16 and 11/16” wrench to remove the nuts and bolts from the bonnet. You may need a flathead screwdriver or a similar tool to separate the bonnet from the housing.
Remove and discard the diaphragm.
The spring behind the diaphragm plate is spring loaded so be careful when disassembling. Loosen the diaphragm plate with channel locks. Then apply downward pressure while carefully unthreading by hand to remove fully.
4.3 Diaphragm Plate Removal
Remove the spring.
Use a 9/16” wrench to remove the bolts from the lower housing.
Carefully pour out and discard the oil from the housing.
“Cage Assembly” Disassembly Steps
Secure the body in the vise at a 90° angle.
Use a large punch to tap out the cage assembly through the top of the body. Be careful not to strike the stem and to only use the punch on the seat. Remove it in a controlled manner and do not let it fall out, which could cause damage or injury.
4.4 Cage Assembly Removal with Punch4.5 Cage Removal
Remove the body from the vise.
Secure the cage assembly in the vise by the lock nut.
Use a spanner wrench or Kimray Diaphragm Nut Removal Tool to hold the diaphragm nut still while you unthread the stem assembly with an adjustable wrench.
4.6 Diaphragm Nut Removal Tool
Put a 7/16” wrench on the flats of the stem and remove the diaphragm nut with the Kimray tool.
Remove and discard the diaphragm.
Then remove the plate and set it aside.
Use a pick to remove and discard the large O-ring from around the cage.
Then remove the cage from the stem.
Use a 7/16” wrench on the flats to remove the stem.
Remove and discard the gasket from the bottom of the cage. This could also be stuck inside the valve. Be sure to remove any fragments of the old gasket from both surfaces.
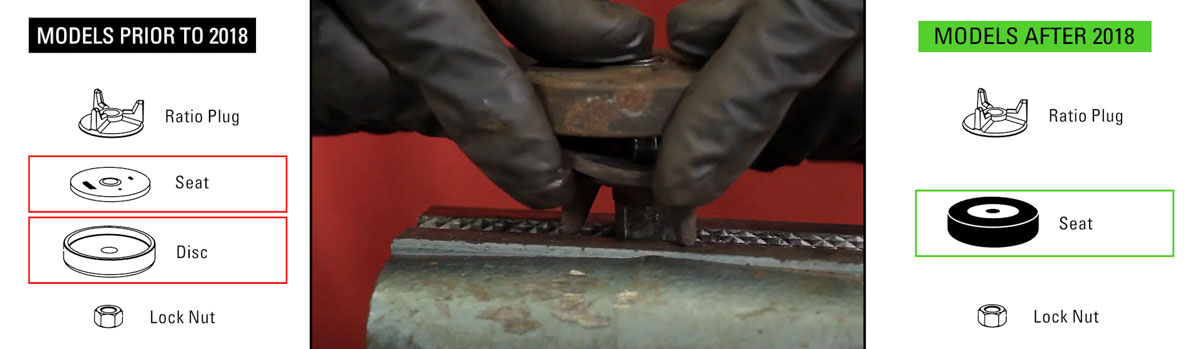
Remove and discard the seat but keep the ratio plug. The separate disc and seat found on models prior to 2018 has been replaced by a reversible seat. If only one side is worn, it can be flipped 180° to be used again or replaced from the repair kit.
4.7 Old Seat vs New Seat
Remove the nut from the vise and discard.
“Stem Guide” Disassembly Steps
Put the housing in a vise and use the Kimray Stem Guide tool to remove the stem guide assembly.
Remove and discard the O-ring around the threads of the stem guide.
Then, remove and discard the backup, O-ring and second backup.
At this point, your valve is disassembled and you’re ready to inspect the parts.
How to Inspect a Pneumatically Operated Diaphragm Balanced Liquid Dump Valve for Damage
Clean around the O-ring groove on the stem guide. Any loose particles left in the groove could cause leakage. If the groove surface shows light scratches, it may need to be replaced.
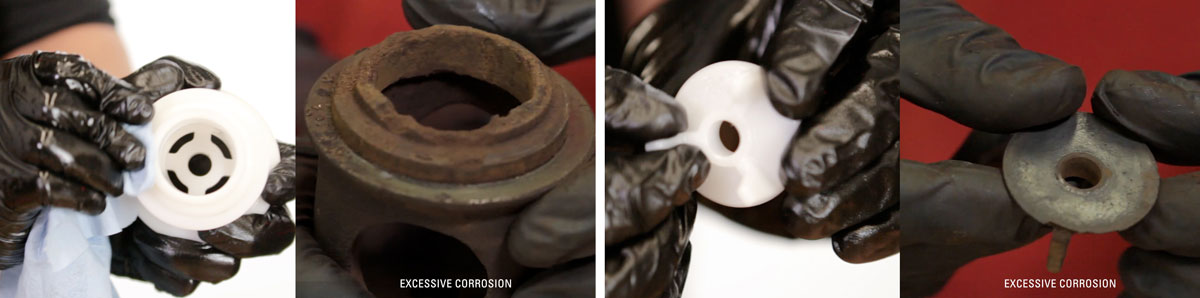
Inspect the bottom surface of the cage. If there is excessive corrosion or erosion, or any damage that could create a leak path between the cage and seat, discard and replace.
4.8 Cage Corrosion
Also check for fragments of gasket material, which can cause misalignment of the body surface. Use a flat file to clean the surface but replace the cage if there are deep nicks that cannot be removed or if the cage body shows signs of wear.
Inspect the ratio plug. If there is an excessive amount of corrosion or erosion, it will need to be replaced.
Clear the stem guide communication hole of any debris.
Check the diaphragm nut to make sure the threads are intact, and that the communication hole is clear of debris.
On the valve body, inspect the inlet and outlet threads to make sure they are intact.
Inspect the seat area where the gasket will sit and check for any severe washouts inside the valve.
Clean the interior and exterior to make sure it’s free of all solvents, debris, and fluids that may damage elastomers and affect O-ring and gasket seals.
Use a parts washer or a wire brush, degreaser, and the appropriate PPE to get them as clean as possible.
How to Reassemble a Pneumatically Operated Diaphragm Balanced Liquid Dump Valve
"Stem Guide" Assembly Steps
Place the housing in the vice.
Apply all-purpose grease to the threads of the stem guide.
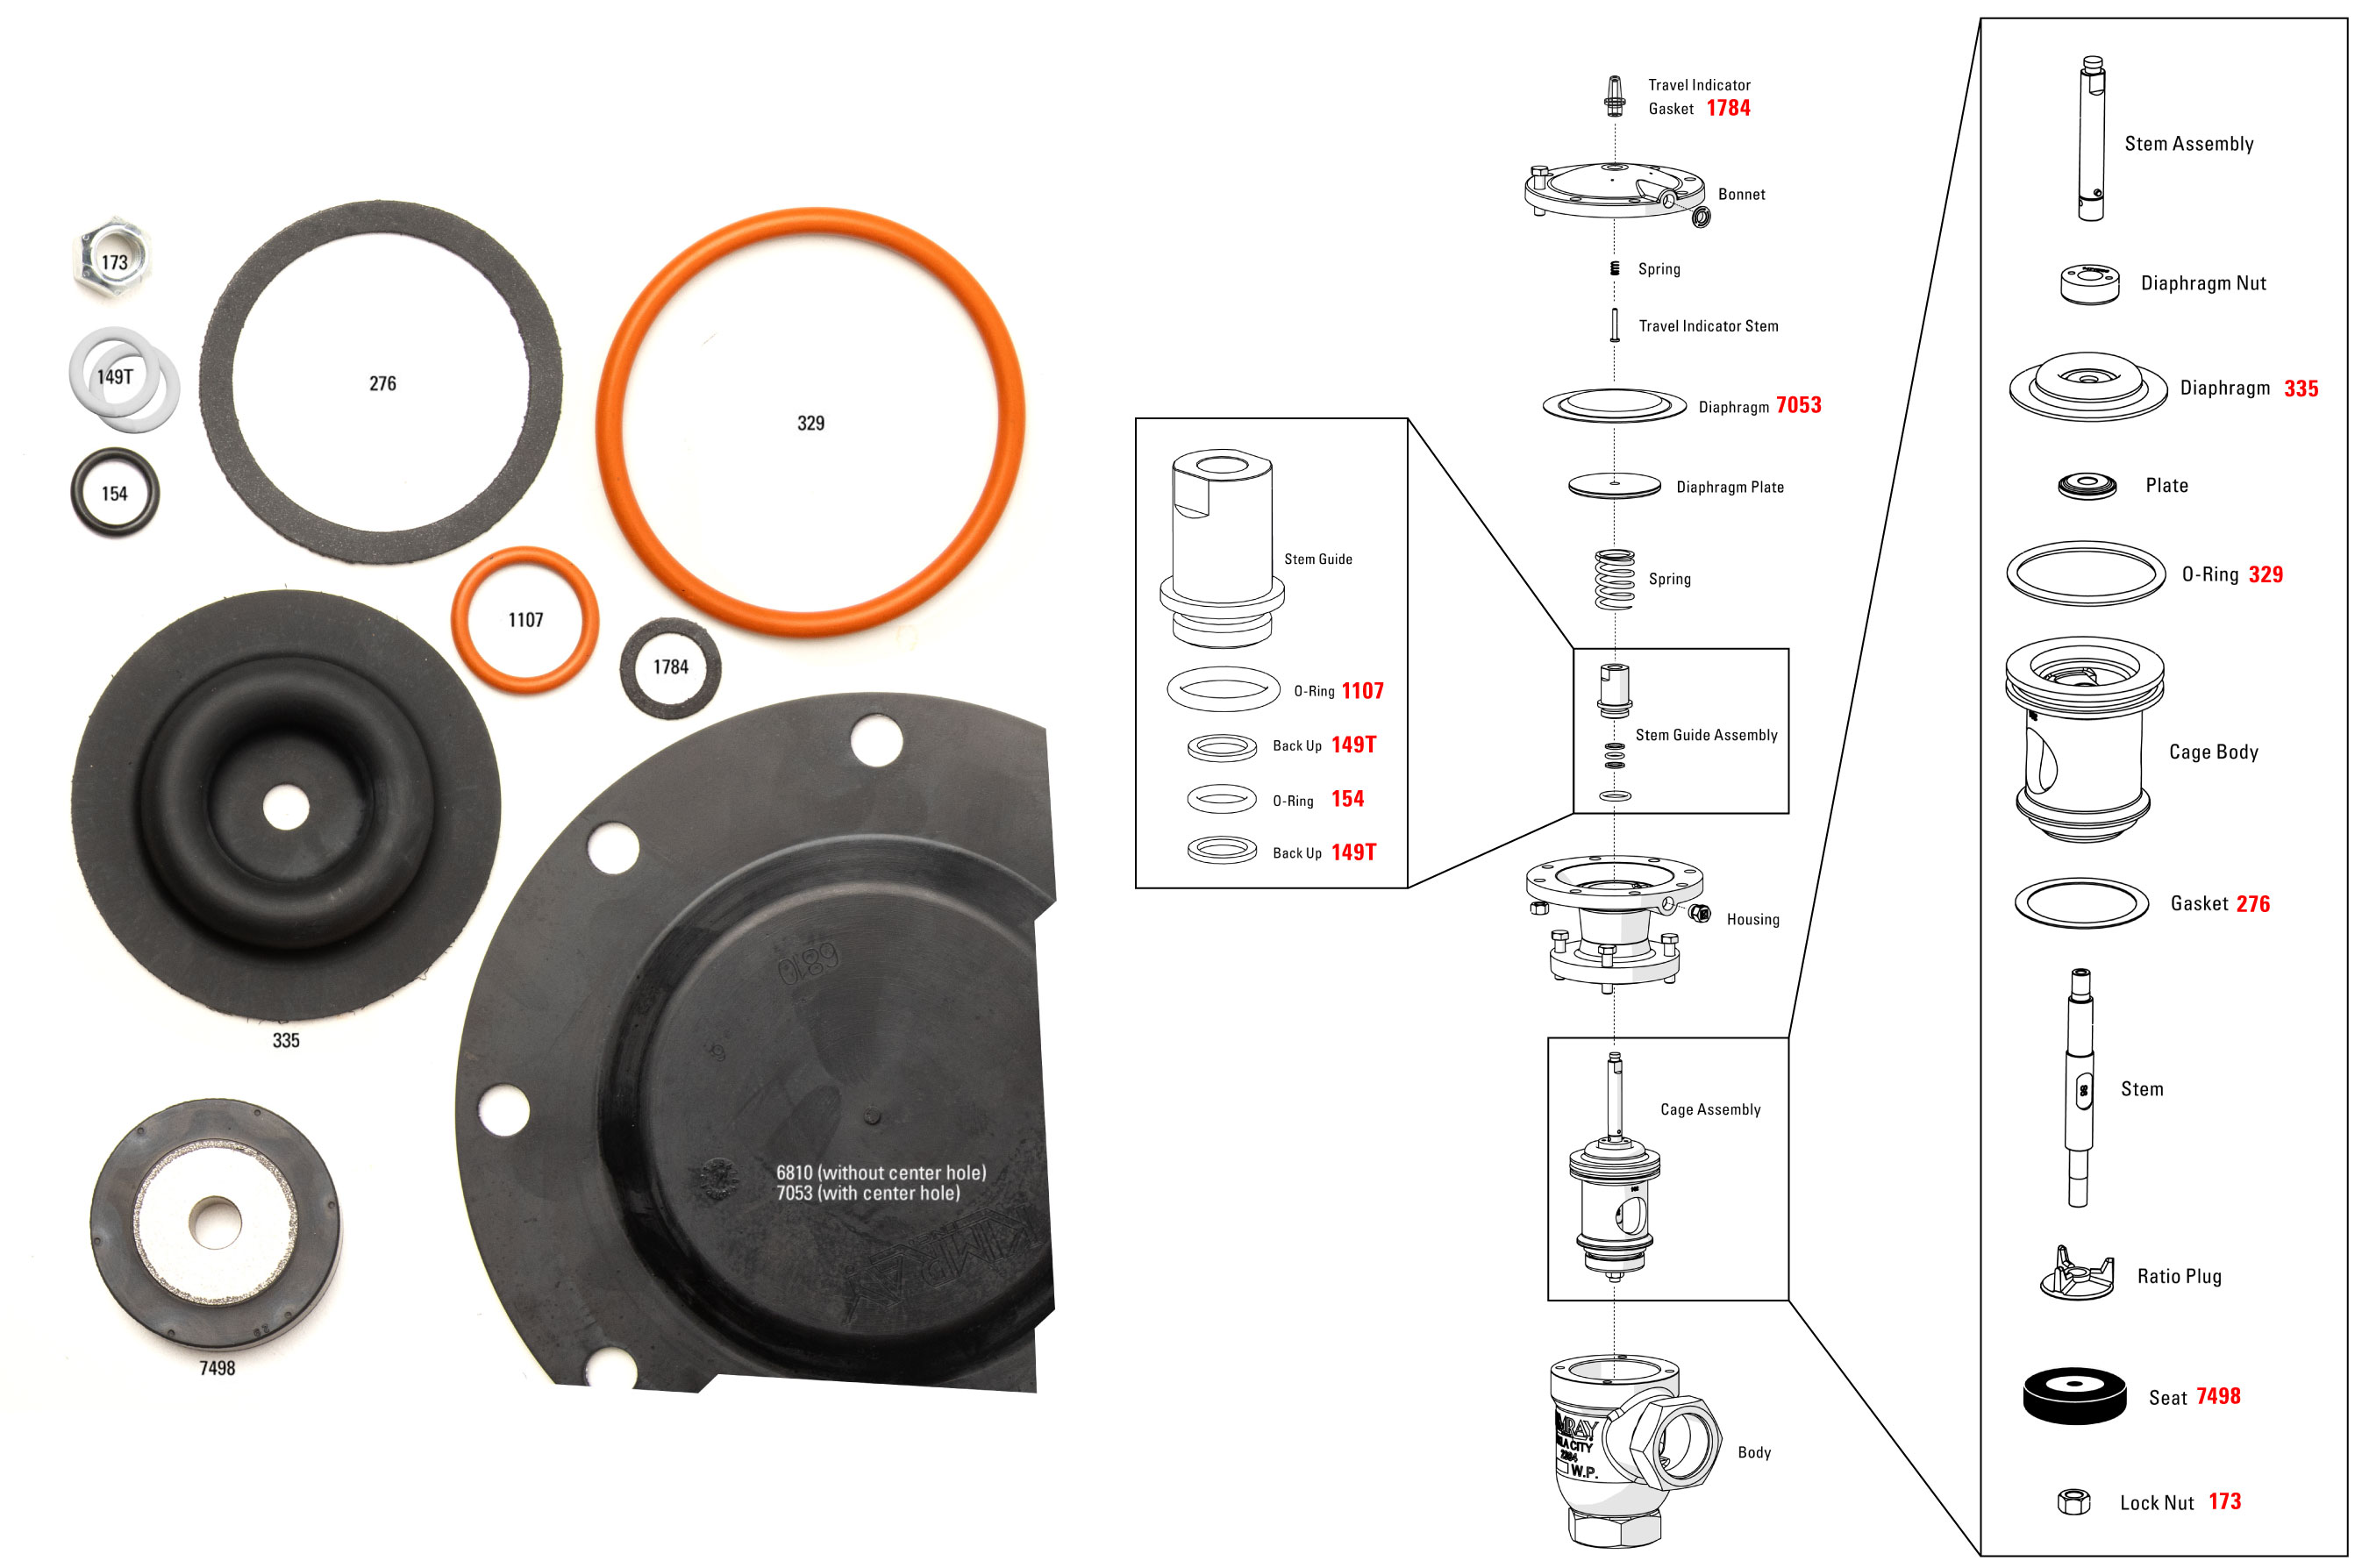
Place the (1107) O-ring onto the outer groove of the stem guide and apply grease.
Put in the first (149T) spiral back up, followed by the (154) O-ring and the second (149T) back up.
Add grease to the inside.
Tighten the stem guide into the housing.
"Cage Assembly” Assembly Steps
Place the new (329) O-ring onto the cage.
Apply grease to the O-ring.
Then apply grease to the bottom of the cage where the gasket will set.
Put on the (276) gasket and apply grease. Then set the cage aside.
While holding the stem, slide on the ratio plug, followed by the (7498) seat. If you’re using a reversed seat, put the worn side facing away from the ratio plug.
Hand start the new (173) lock nut onto the valve stem, making sure the flat end of the nut is facing the seat.
Flip the stem over and tighten the nut into the vise.
Use a 7/16” wrench on the flat area of the stem to fully tighten.
Slide the cage over the stem.
Followed by the plate.
Place the (335) diaphragm over the plate with the raised side facing up.
Hand start the diaphragm nut onto the threads.
Apply Loctite to the threads. Use a spanner wrench or Kimray Diaphragm Nut Removal Tool to fully tighten the diaphragm nut.
Then thread the stem assembly into the lower stem using an adjustable wrench.
Now secure the valve body in the vise and insert the cage assembly with the hole facing the same direction as the valve connection.
Tap on top of the cage with a rubber mallet while applying pressure to the opposite side until the cage seats fully. The diaphragm edge must be near flush with the body.
4.9 Cage Assembly Insertion
Place a Kimray Stem Guide on top of the stem.
Body, Cage, & Housing Assembly Steps
Seat the housing on the valve body. The breather plug should be parallel to the valve inlet.
Remove the stem guide.
Tighten the bolts in a crisscross pattern to avoid misalignment. For 2”, 3” and 4” valves, tighten bolts between 25-30 ft/lbs torque.
Apply 5/8” to ¾" of oil into the housing—enough to cover the communication hole.
4.10 Communication Hole4.11 Stem Guide Lifting
Thread on the diaphragm plate. Then use two flathead screwdrivers to make sure the stem is all the way up.
Now remove the plate and install the spring into the housing.
Diaphragm Plate Assembly Steps
To install the diaphragm plate, you’ll need to use the Kimray Spring Compression tool.
Attach the tool to the housing and tighten it securely. Carefully compress the spring by pulling down on the lever. Then thread on the diaphragm plate by hand—about three full rotations.
4.12 Spring Compression Tool
Relax the spring pressure while assuring the plate remains in place. It’s important to make sure that the spring stays under the compressor tool.
Carefully remove the spring compression tool. You can use a wrench to loosen the wing nut on the tool.
Before fully tightening, apply thread locker (Loctite) to the exposed threads.
Now tighten by hand until snug and use channel locks to tighten fully. When it’s tight, the top of the stem should be flush or slightly above the plate.
Place the (6810) diaphragm over the diaphragm plate, bevel side up, and center with the bolt holes.
Place the bonnet on the housing and align the supply inlet with the housing breather hole.
Place the bolts in the bonnet and tighten the nuts in a crisscross pattern between 25-30 ft/lbs. torque. If your valve has hoist rings, attach them across from each other.
Place the spring on the indicator stem. Then place this into the bonnet.
Place the (1784) gasket on the travel indicator housing.
Insert the travel indicator housing into the bonnet and tighten with an adjustable wrench.
Apply thread locker to the breather plug threads and install it into the upper housing.