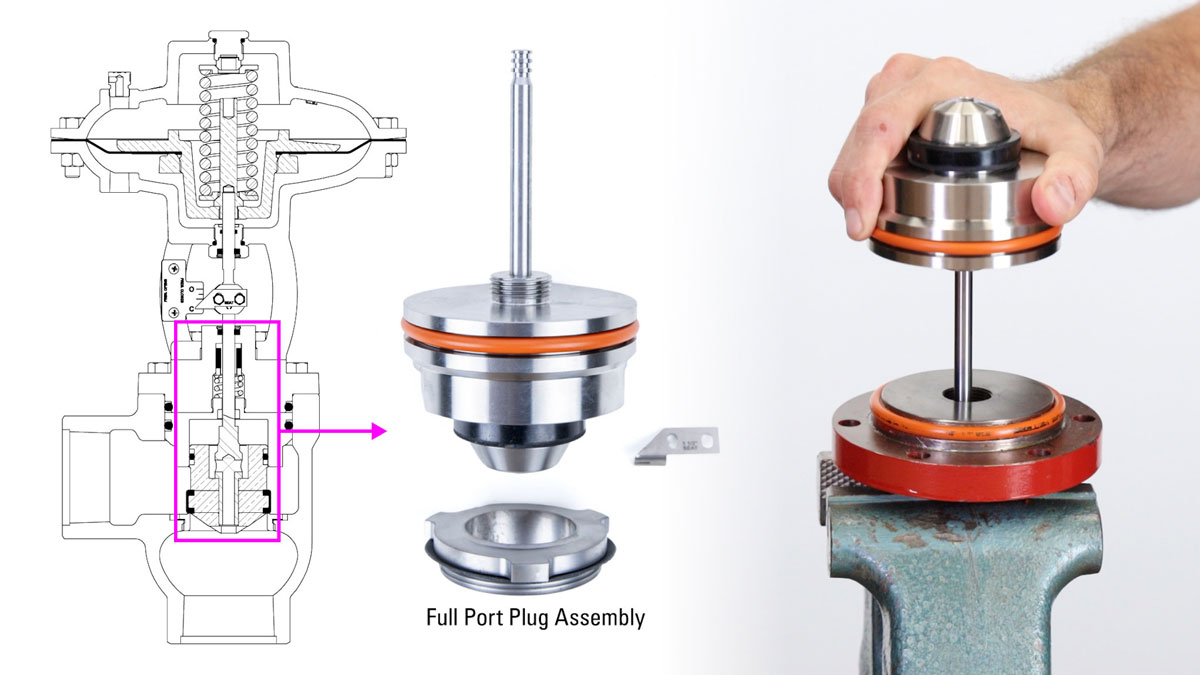
Kimray’s LPHV Valve is specially designed for erosive applications. While the valve body can last decades in production, the internals need to be replaced and maintained. In a previous video we covered how to complete a full repair of the LPHV using a Kimray repair kit.
Many of the components replaced are part of the plug assembly. As an alternative to a complete repair, you could quickly install a replacement plug assembly.
This also makes converting an existing valve to a full or reduced port trim much faster and easier. In this video, we’ll be showing the conversion of a 2” reduced port LPHV to a full port trim size.
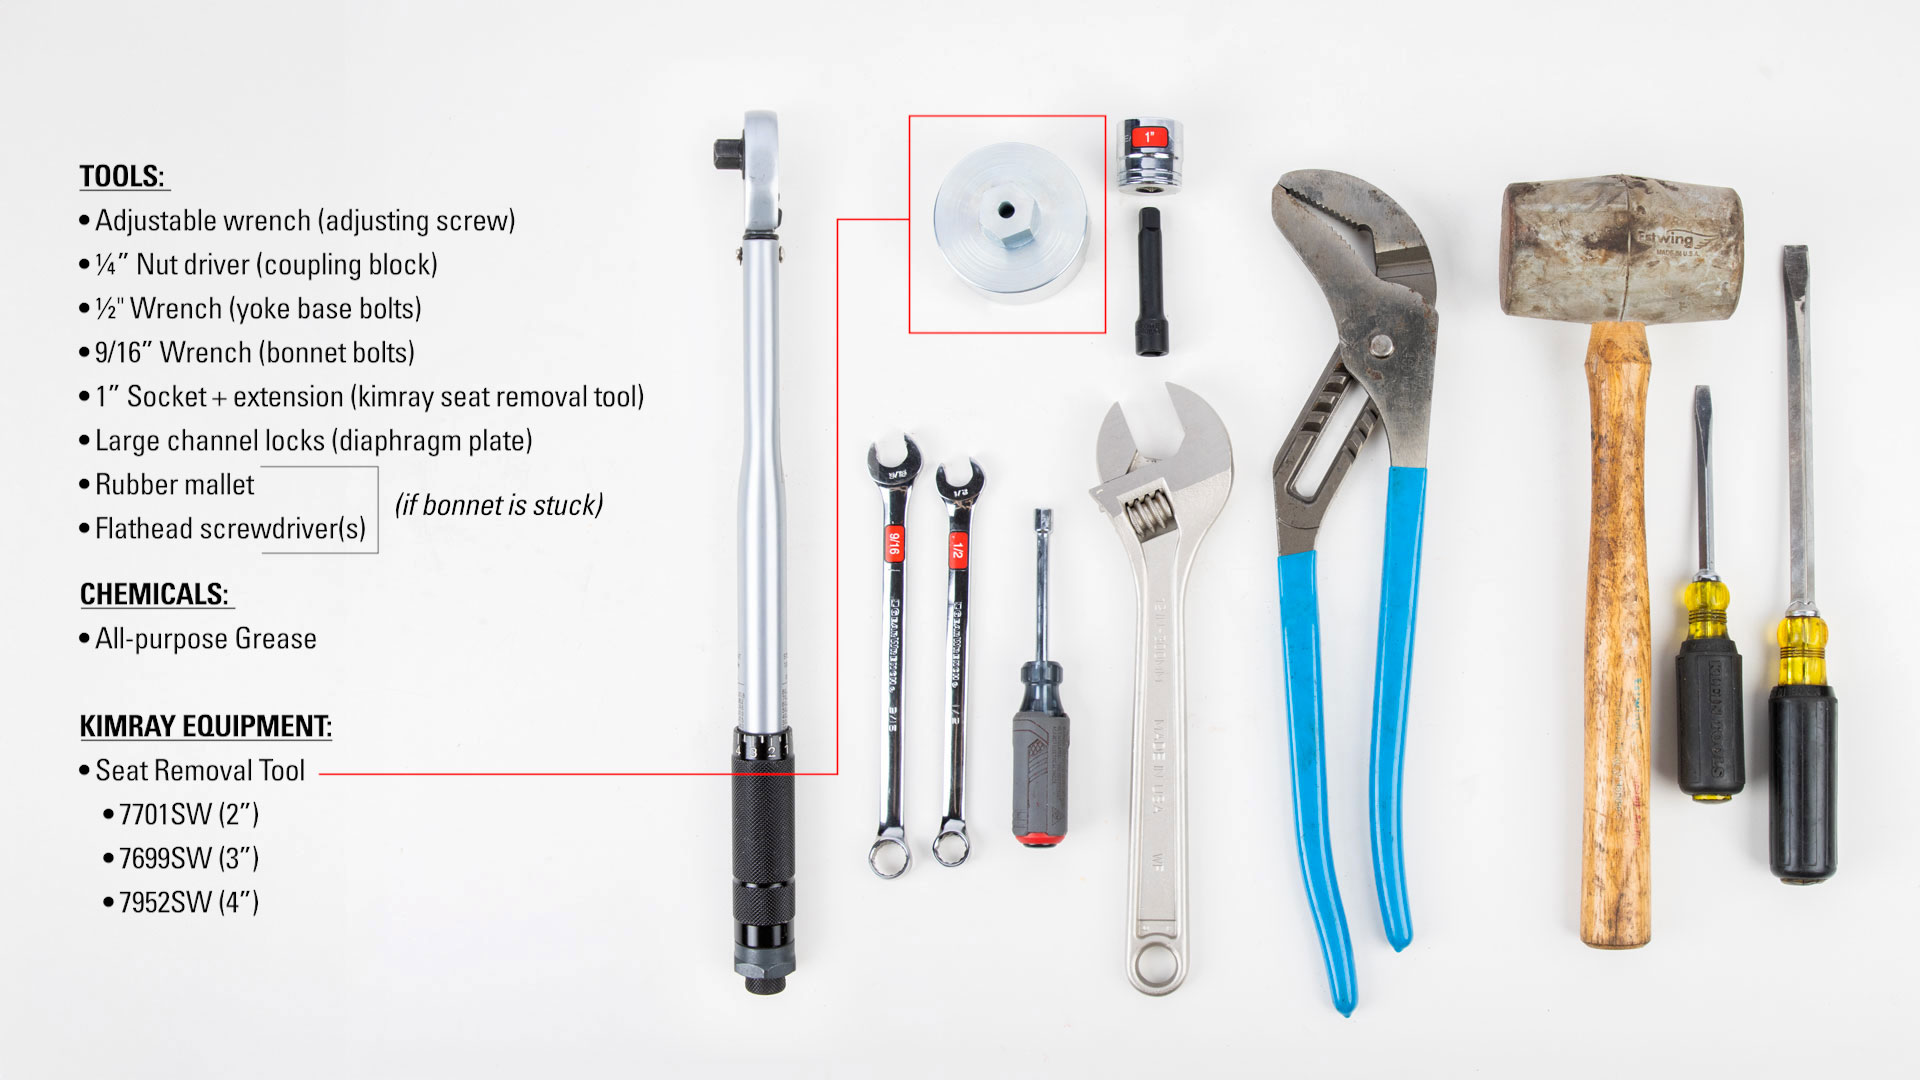
Tools Needed:
- Adjustable wrench (adjusting screw)
- 1/4” Nut driver (coupling block)
- 1/2" Wrench (yoke base bolts)
- 9/16” Wrench (bonnet bolts)
- 1” Socket + extension (with Kimray seat removal tool)
- Large channel locks (diaphragm plate)
- Rubber mallet
- Flathead screwdriver(s)
- Grease
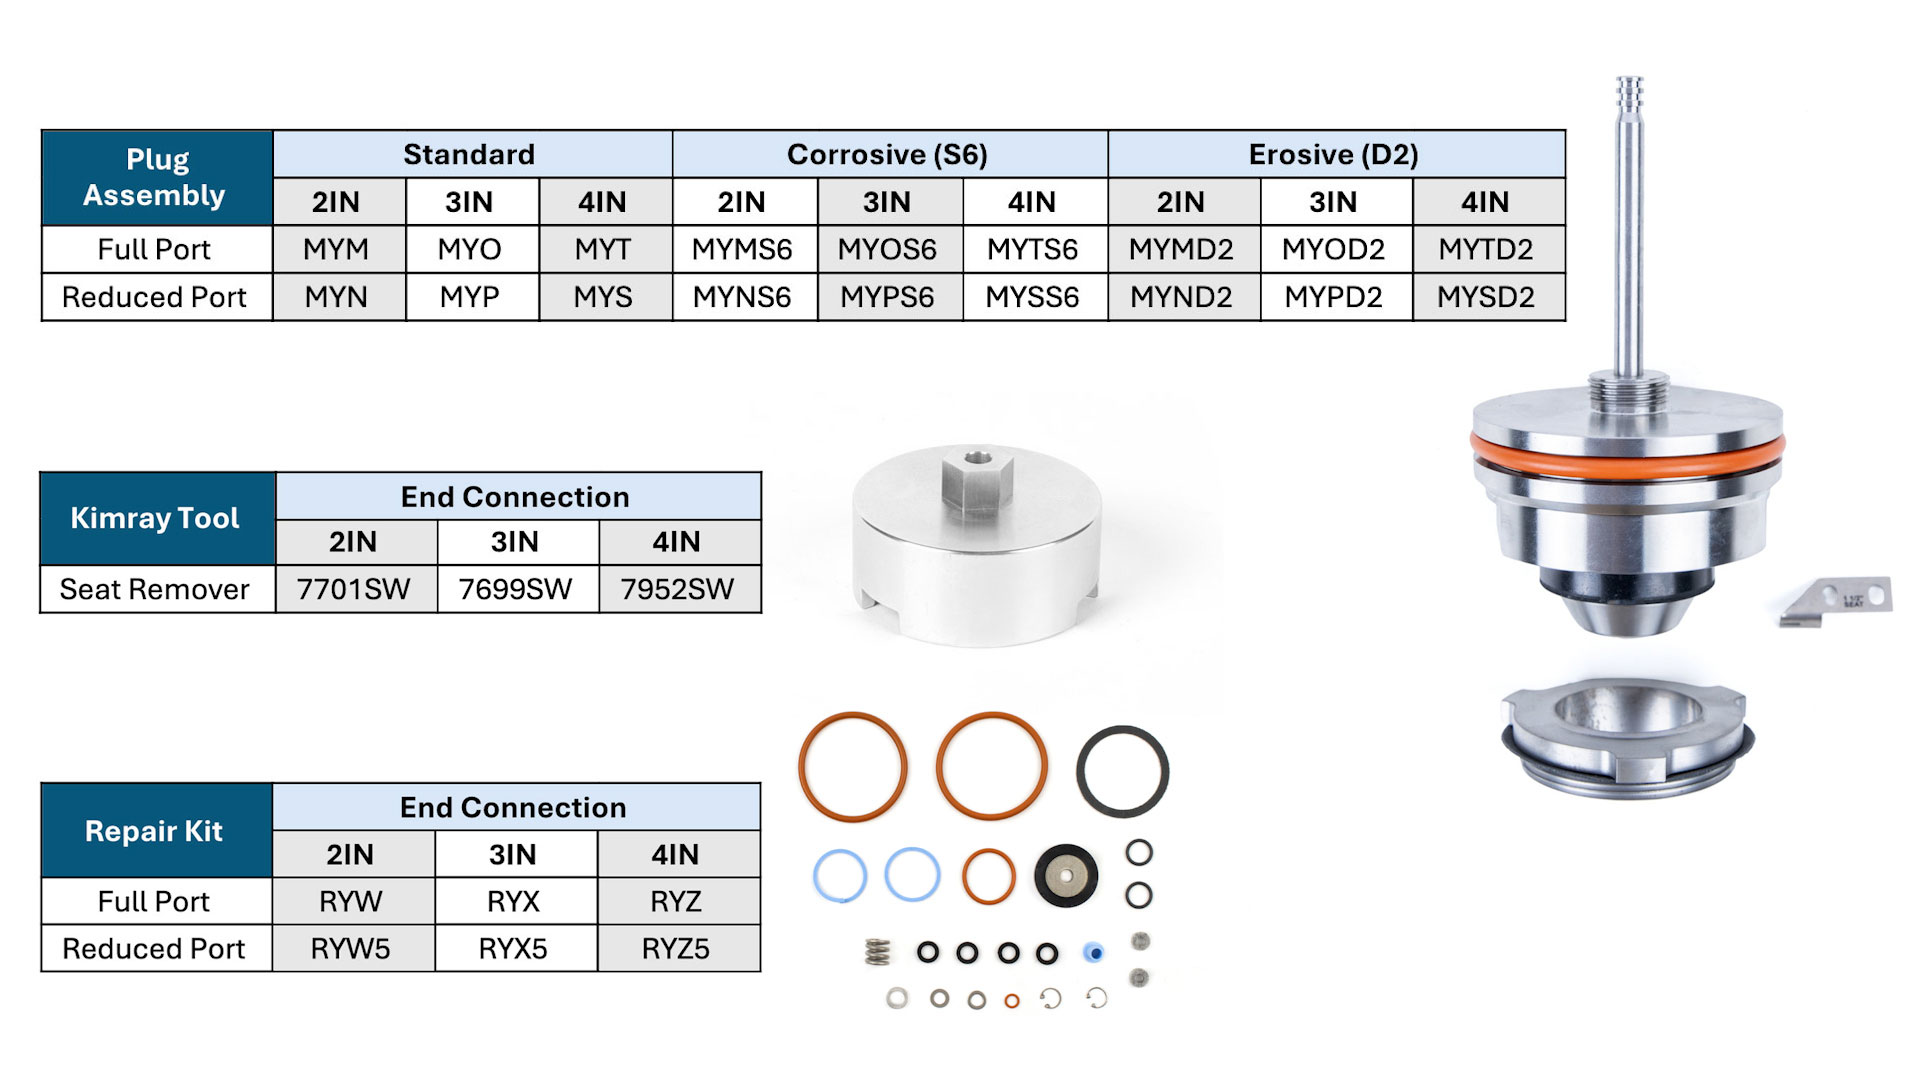
Kimray Components:
- Plug Assembly
- Seat Removal Tool
- Repair Kit (Optional)
Disassembly
The process of replacing trim size plug assemblies can be done inline, though if the valve has been in service, you will most likely need to use a full repair kit. If your valve is not in service, start by clamping the body securely in a vise.
- Using an adjustable wrench, back out the upper adjusting screw. You do not need to take this all the way off, just enough to relieve spring tension.
- Remove the coupling block with the ¼" nut driver.
- Use a ½" wrench to remove the four bolts from the yoke base.
- Remove the actuator top and set it aside.
- Use a 9/16” wrench to remove the stuffing bonnet bolts.
- Remove the stuffing bonnet assembly.
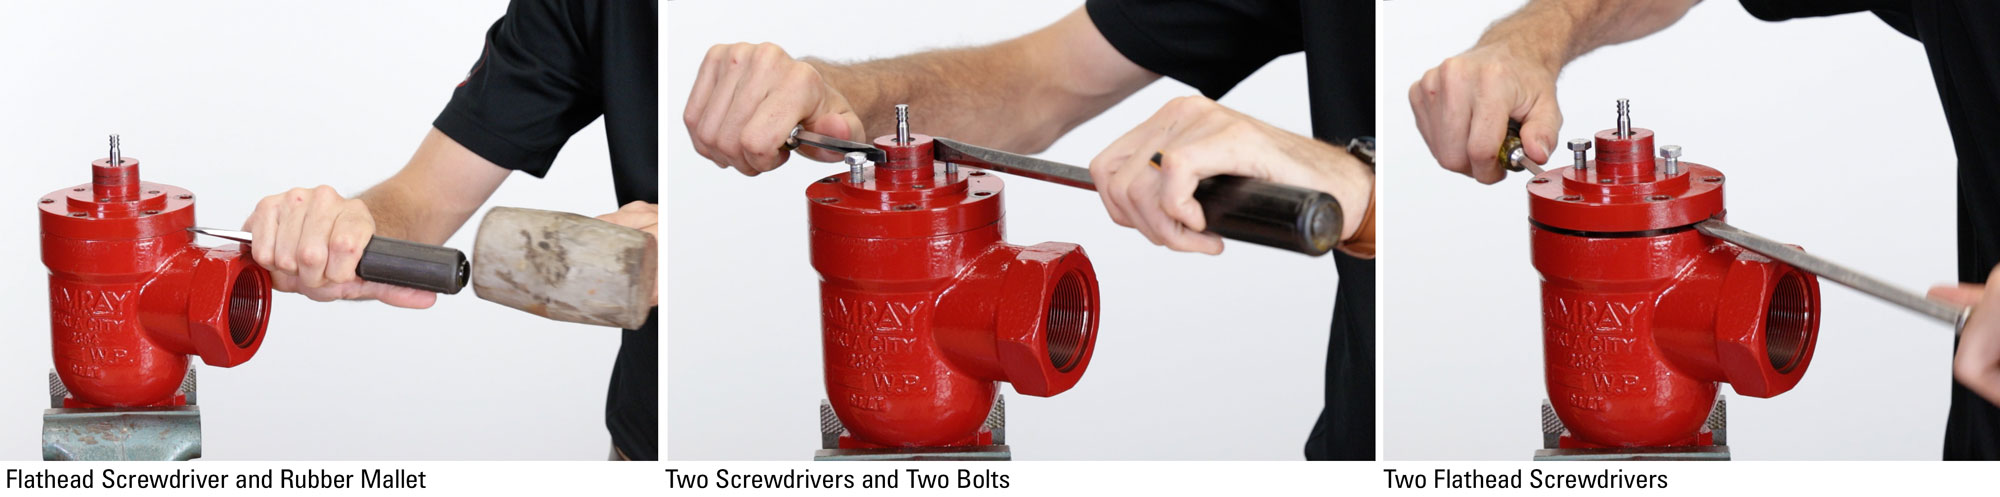
- Use one or two flathead screwdrivers and a mallet to pry off the stuffing bonnet assembly and piston assembly from the valve body.
- If you can’t pry off the stuffing bonnet, try re-installing two of the ½" bolts into the bonnet and use two screwdrivers for leverage to twist the bonnet loose. Then you can pry it off with the screwdrivers once it’s been loosened.
- Using the Kimray seat removal tool and a 1” socket and extension, remove the seat and gasket. If this is a new valve, these can be saved for another use or application. If it’s been used, these can be discarded.
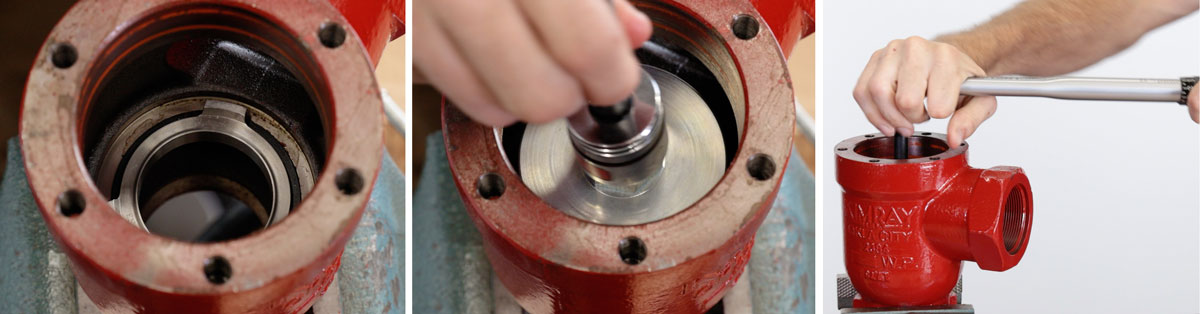
- Grease the gasket of the new seat or the seating surface inside the valve.
- Tighten the new removable seat and gasket into the body using the following torque specs:
- 2IN: 55-65 ft-lb
- 3IN: 55-65 ft-lb
- 4IN: 80-100 ft-lb
- Remove the valve body and place the stuffing bonnet upside down in the vise.


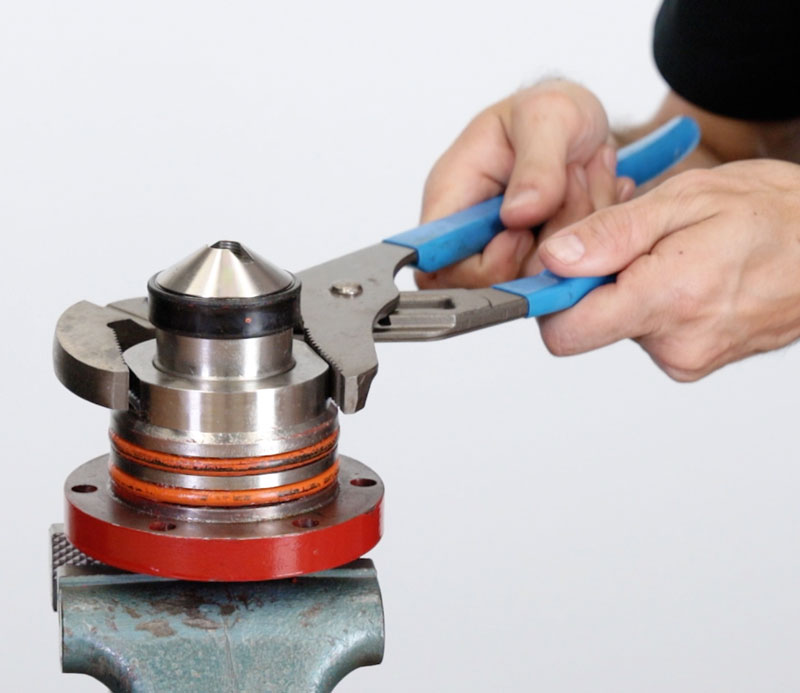
- Use large channel locks on the flats to unthread the cylinder from the stuffing bonnet. If this is a new valve, this can be saved for another use or application. If it’s been used, these can be discarded.
- Be sure to leave the O-ring on the bonnet, this is not included in the plug assembly.
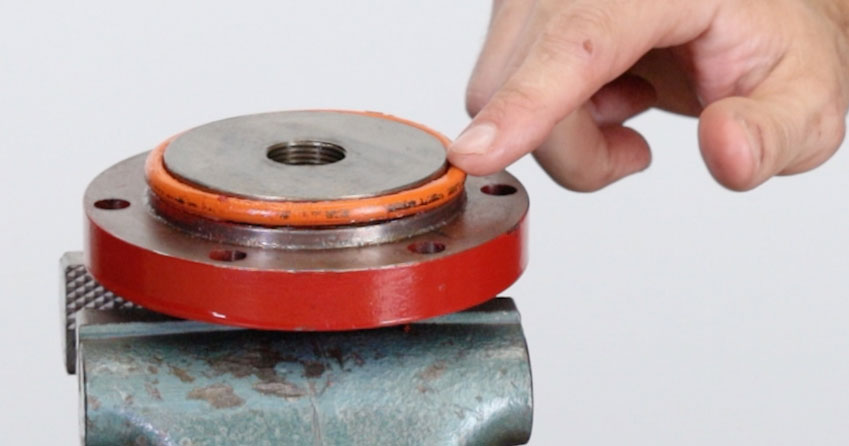
This is as far as we need to disassemble the valve for changing trim sizes. Now we’re ready to install the new plug assembly.
Assembly
- Thread in the new plug assembly by hand and tighten with channel locks.
- Put the valve body back into the vise.
- Grease both O-rings on the assembly.
- Then insert the assembly into the body, aligning the bolt holes.
- While bracing one side, use a rubber mallet to gently tap it into place evenly.
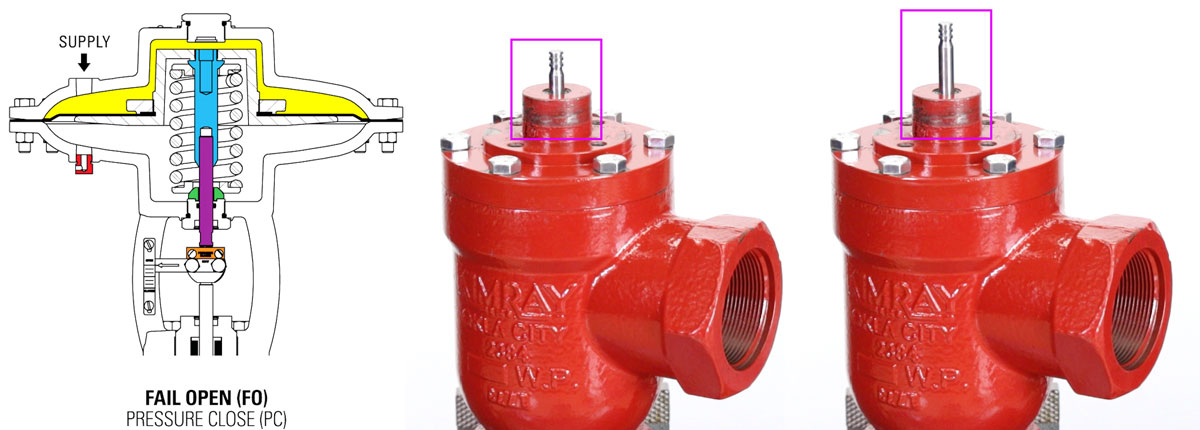
- If your actuator is in a fail open position, you’ll need to first pull up the stem to make attaching the coupling block easier.
- Replace the six bonnet bolts with a 9/16” wrench to 35-45 ft-lb for all sizes
- Place the actuator on top and hand start the four bolts. Attach the coupling block with the new position tag from the plug assembly stating the new size.
- Next, fully tighten the bolts on the actuator.
- Finish by fully tighten the adjusting screw with an adjustable wrench.