In this video and blog, we’re going to look at the essential steps for adjusting set pressure on LaMOT Pressure/Vacuum Relief Valves.
LaMOT Valve and Arrestor pressure/vacuum relief valves are available with a wide range of pressure and vacuum settings, measured in ounces per square inch gauge (osig). This unit of pressure measurement is for very low pressures and measures pressure relative to the ambient atmospheric pressure, not an absolute vacuum.
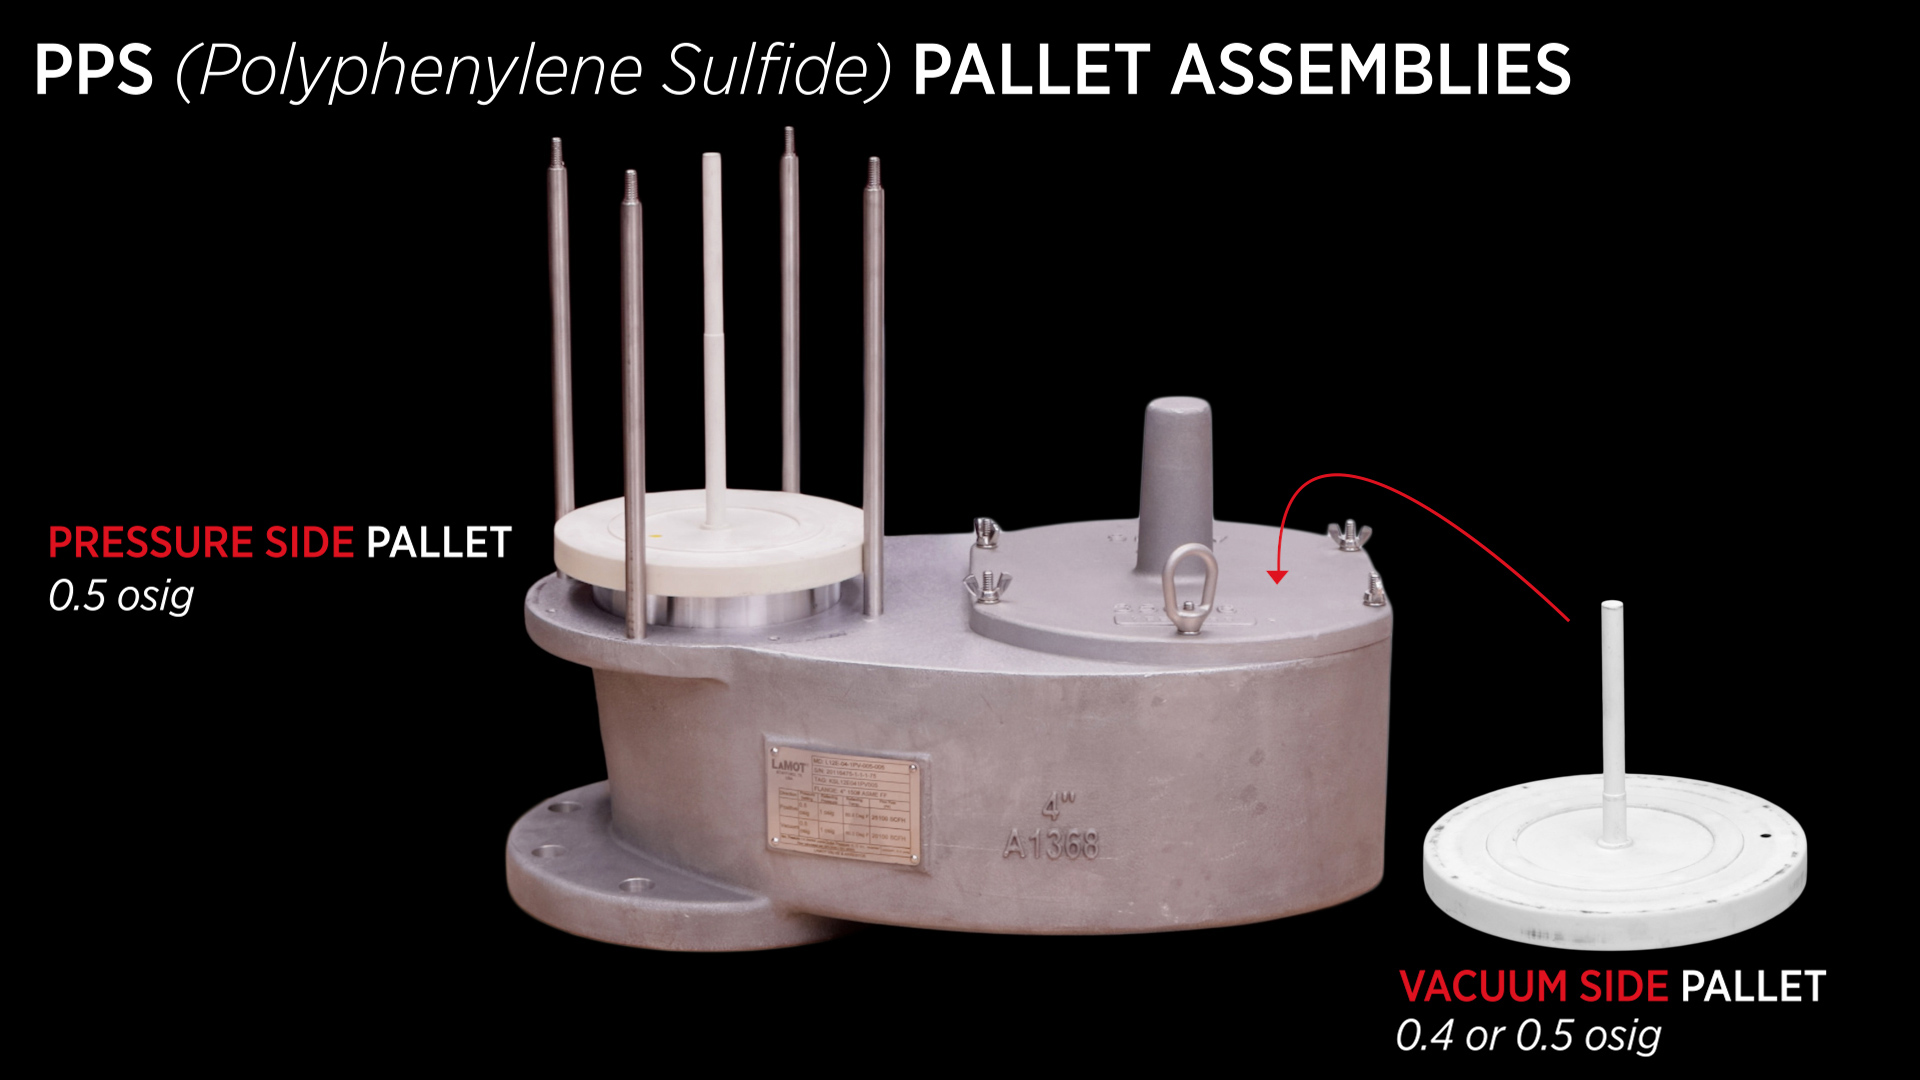
Each valve is equipped with PPS pallet assemblies that are factory-calibrated to:
- 0.5 osig on the pressure side
- 0.4 or 0.5 osig on the vacuum side
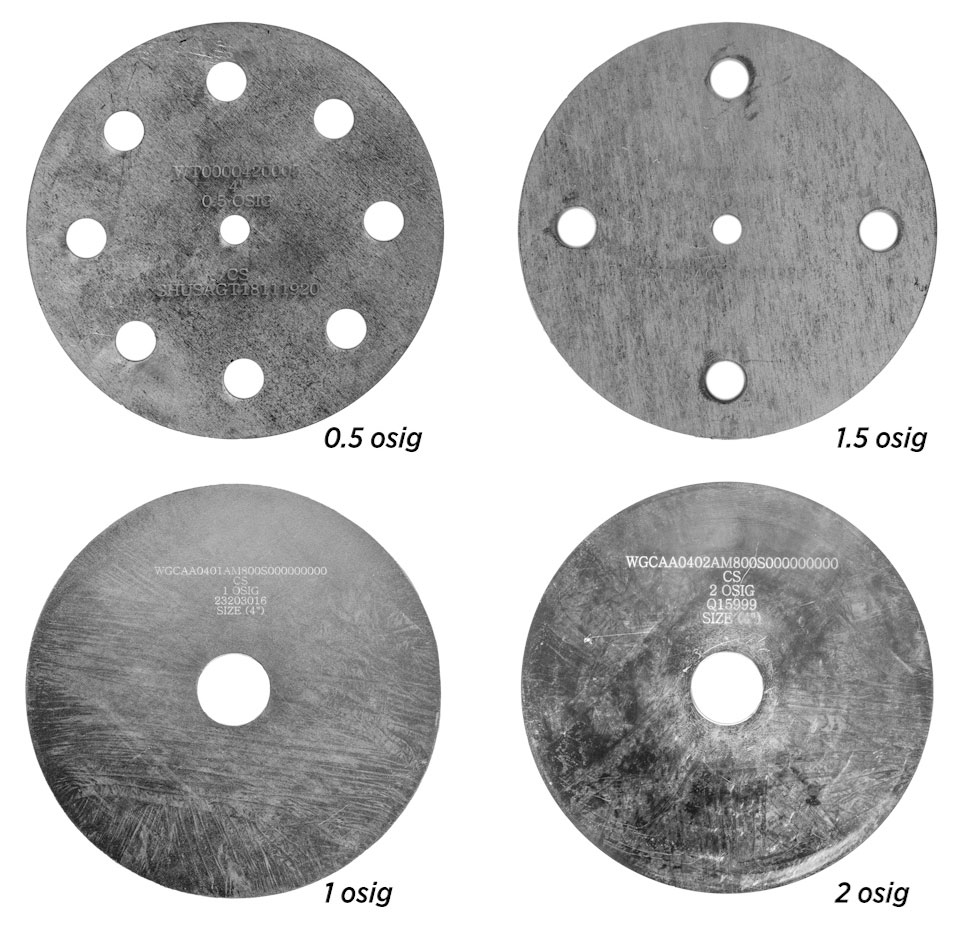
For applications requiring a setting higher than 0.5 osig, calibrated weights are used to increase the pallet’s setpoint to the required value. Each additional weight is clearly marked with its equivalent pressure value, allowing users to stack weights as needed to achieve the specified setting.
LaMOT Valve and Arrestor weights are also measured in osig. Each weight is stamped with the valve size and the incremental pressure value it provides. To ensure the integrity of the pallet assemblies, all calibrated weights are packaged separately when the valve is shipped.
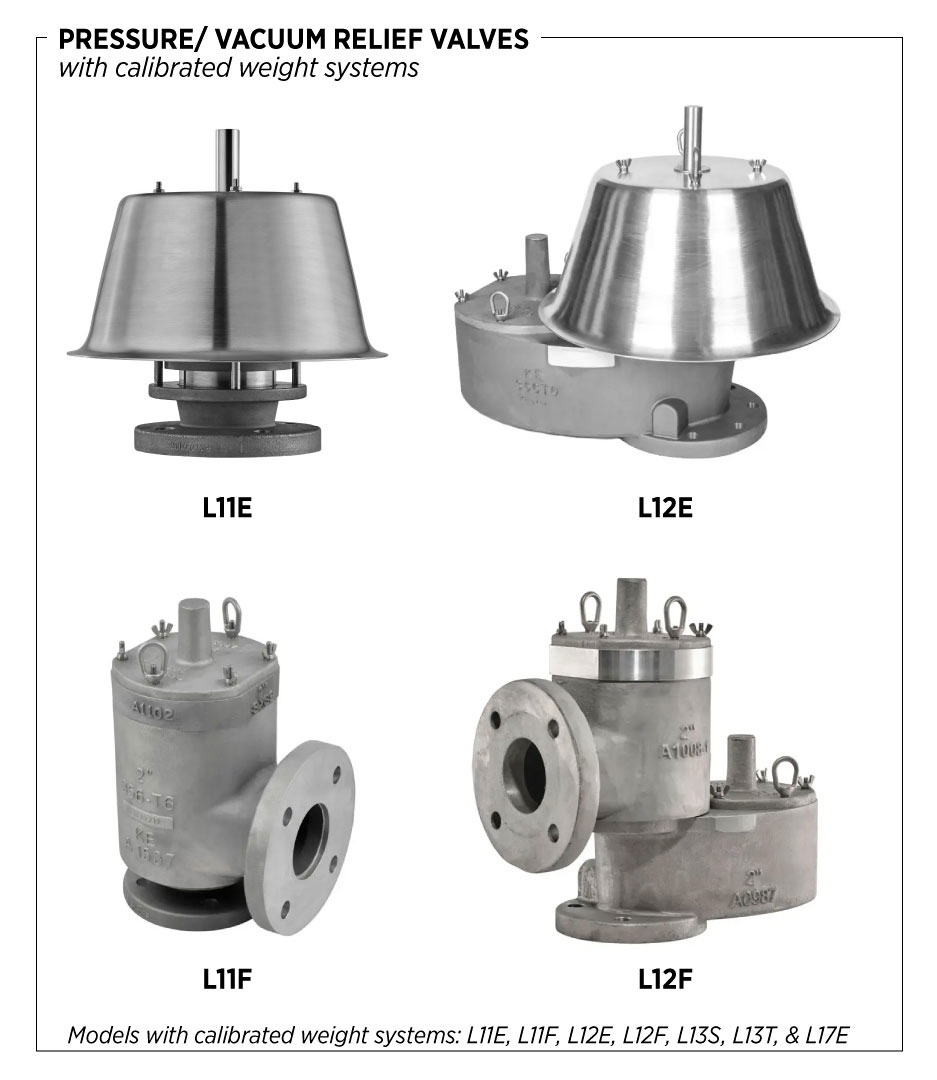
Note: These steps only apply to LaMOT Valve and Arrestor’s models with calibrated weight systems, including: L11E, L11F, L12E, L12F, L13S, L13T, and L17E.
CAUTION: The procedures in this video are intended for general informational purposes only. Always follow your company’s safety requirements, policies, and applicable regulations when performing any maintenance or repair.
Before starting any repair or maintenance activities:
Review and follow all WARNING notes found in the LaMOT Valve and Arrestor’s Installation, Operation, and Maintenance (IOM) guide for your specific product.
Wear all required personal protective equipment (PPE), including approved eye protection, steel toe safety shoes, and protective gloves to protect against exposure to chemicals and other hazardous materials.
Failure to use appropriate PPE or follow proper procedures can result in serious injury or death.
Adjust set point with Calibrated Weights
Determine required weights for both the pressure and vacuum side
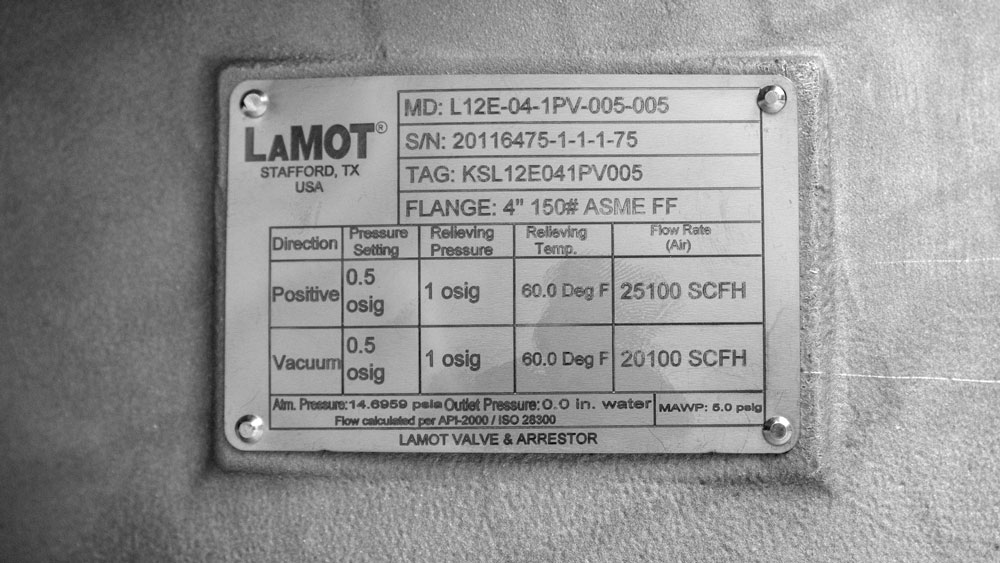
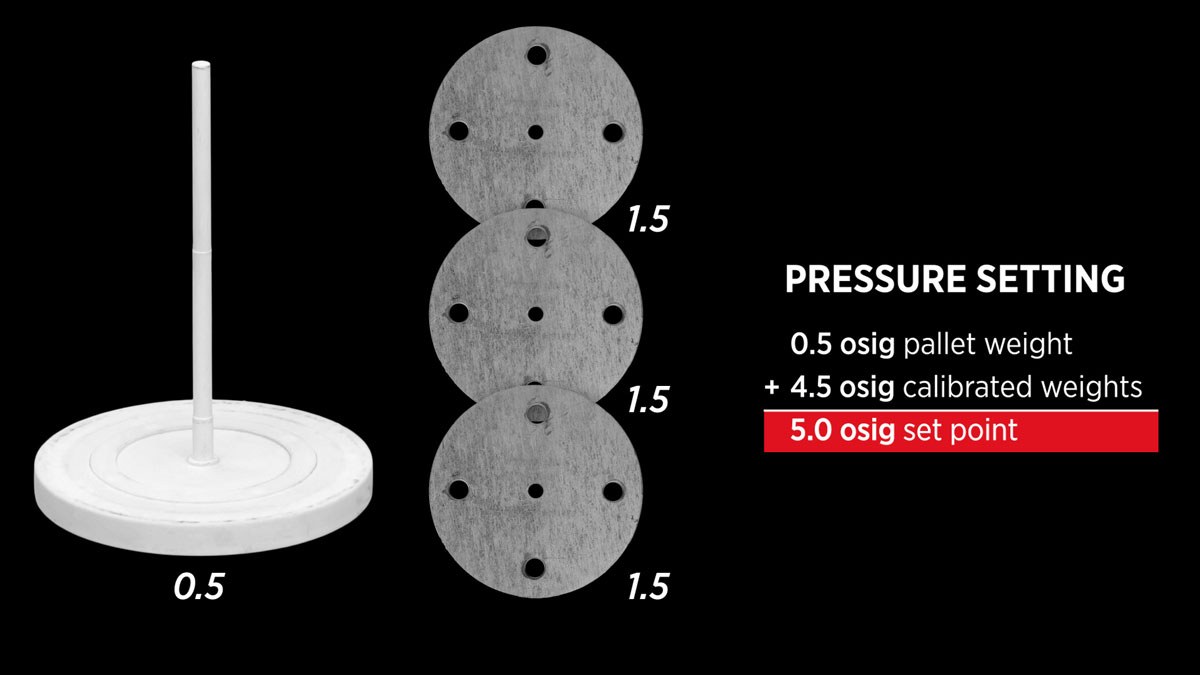
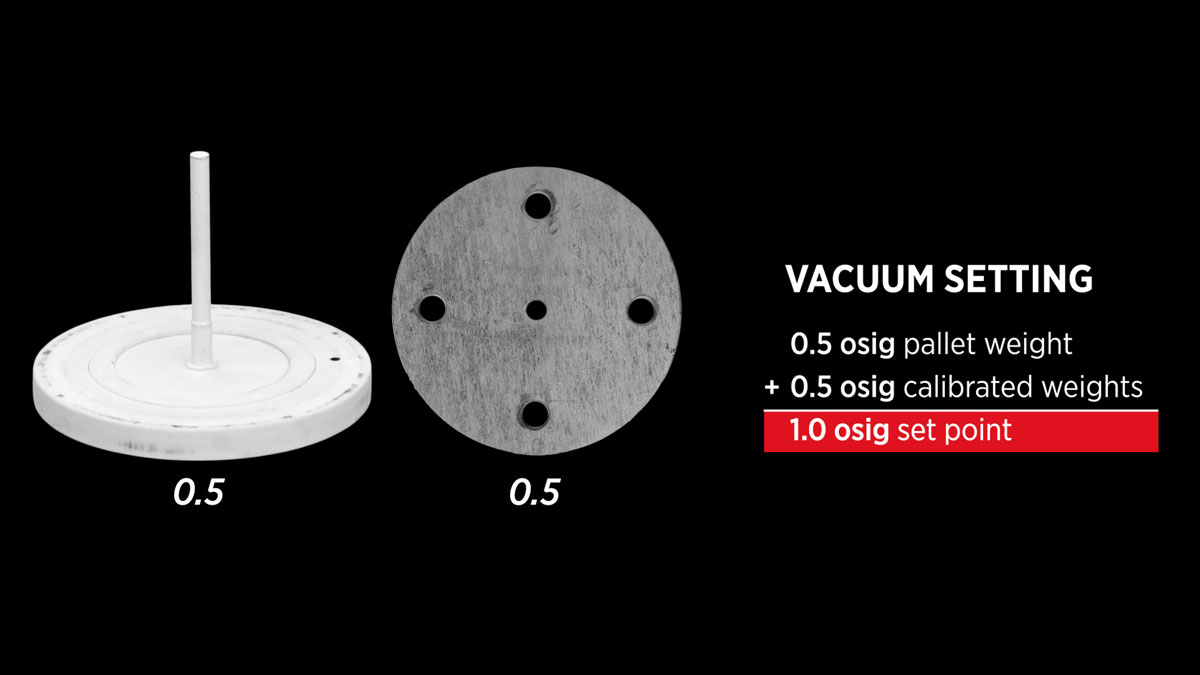
Refer to the tag attached to the valve for the specified pressure and vacuum settings. This pallet assembly shown in the video provides 0.5 osig on the pressure side and 0.5 osig on the vacuum side.
The valve set point is the pallet assembly weight plus the combined total of the calibrated weights. In this example, for a required pressure setting of 5 osig, add weights totaling 4.5 osig to the pallet assembly (4.5 osig + 0.5 osig pallet = 5 osig).
For a required vacuum setting of 1 osig, we will add a 0.5 osig weight to the pallet assembly.
Pressure Side Disassembly and Weights
- Remove the fasteners and washers from the top of the valve.
- Lift off the weather hood.
Carefully remove the bird screen, being cautious of the sharp edges.
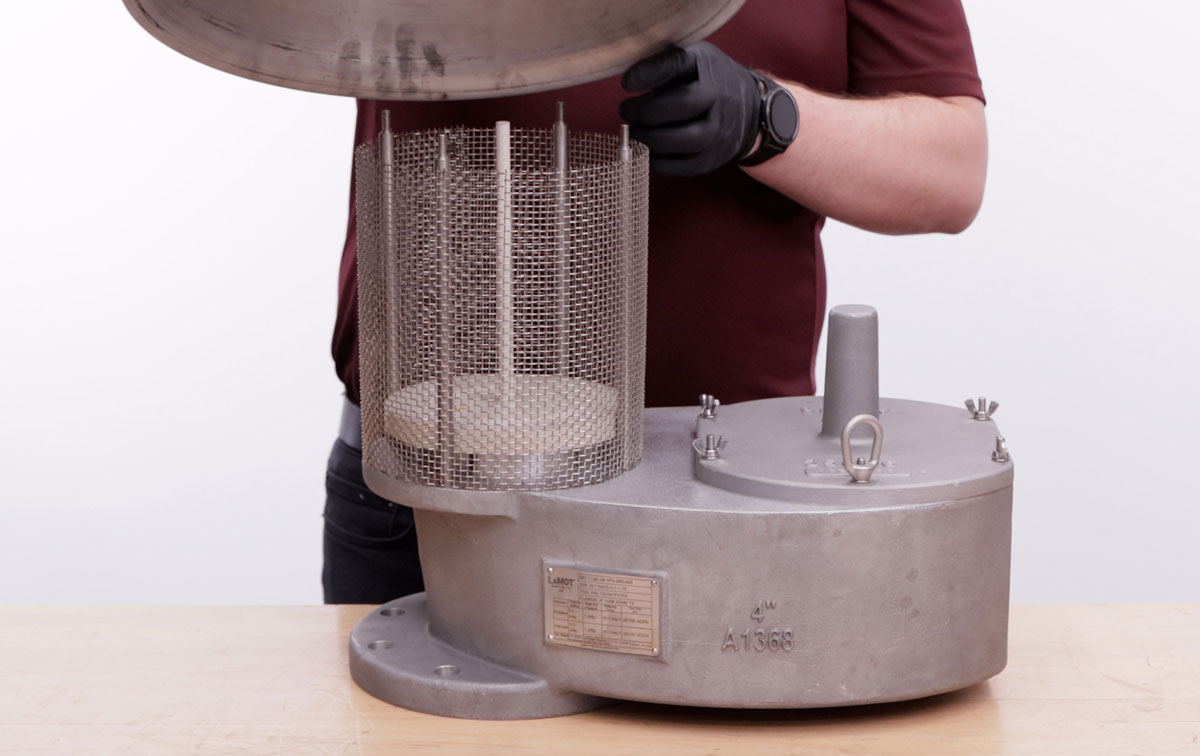
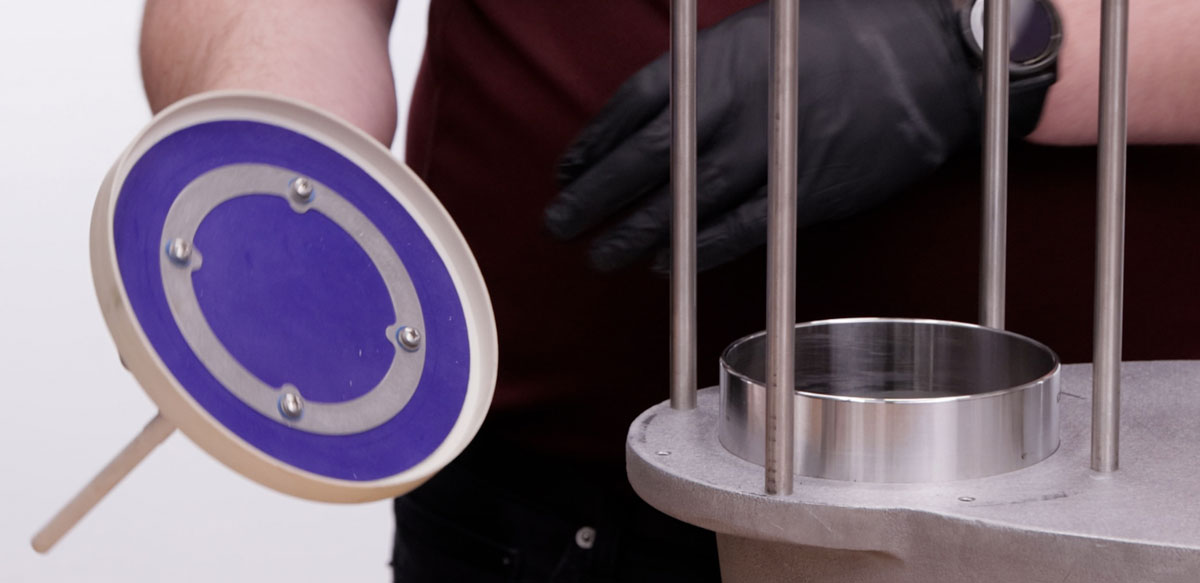
Remove the pressure pallet assembly and inspect the metal seating surface and gasket. Remove any dust, particles, or debris before proceeding.
- Add the appropriate calibrated weights to the pallet assembly one at a time, sliding the weights on gently to avoid potentially cracking the pressure pallet.
Vacuum Side Disassembly and Weights
- Remove the fasteners and washers from the top of the valve on the vacuum side.
- Lift off the cover.
- Then remove the guide rod assembly.
Remove the pressure pallet assembly and inspect the gasket and metal seating surface.

- Add the weight to the pallet. Again, if adding more than one weight, slide them on gently one at a time.
Reinstall the pallet assemblies & reassemble the valve
- Insert the vacuum pallet assembly.
- Insert the guide rods, making sure they are fully seated.
- Install the cover and replace the washers and fasteners; making sure the lifting rings are on opposite sides to not impede with the weather hood.
- Replace the pallet assembly.
- Reinstall the bird screen over the guide rods.
- Then place on the weather hood, aligning with the weather post.
- Secure all fasteners. The lifting rings should be on the side closer to the center of the valve for weight distribution.
Reach out to your local Kimray representative today to explore what LaMOT products can do for your operation.